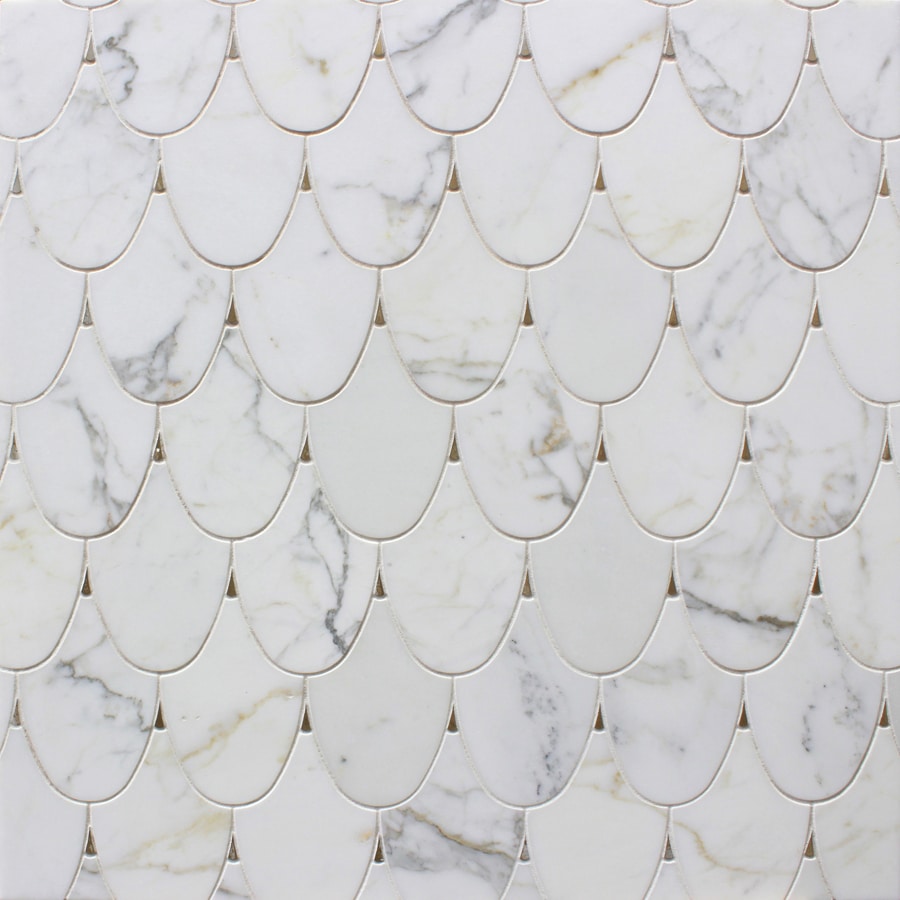
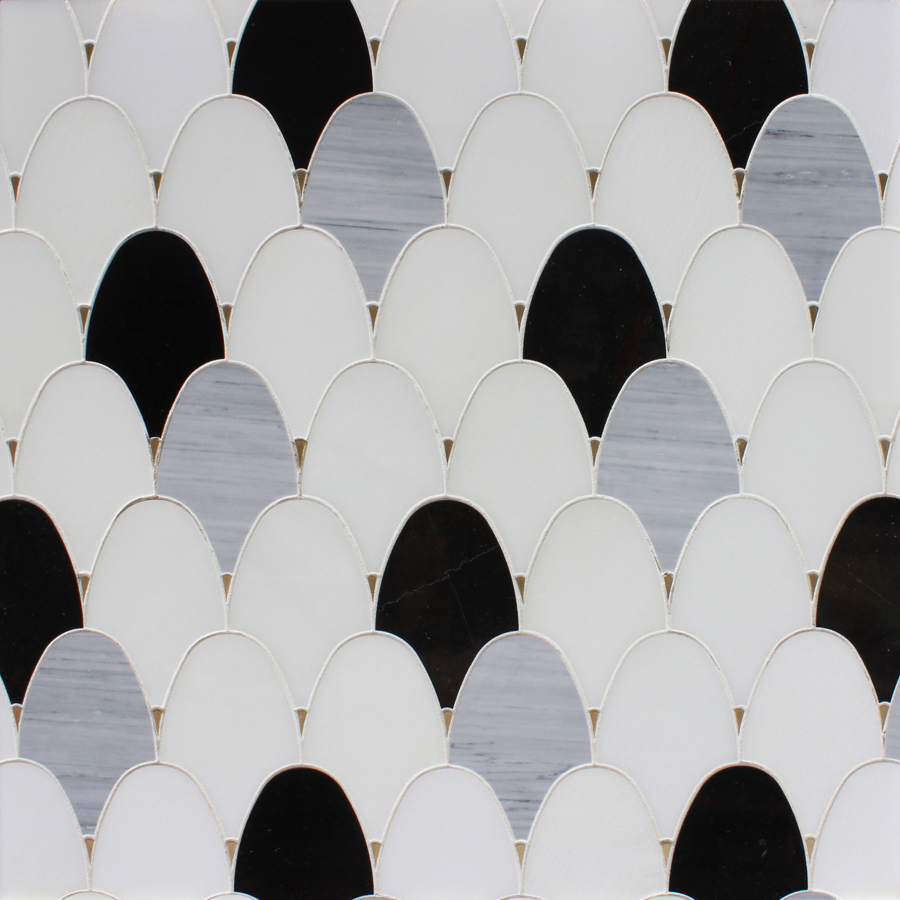
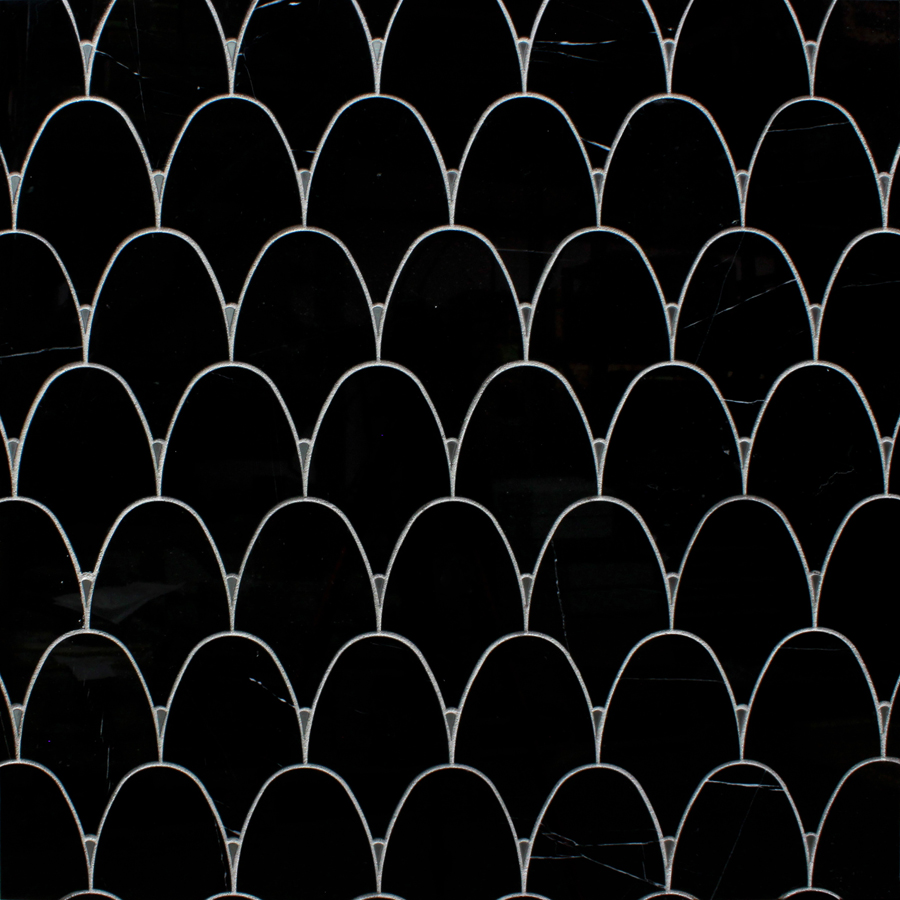
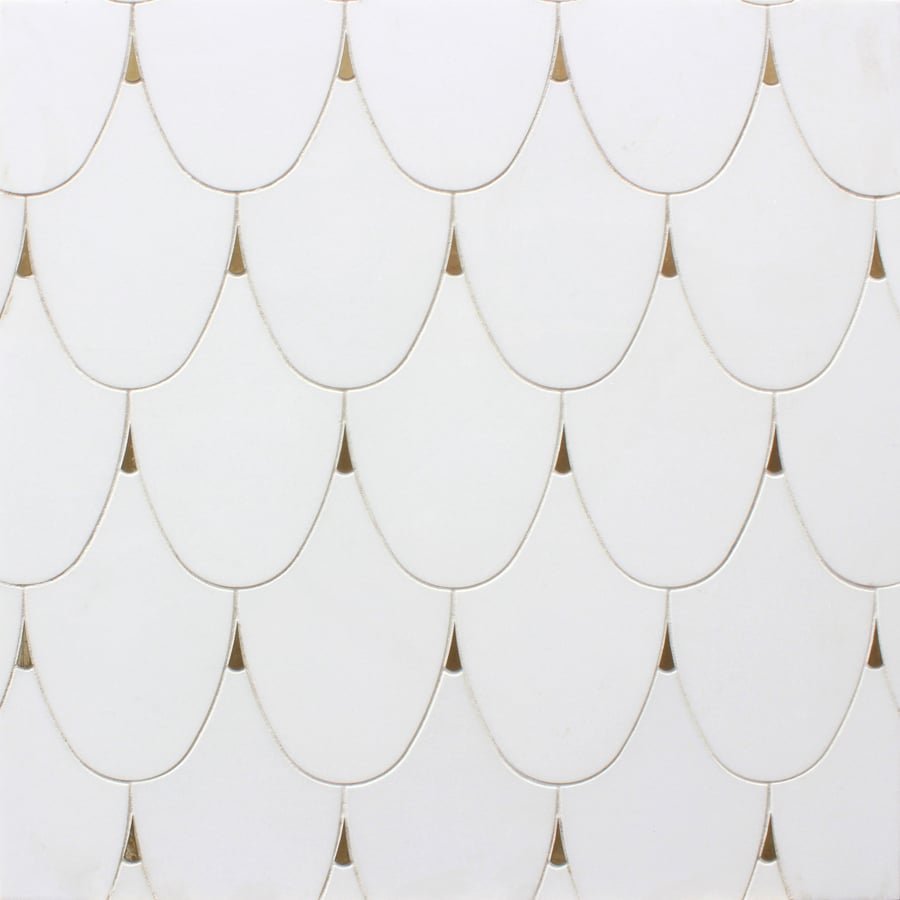
AVELINE MOSAICS
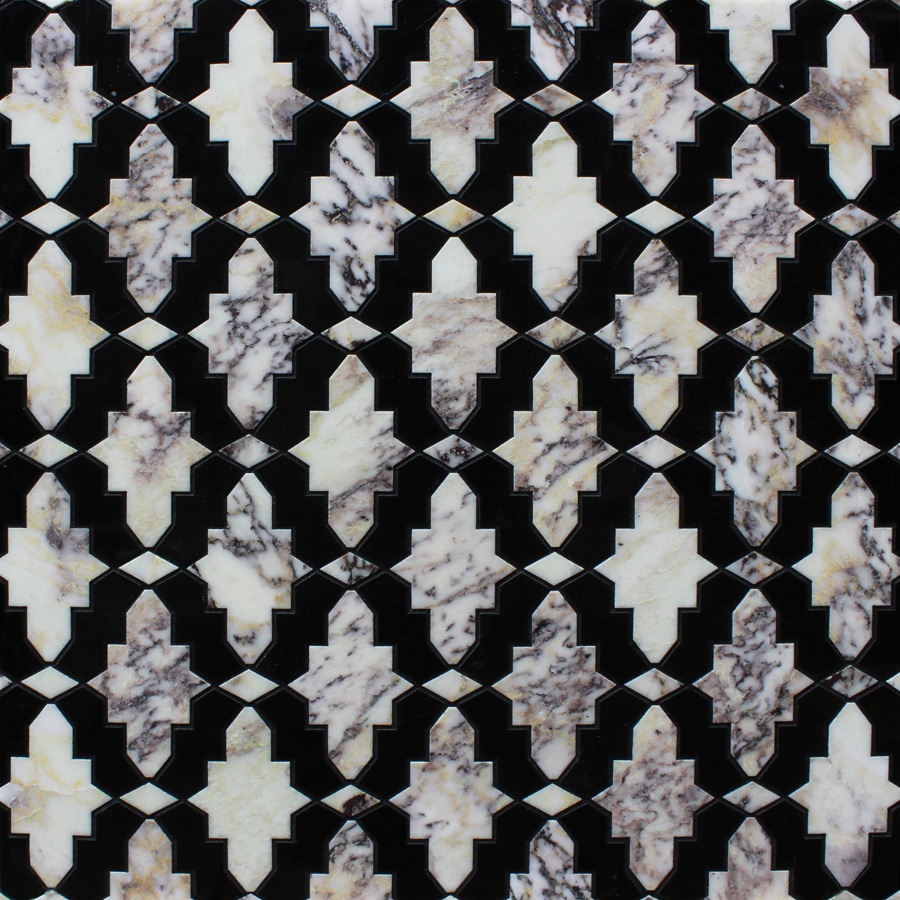
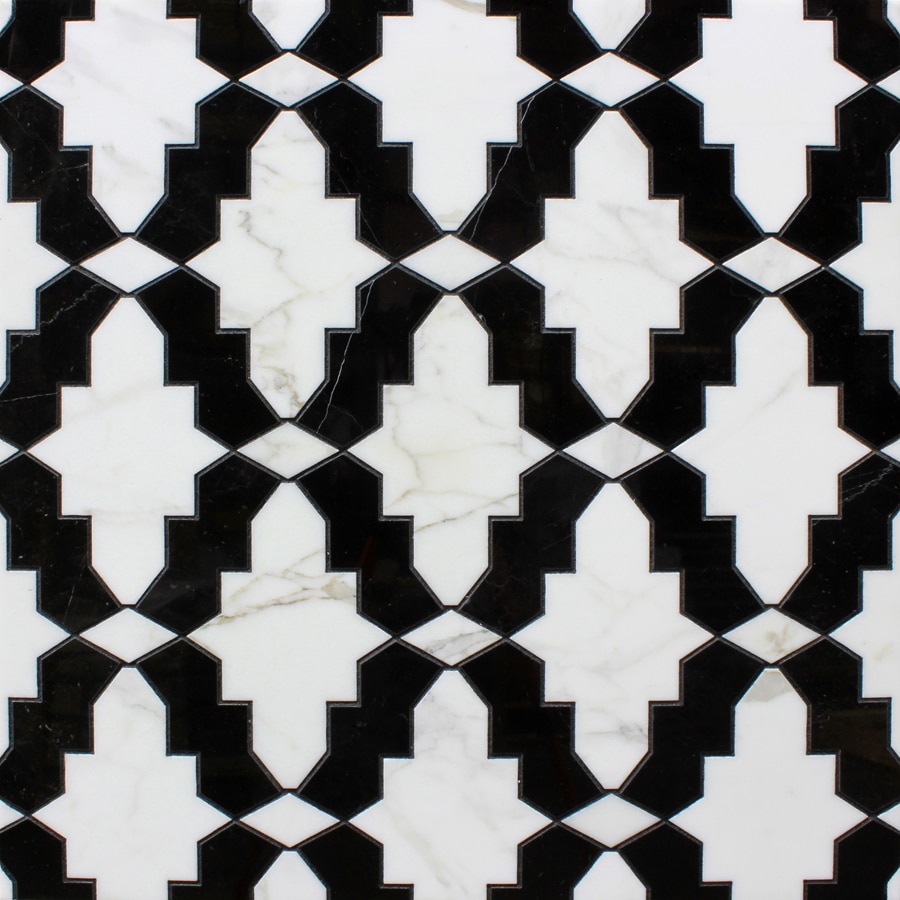
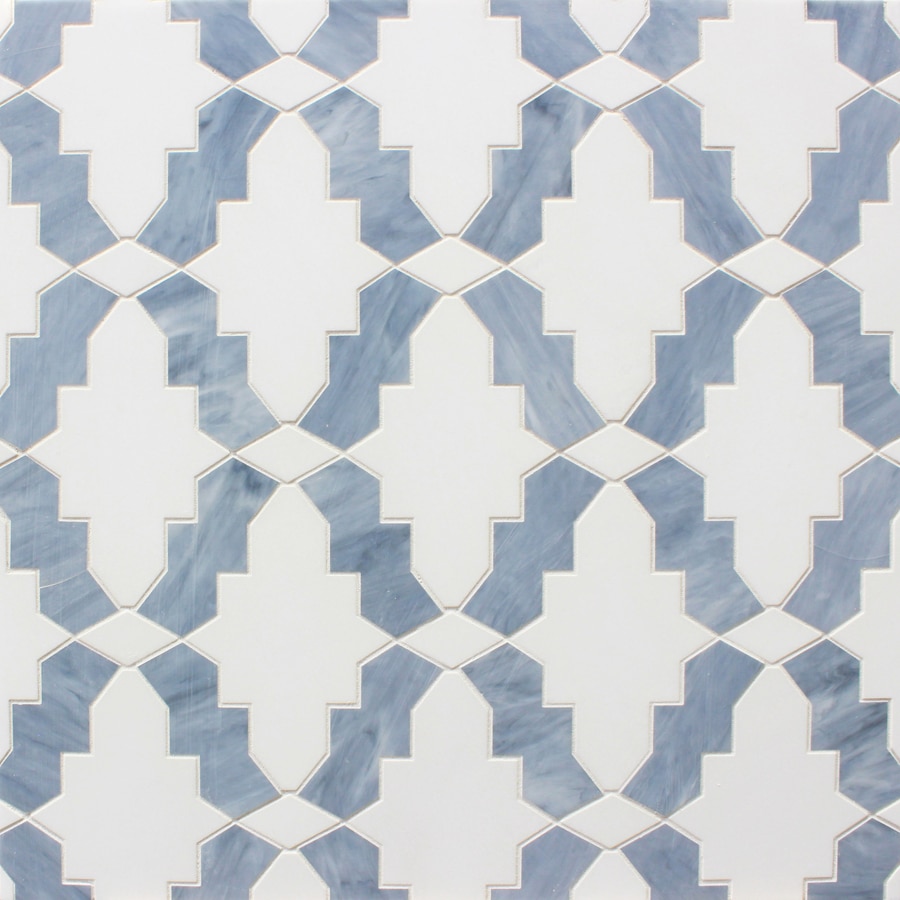
Aveline Mosaic adds an elegant aesthetic to any space. With 25 patterns, 2 sizes (small & large), and unlimited colorways, Aveline can be highly personalized. Choose from one of the options below or select materials from the Material Options page.
Lead time: approximately 8-10 weeks.
Usage: Commercial, Residential, Interior applications.
Custom: Mosaics are custom-made on mesh-mounted, interlocking sheets for a seamless design.
Orders of 5 sheets or less are subject to additional freight cost.
Variation: Pictures shown are representations ONLY. Sizes are approximate & may vary slightly with each order.
- Exterior Cladding:
- Exterior Pavers:
- Interior Walls: Yes
- Interior Floors: Yes
- Kitchen Countertops:
- Other Countertops:
- Wet Areas:
- Traffic: Low Commercial, Residential
Rock Mill strongly recommends hiring a licensed tile contractor for all tile installation.
Inspection, Storage & Usage
- Upon receipt of your order, please inspect all tiles carefully to confirm shading consistency. Slight variation in shade and color tone is expected. Rock Mill will not be responsible for product issues once tiles have been installed. Please report any issues to Rock Mill within 30 days.
- Exercise care when handling each piece during inspection and installation, as edges can be chipped and surface scratched. Keep paper in between each tile to protect the face of the tile. Keep tiles dry and store boxes in a dry area, away from any dampness, to avoid staining/damage.
Substrate & Membranes
- A licensed contractor should ALWAYS be consulted for complete and proper installation and guidance.
- With all Natural Stone & handmade tiles, please expect slight color variation within each order. For the best look, mix tiles from different boxes throughout the installation process. Wipe off any residue on the tiles before installing.
- The surface upon which the tiles will be installed should be clean, solid, leveled and without cracks. Installation should not be started until substrate meets these conditions. The surface should have a max variation of less than ¼” over a 10’ area. For vertical surfaces, wall should be plumb.
- A waterproof membrane, which offers uncoupling (anti-fracture), water-proofing and vapor management, is recommended. It is not recommended to use metal mosaics in water/wet applications. Follow manufacturer instructions.
Cutting, Thin-Set & Tile Setting
- Follow the adhesive manufacturer’s guidelines for specific substrate adhesive requirements. Refer to TCNA handbook for appropriate adhesive and specific installation instructions.
- Start by marking required vertical and horizontal guidelines, to assist in determining where the sheets will be laid and where cutting will be necessary.
- Apply adhesive initially with smooth side of trowel to ensure that enough product is applied. Do not apply more than 10 sq. feet of area at one time. Using a small notched trowel apply additional adhesive in a smooth and uniform direction. The size of notch depends on tile and installation location.
- Mosaic sheets should be placed upon adhesive while it is still fresh and pressure should be applied until there is full adhesion. Keep sheets level with each other by applying uniform pressure to each sheet as it is placed. A rubber float may be used to pound the tile to achieve a more even level across the surface.
- Continue to install the remaining sheets, taking care to line up grout joints and ensure a level surface. For mesh-mounted tiles, any excess adhesive that remains on the edge of the mosaic should be removed immediately and not allowed to harden because it is necessary to leave the space between the mosaic pieces for grout.
- For paper face-mounted tiles, paper should be removed once adhesive has hardened, to make sure that full coverage has been achieved beneath the paper. Use a wet sponge to thoroughly saturate the paper to peel it off the surface without disturbing the mortar. Tile can be cleaned with a white scrubber to remove excess adhesive if necessary. Allow to dry.
Applying the Grout
- Wait until adhesive is completely dry before applying grout. Consider temperature conditions at the installation site. Mortar will dry more quickly in exterior installation in hot conditions and it may be necessary to use a damp sponge on the substrate immediately before mortar is applied. Conversely, in colder climates, slow drying mortar may require slightly longer drying times.
- Non-sanded grout is recommended so that the mosaic is not scratched. A quality un-sanded grout (test first) or epoxy are recommended. Grout should be applied with a rubber trowel, diagonally to mosaic joint direction so that joint is completely filled. During drying process, clean surface of grout haze using a soft sponge (& water if needed). After, remove excess grout from tiles with a soft, dry cloth to avoid scratching the tile surface.
Sealing After Installation
- Once the tile and grout is completely clean and dry, a quality protective sealer can be applied to seal the grout. For complete & proper installation guidance, please consult a licensed tile contractor and/or the TCNA Handbook.
*In lieu of bullnose & trim, we recommend the use of Schluter Transition & Finishing System. Please ask us for details.
Please inspect ALL material upon receipt. Claims will not be honored after installation. Rock Mill considers the actions of the installer/contractor/3rd party that customer authorizes to pick up the material to be the responsibility of the customer.
Rock Mill will not honor claims, due to unauthorized or improper installation by customer’s installer/contractor. Please ensure that a sufficient quantity is initially ordered to complete the job.
Add-on orders purchased later may vary slightly as new batches may come and will not be guaranteed to match the original order.
All items that are stocked are located at the Rock Mill Gardena, California warehouse.
For more information, please contact your Rock Mill rep. Thank you!
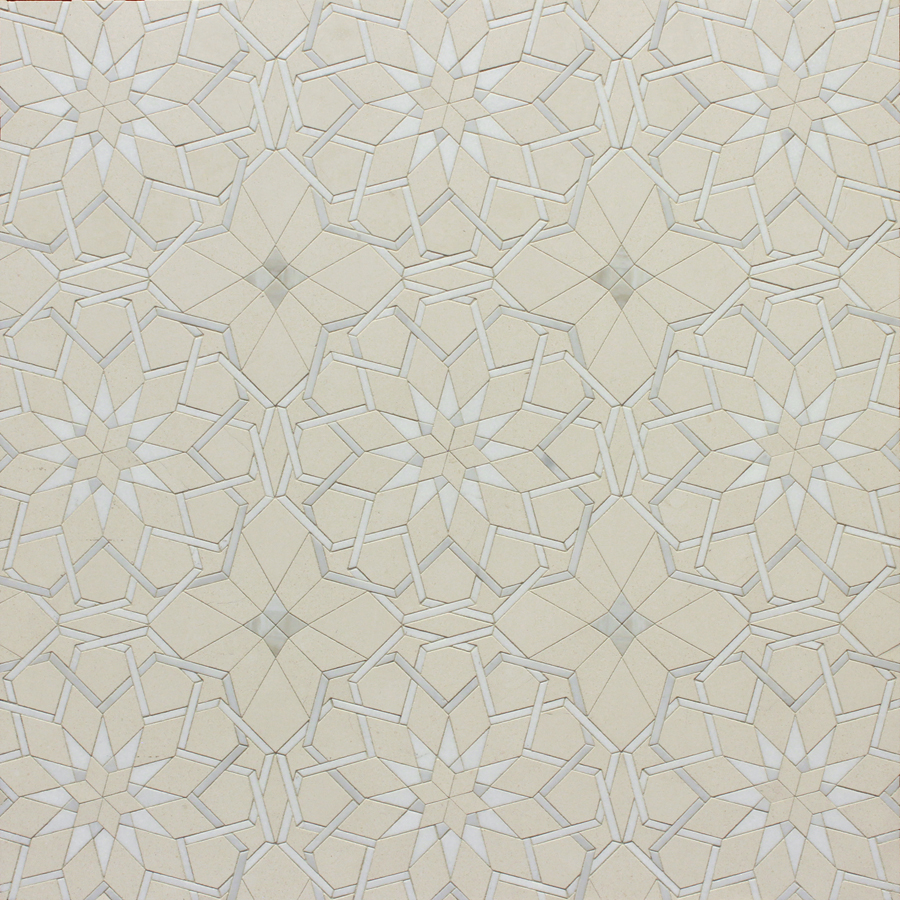
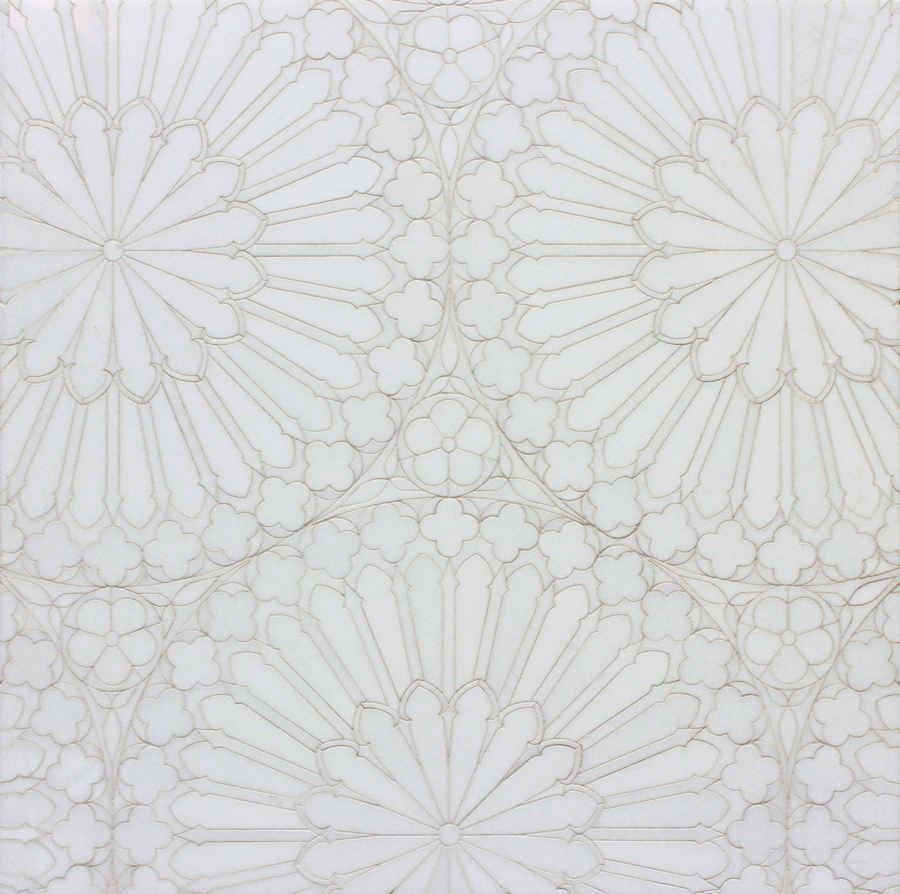
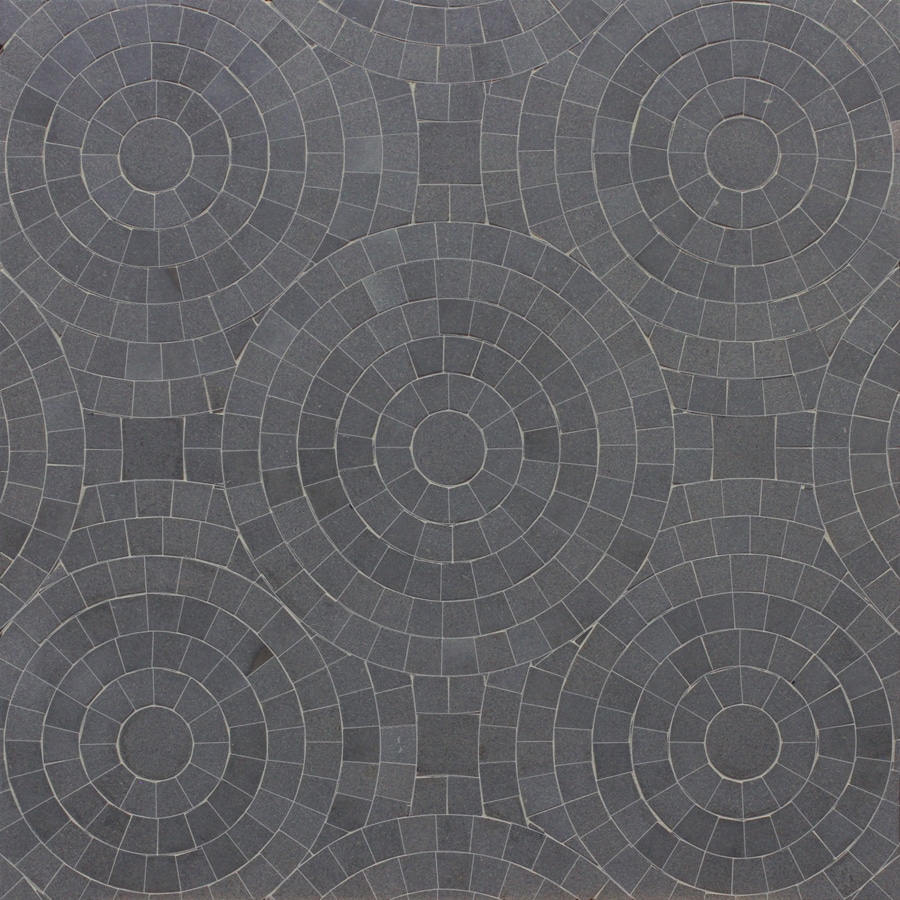
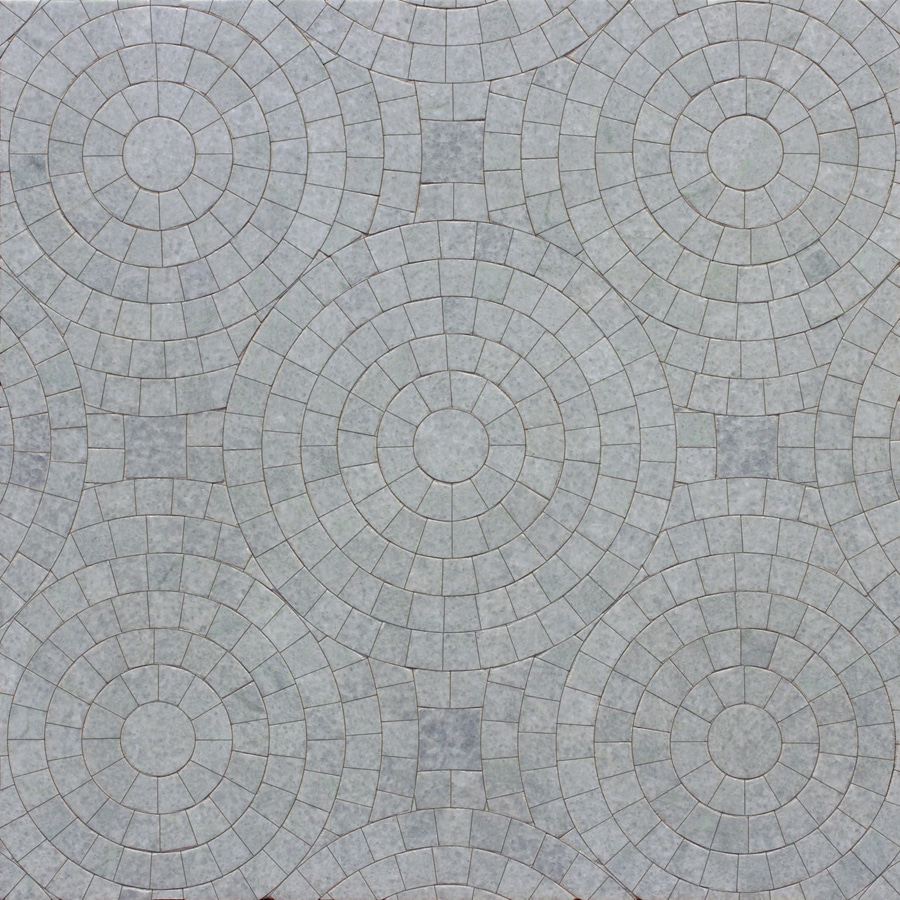
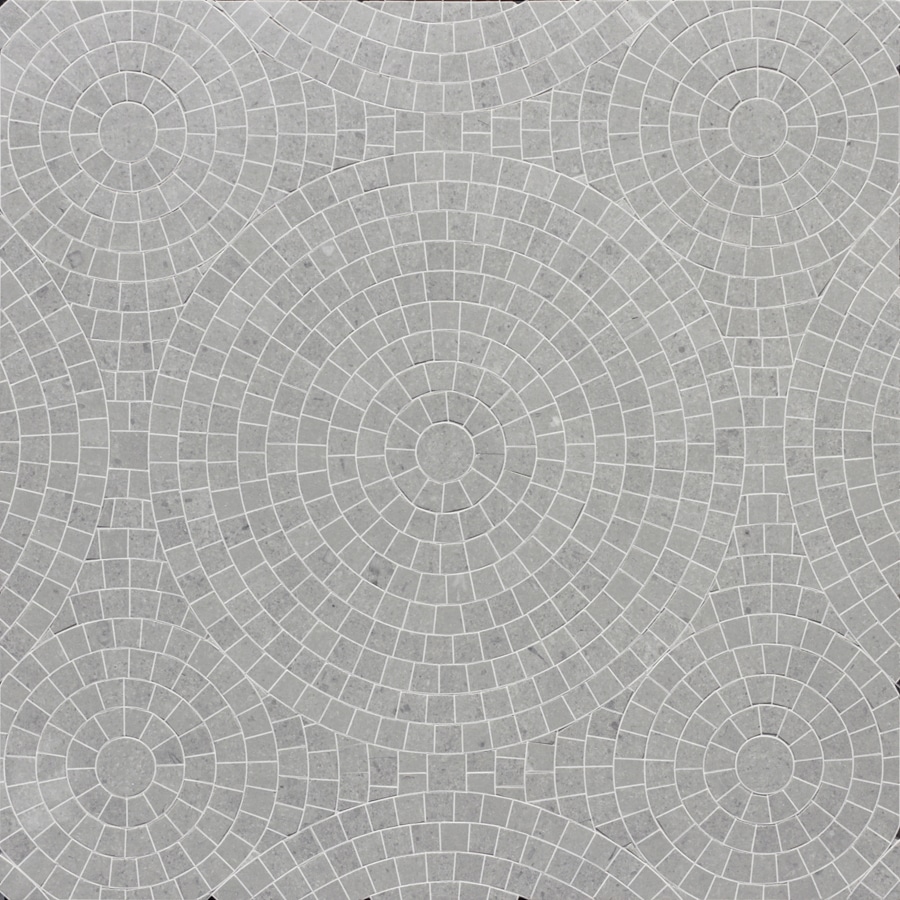
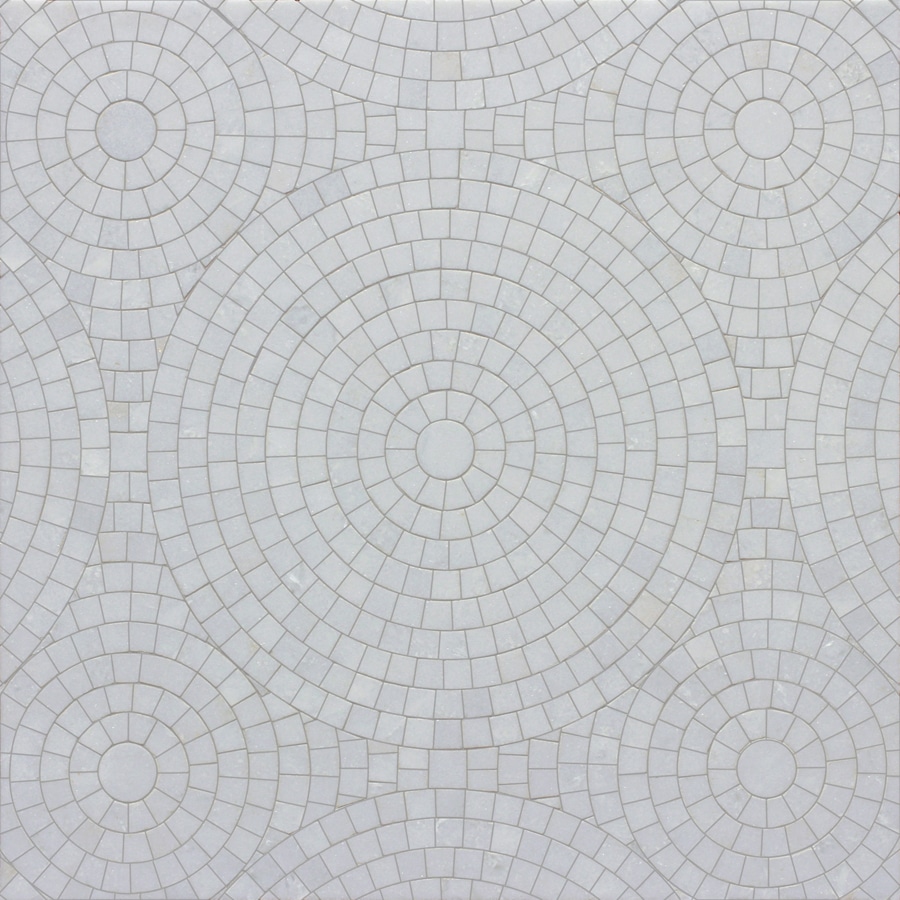
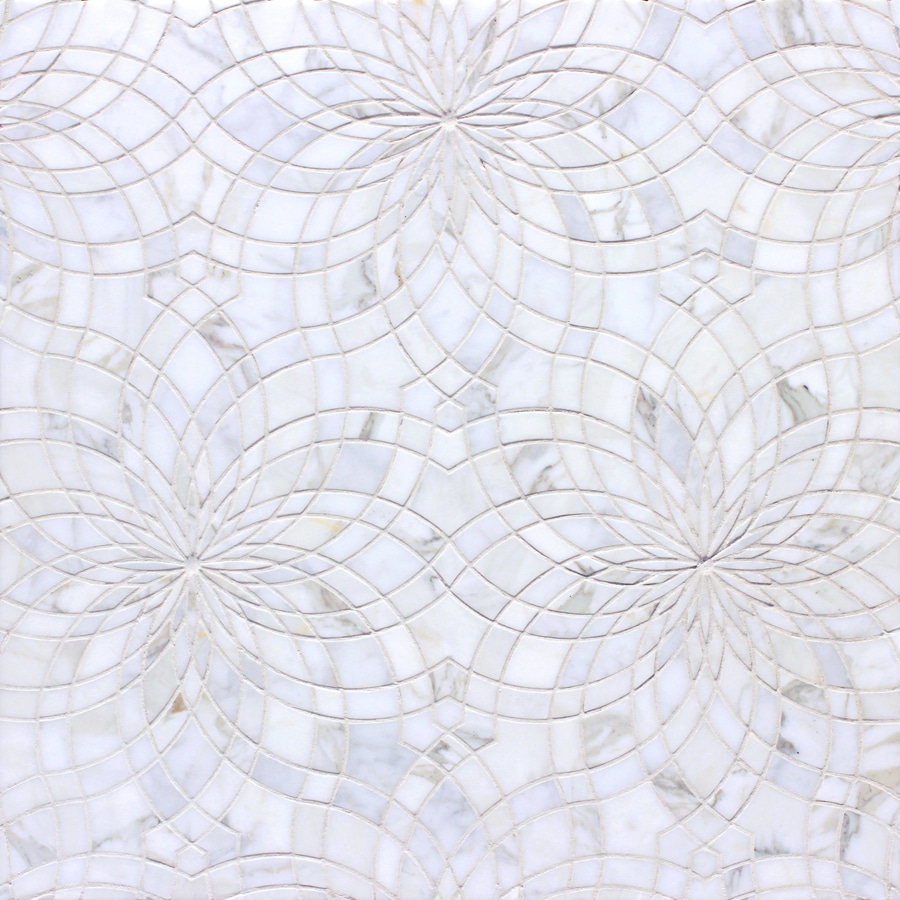
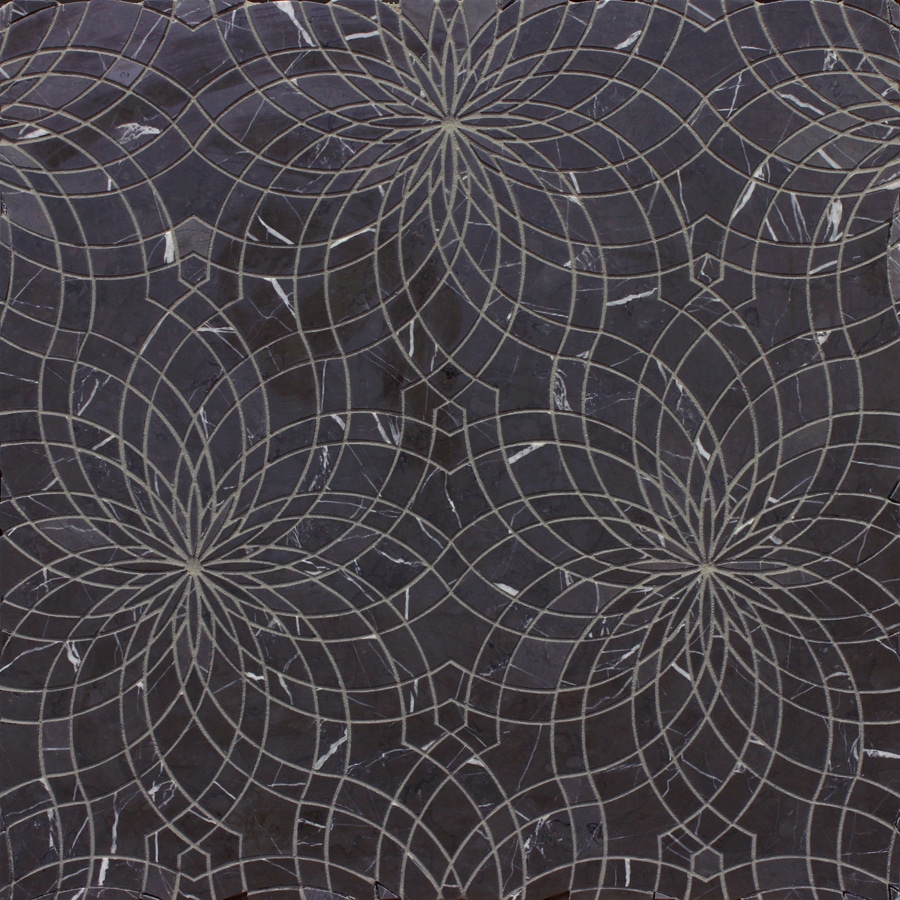
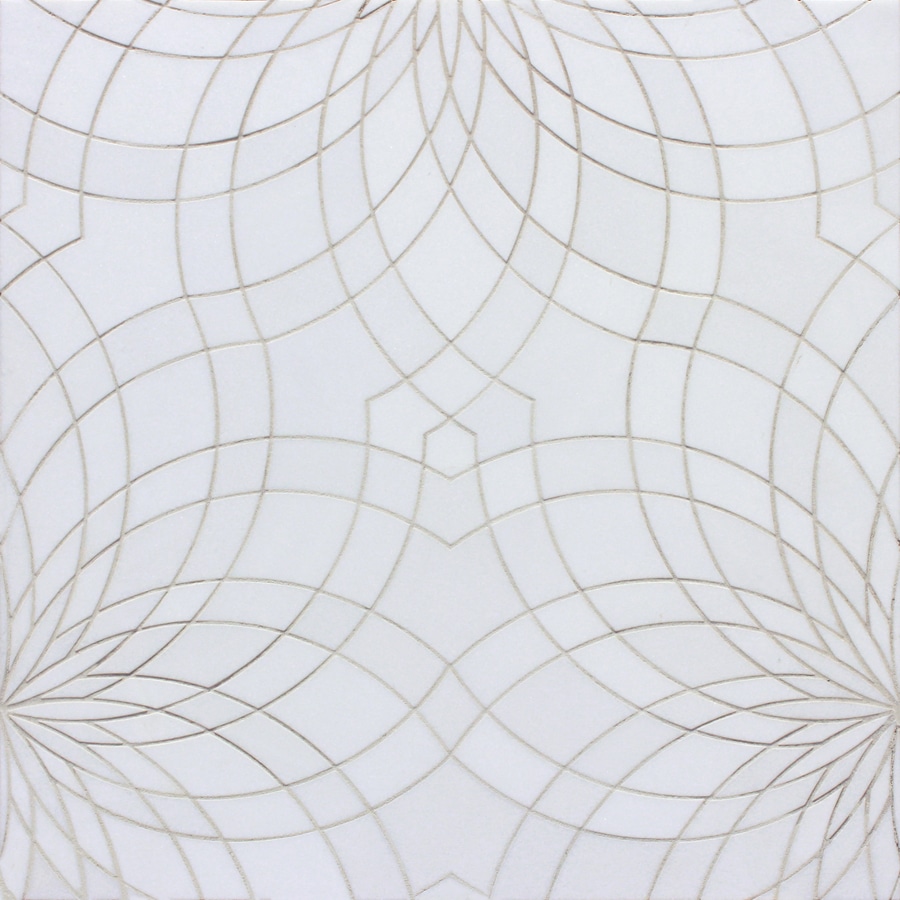
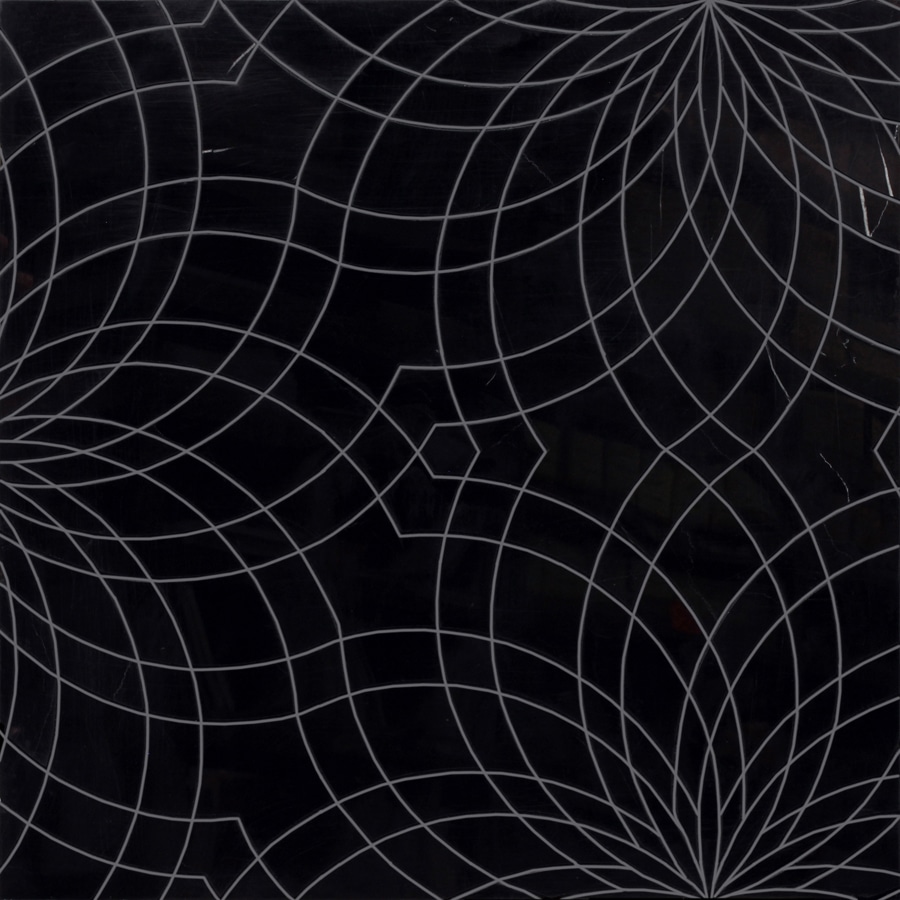
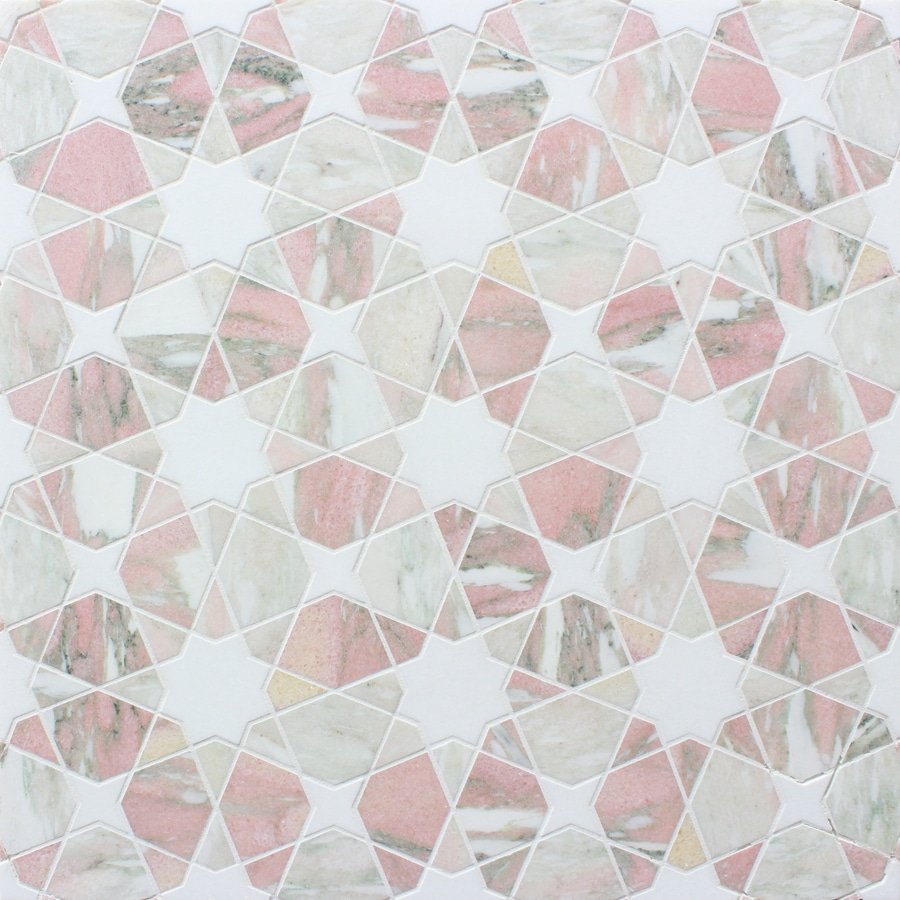
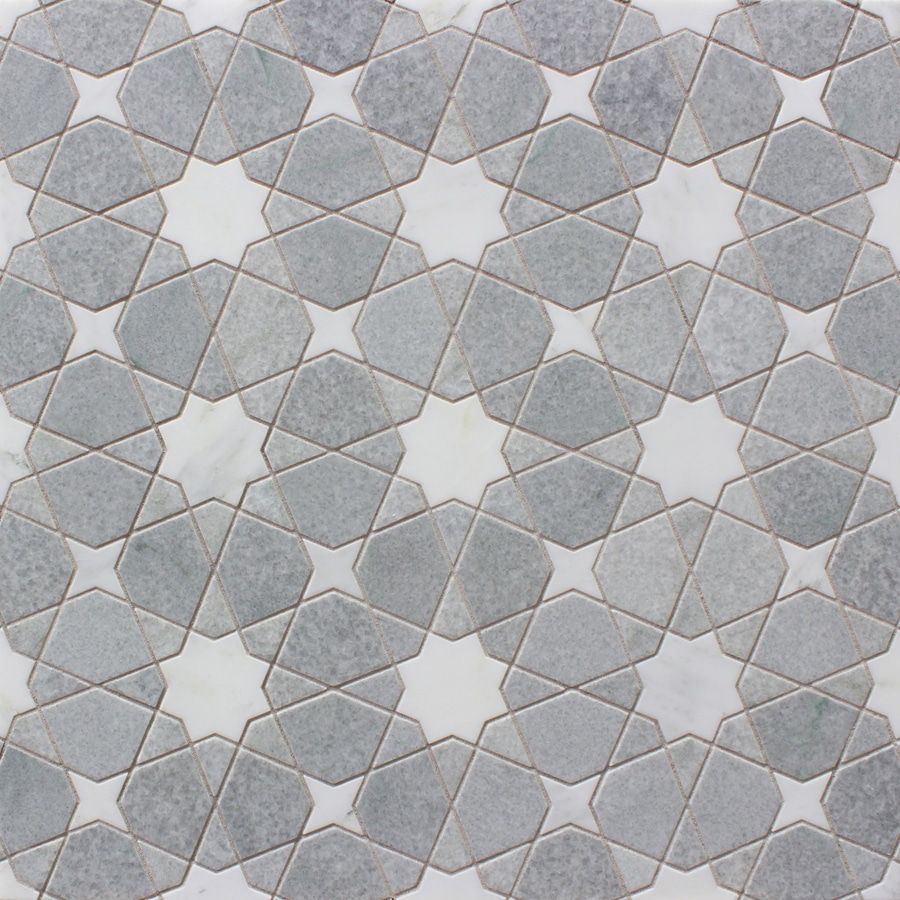
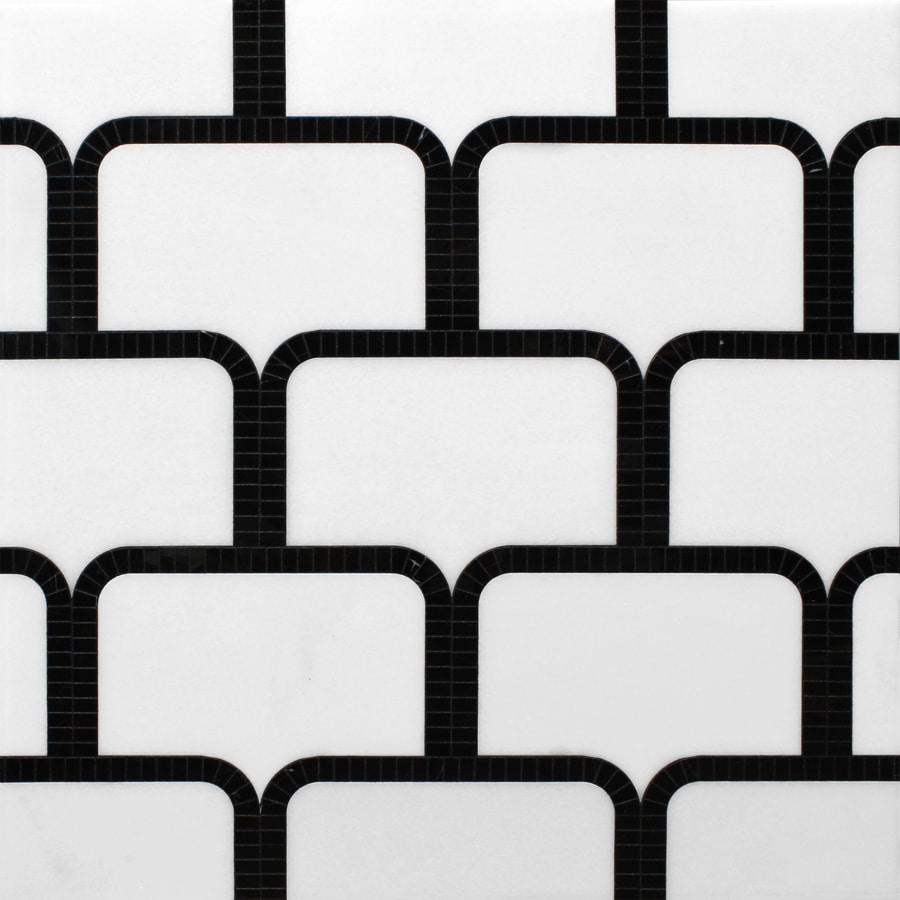
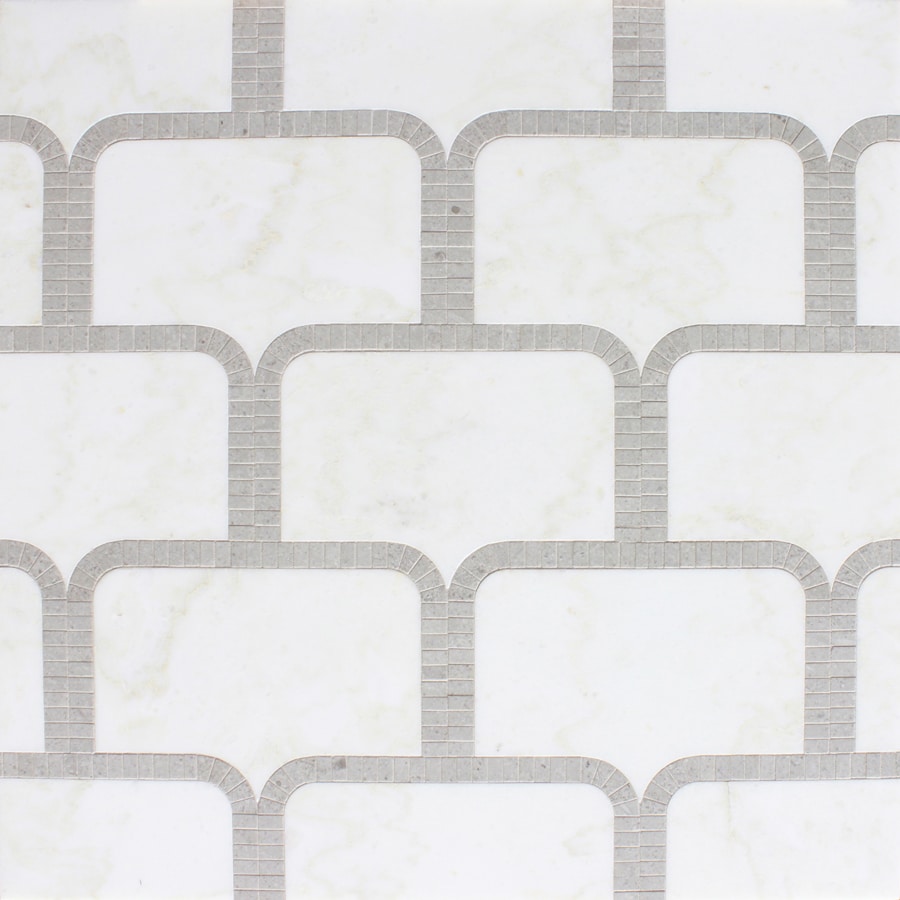
MANDALA
Sheet Size: SMALL: 9 x 9-1/16 x 3/8” | LARGE: 18-1/2 x 18-1/2 x 3/8”
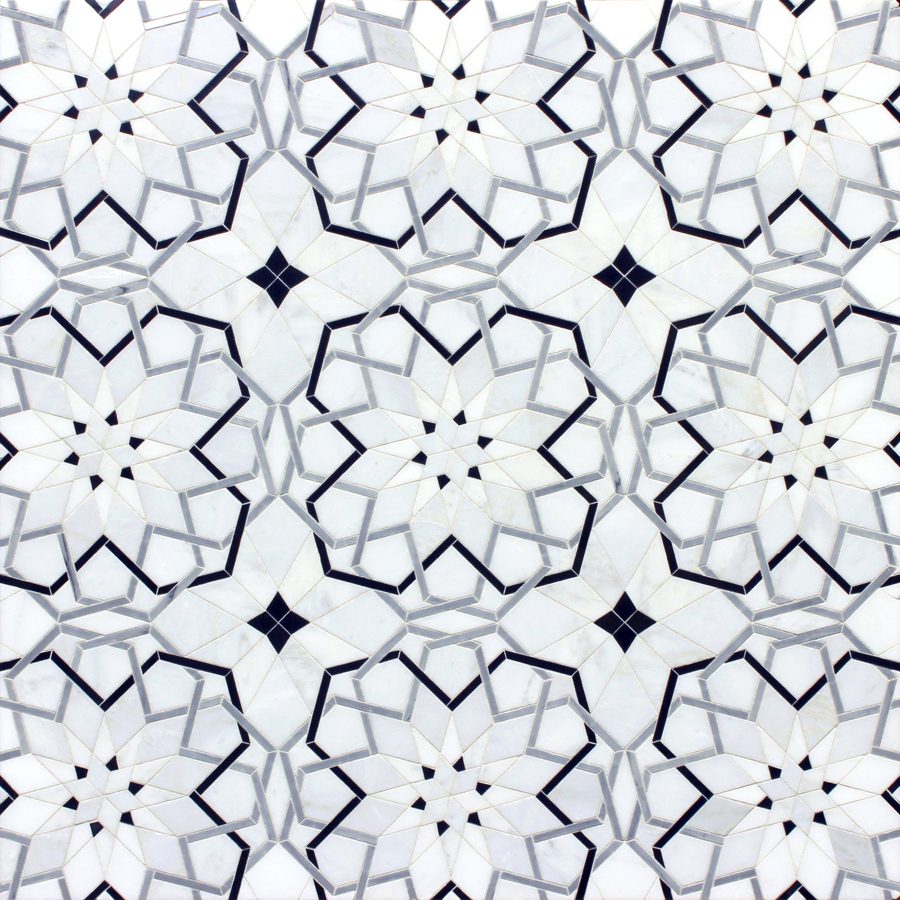
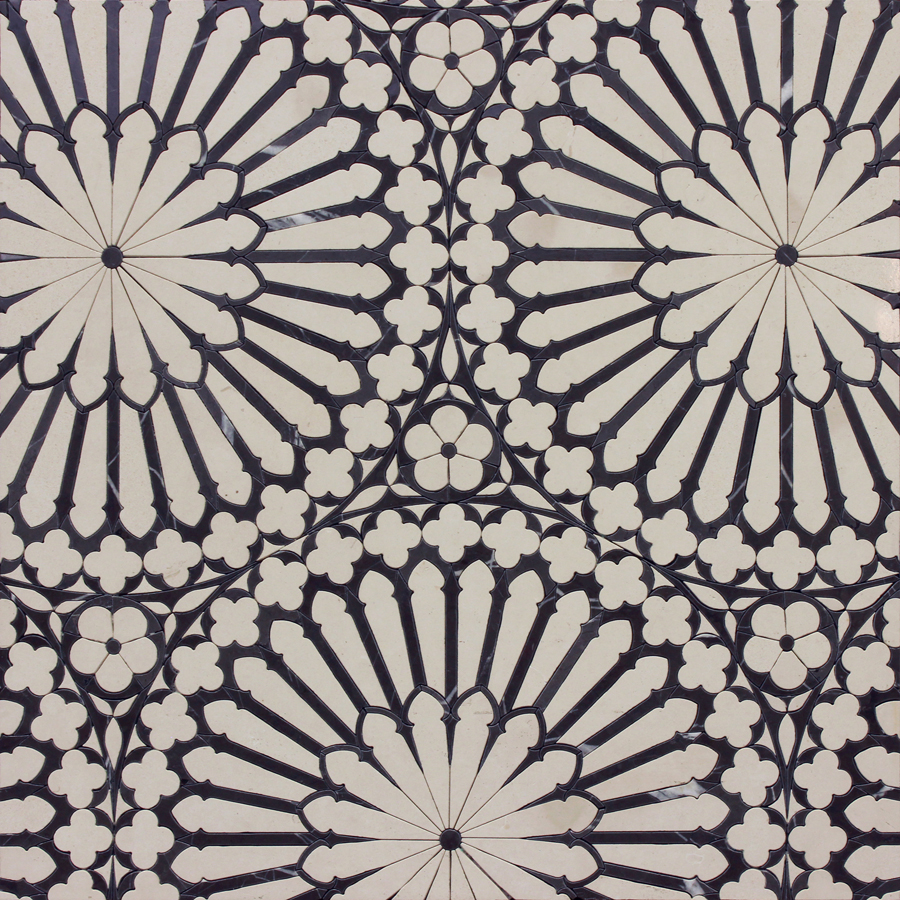
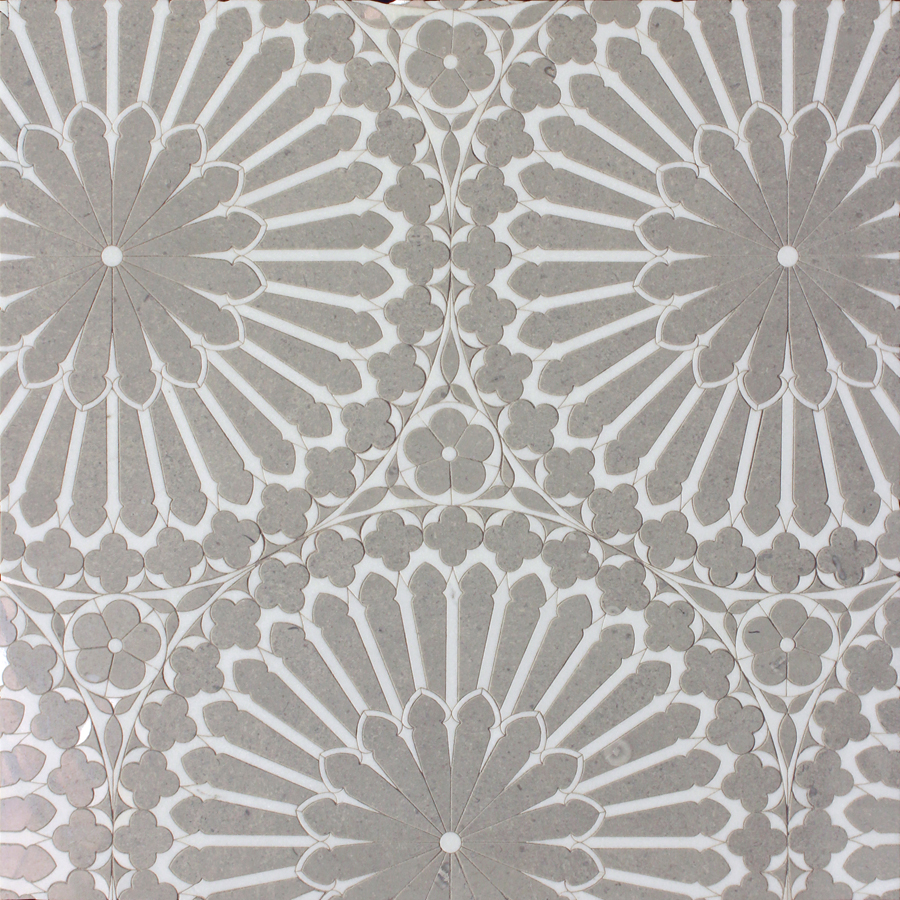
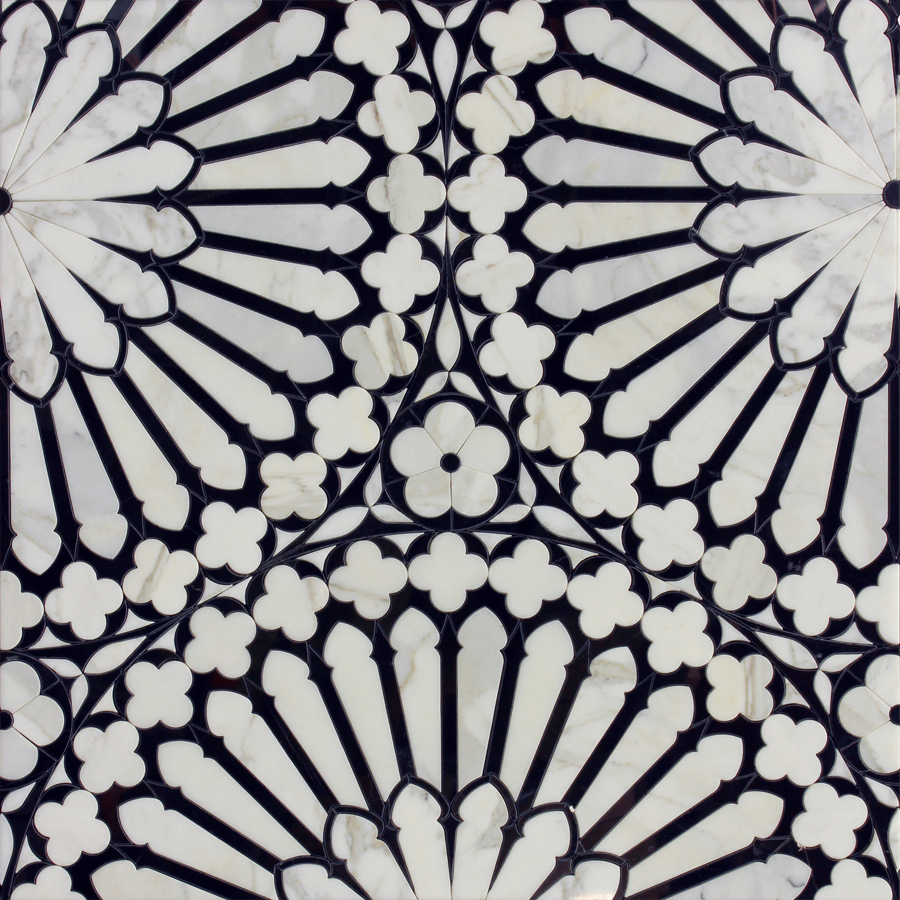
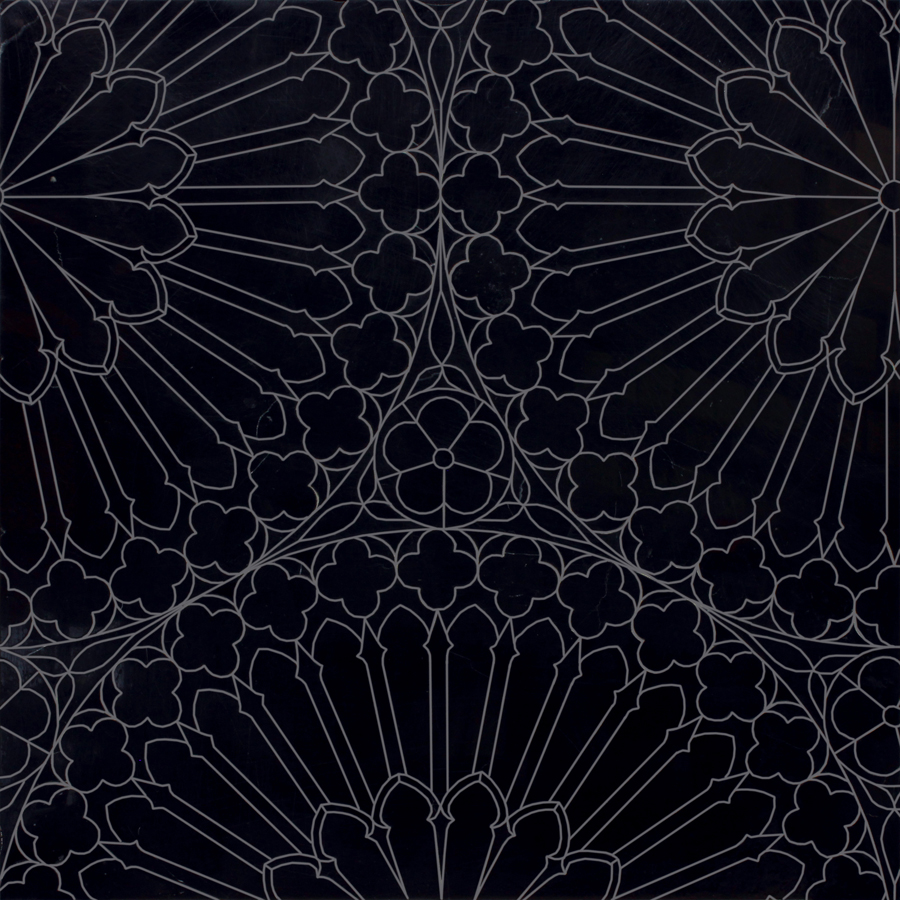
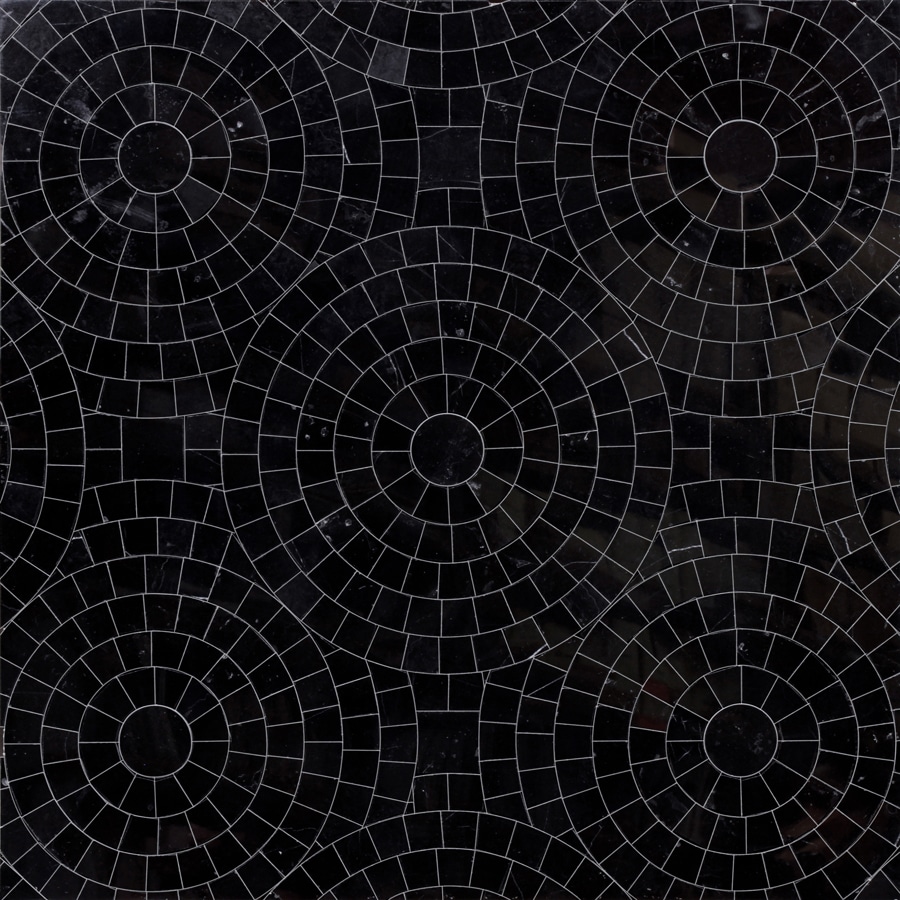
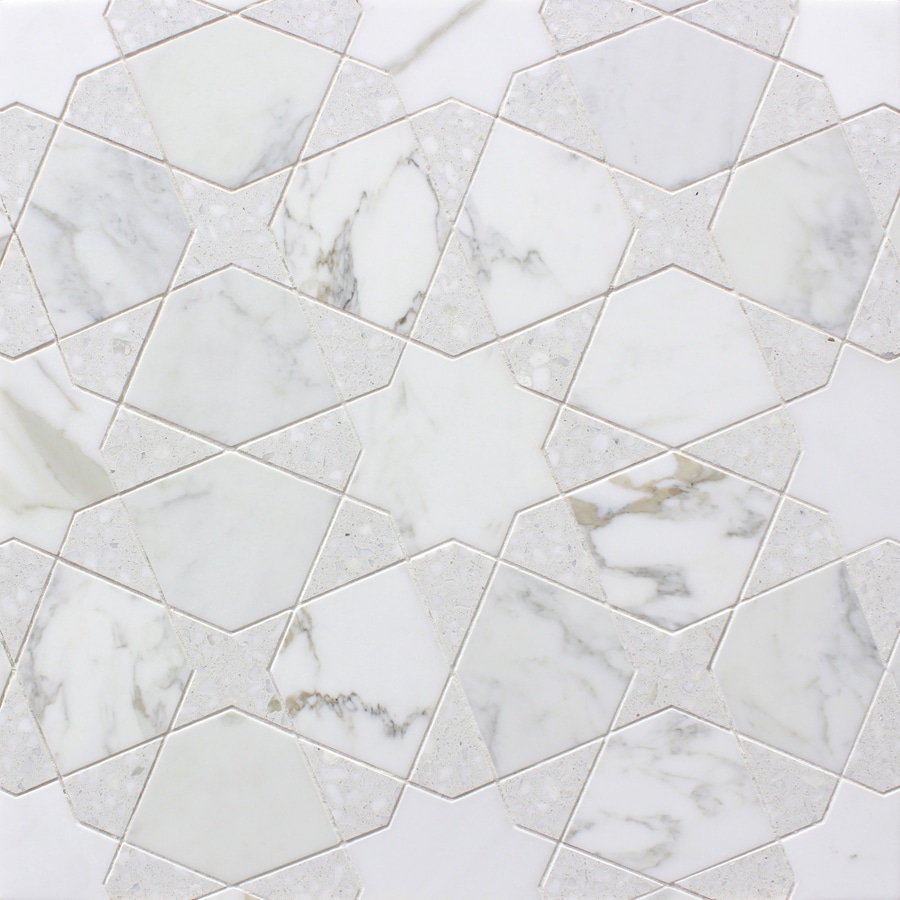
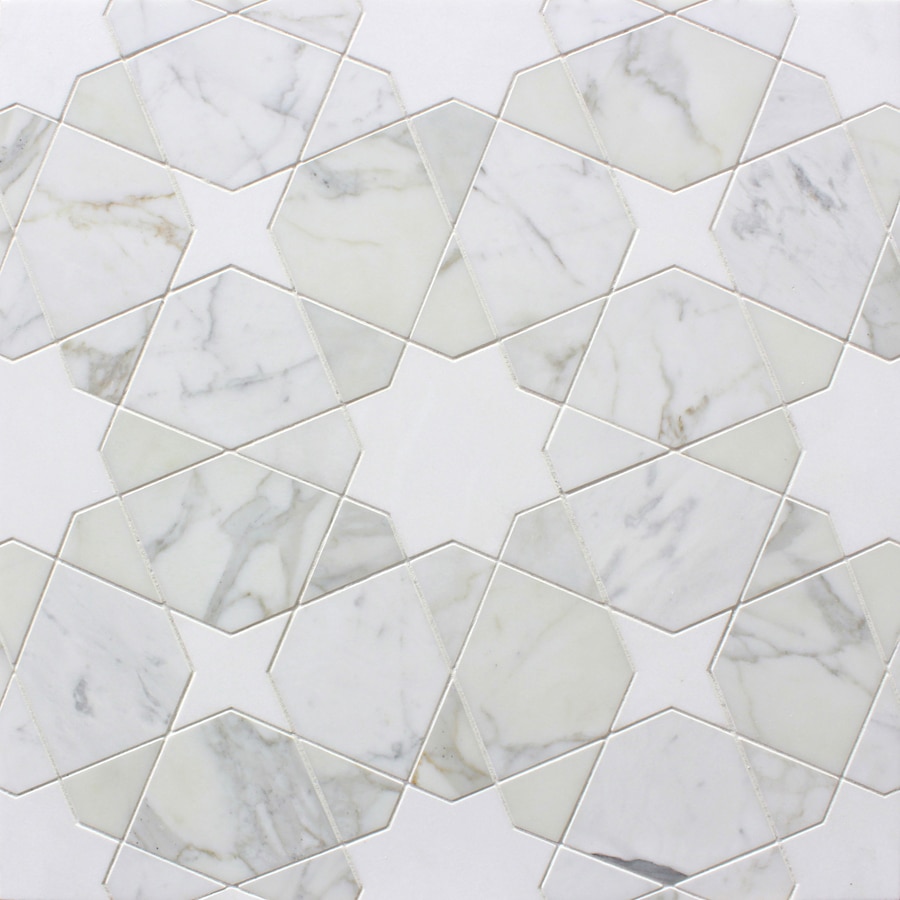
ROSETTE
Sheet Size: SMALL: 15-1/4 x 17-5/8 x 3/8” | LARGE: 20-7/16 x 23-5/8 x 3/8”
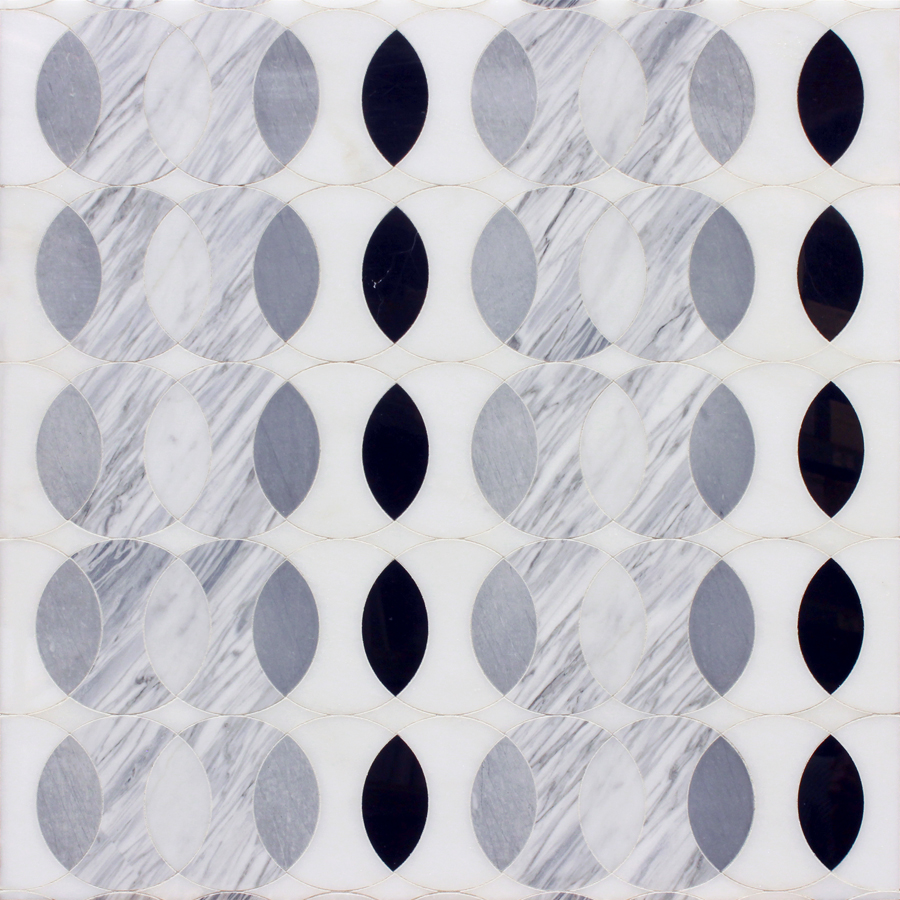
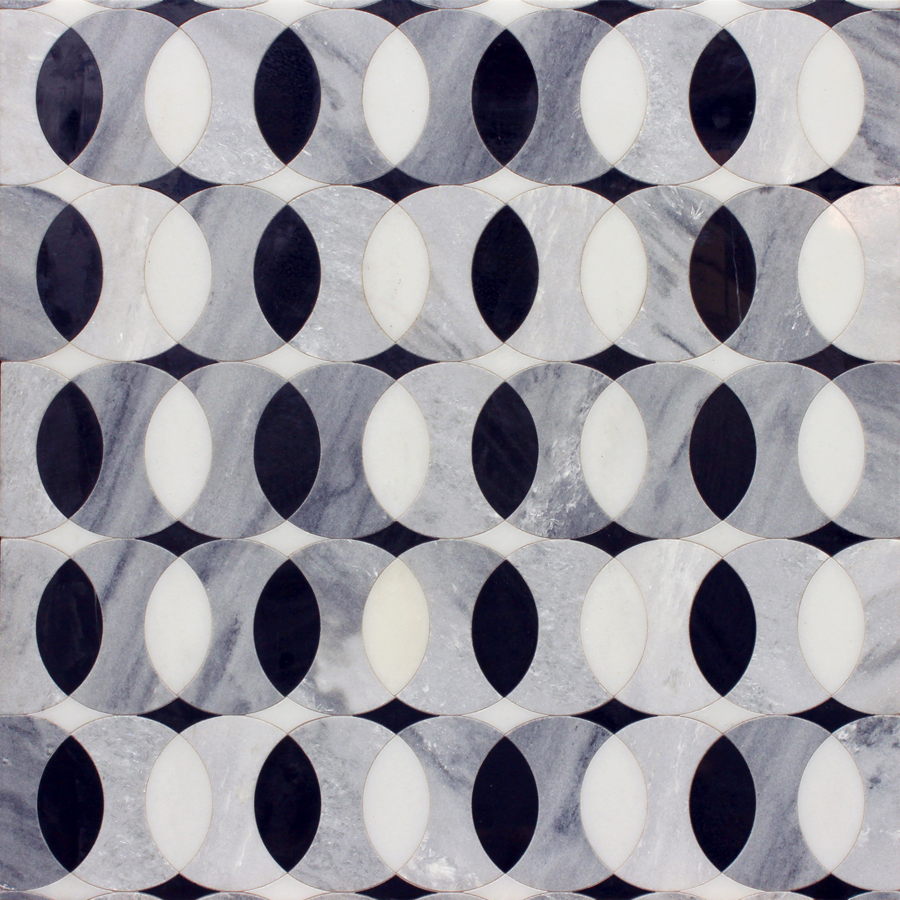
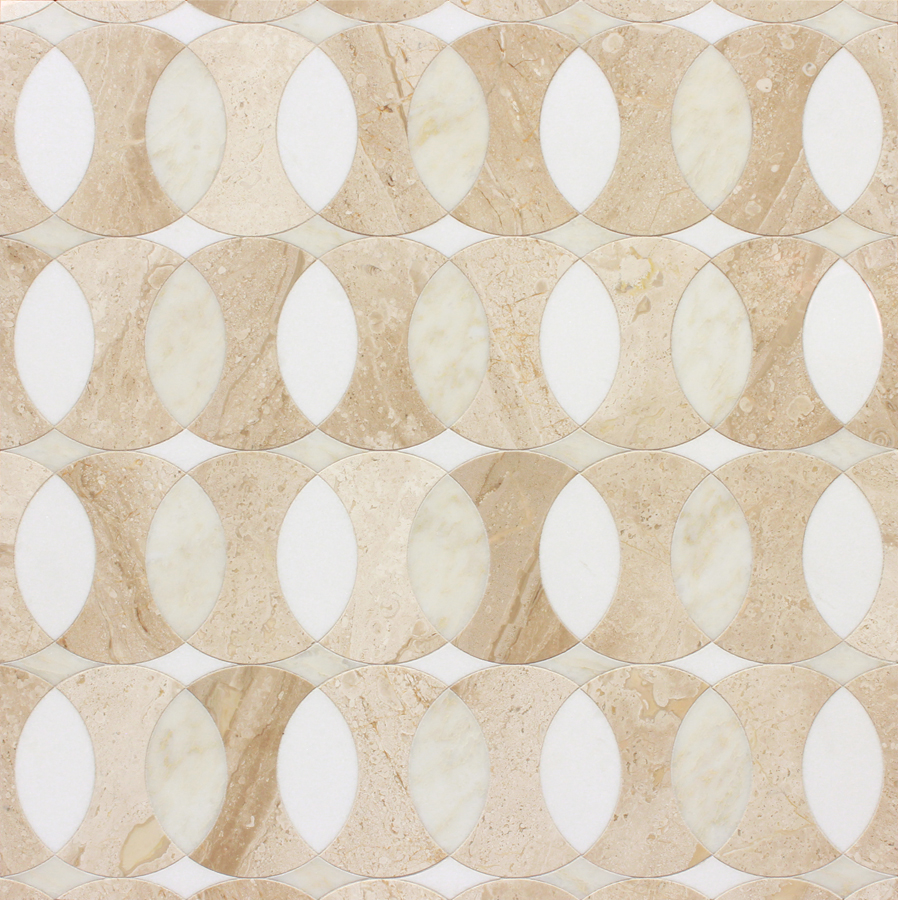
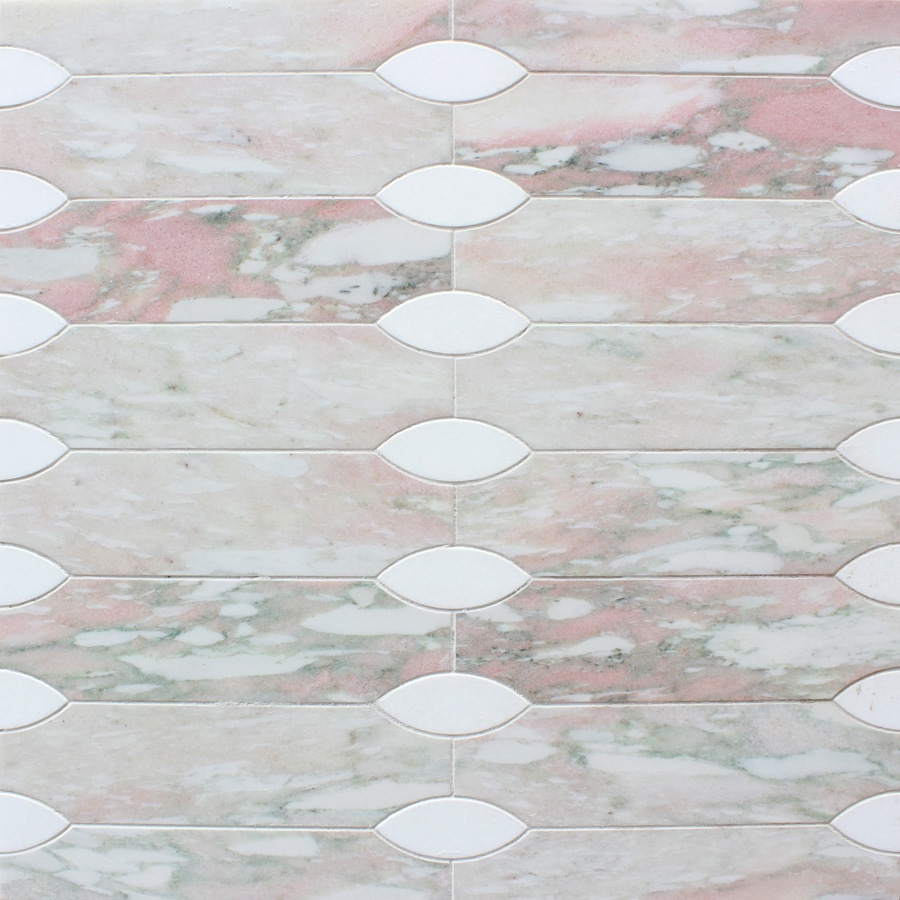
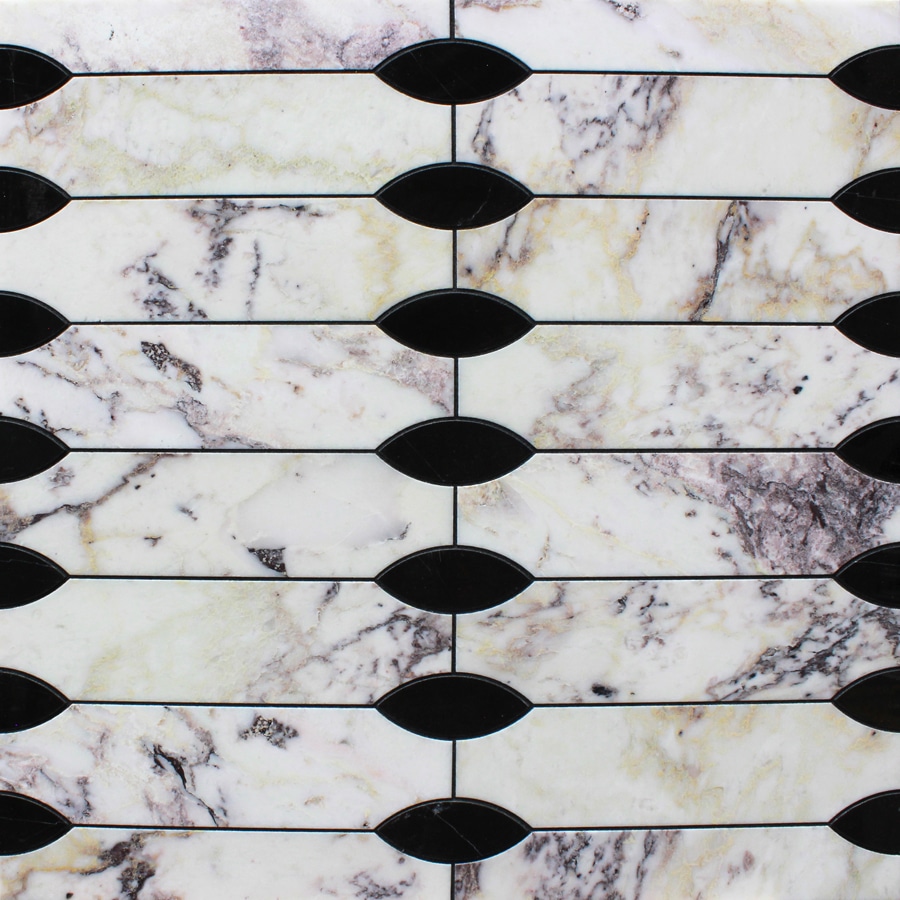
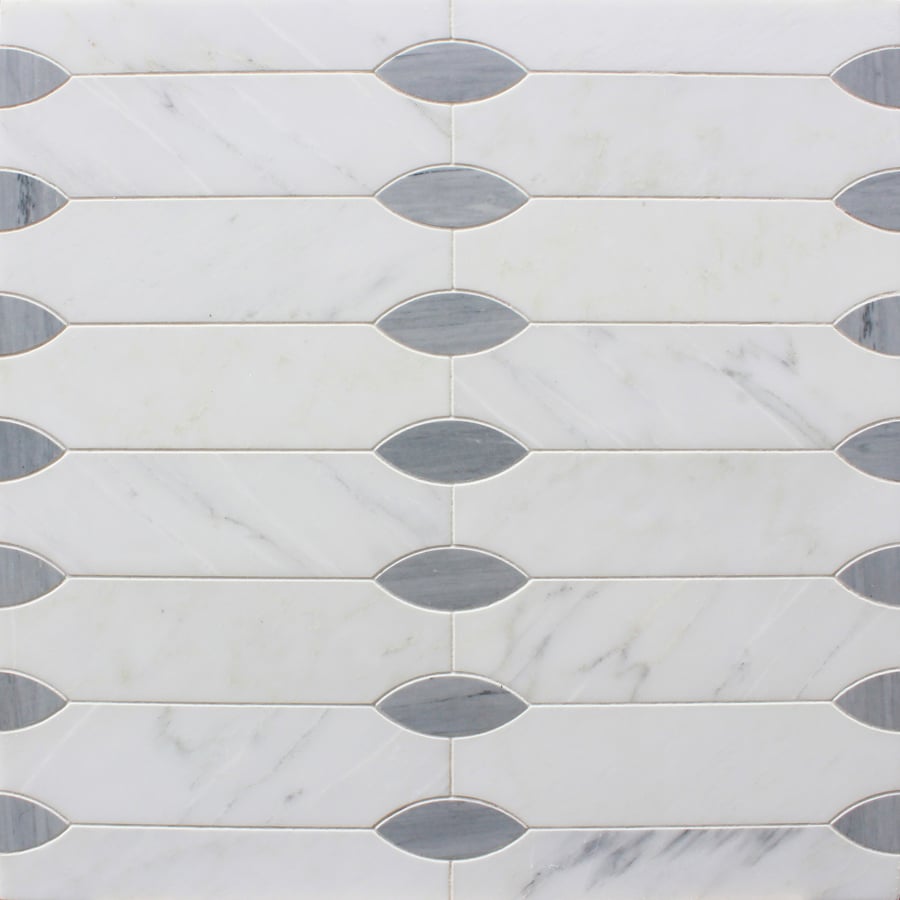
ECLIPSE
Sheet Size: SMALL: 5-1/8 x 11-3/8 x 3/8” | LARGE: 6-3/16 x 13-3/4 x 3/8”


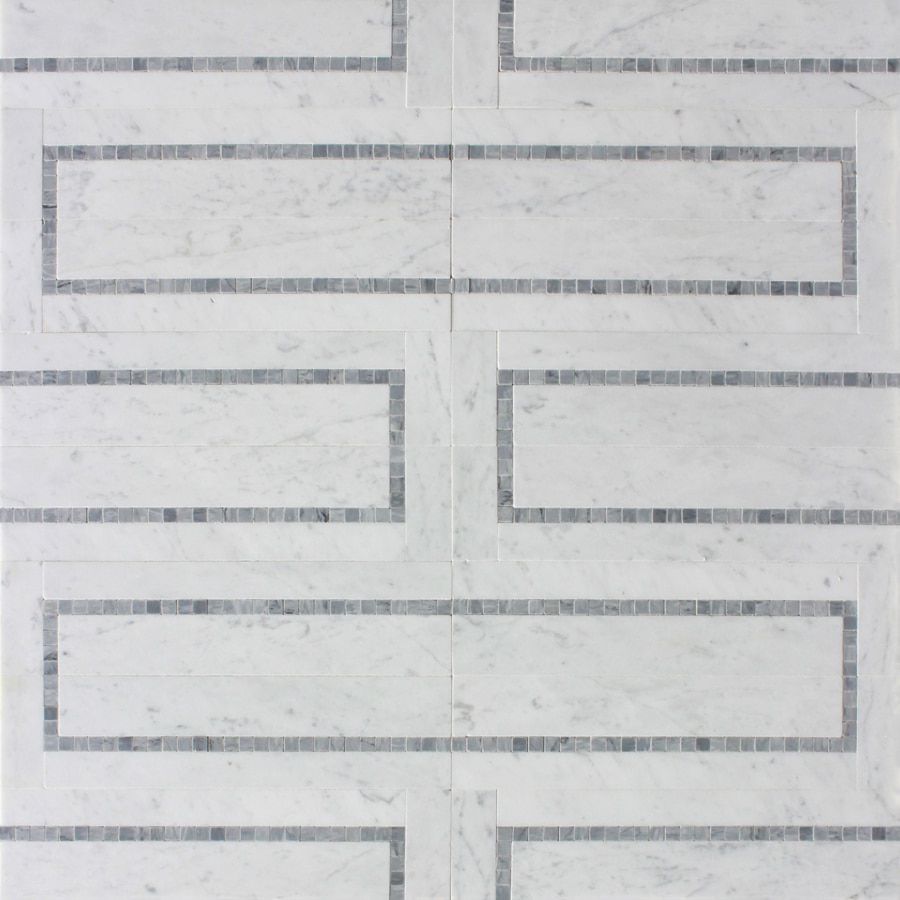
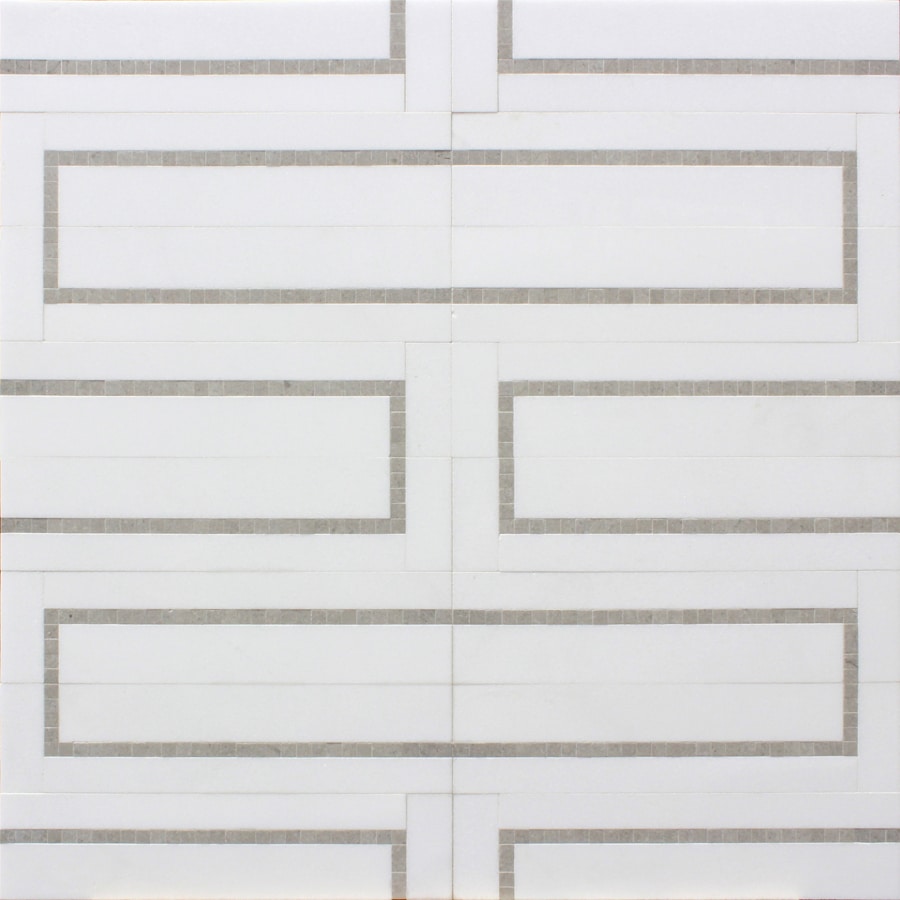
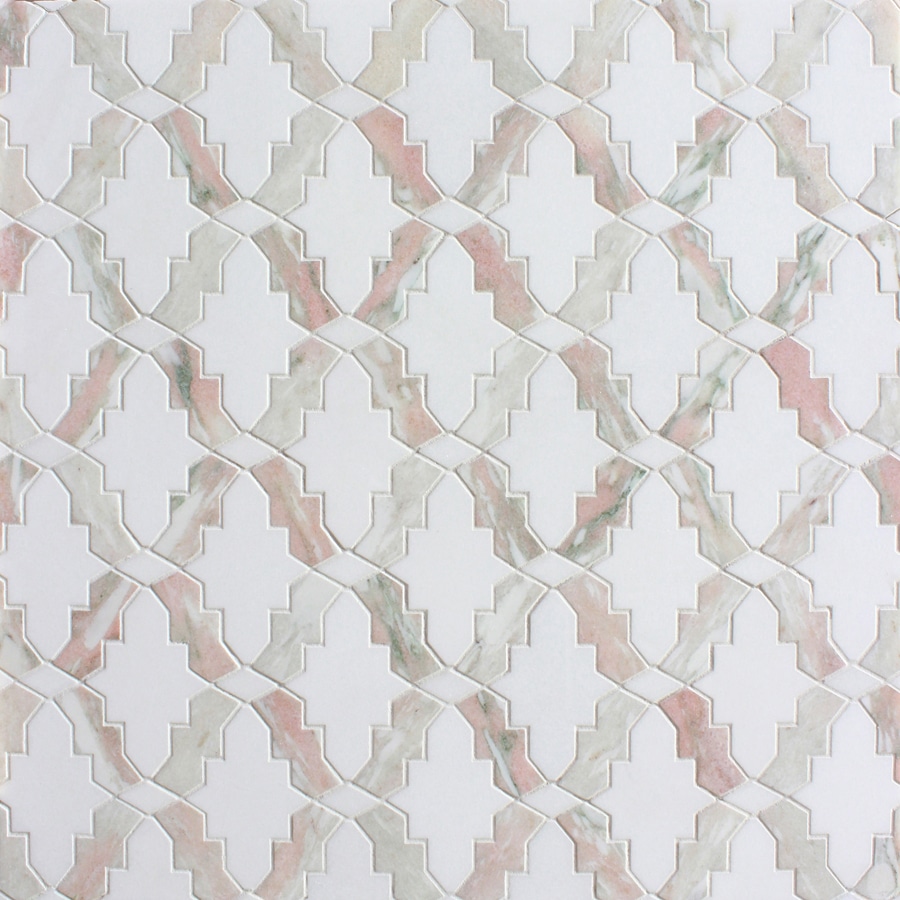
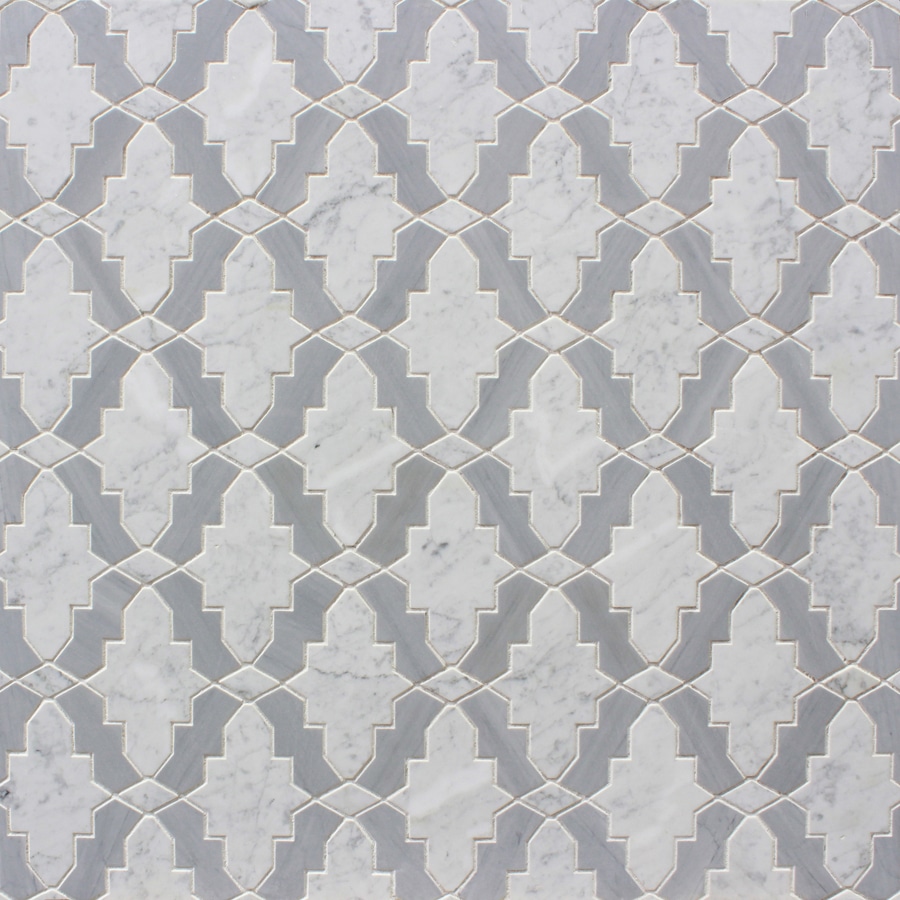
CROSSROADS
Sheet Size: SMALL: 5-13/16 x 5-13/16 x 3/8” | LARGE: 11-13/16 x 11-13/16 x 3/8”


FLANDERS
Sheet Size: SMALL: 11-1/2 x 11-7/8 x 3/8” | LARGE: 20-3/4 x 21-3/8 x 3/8”


PARQUETRY
Sheet Size: SMALL: 11-7/8 x 11-7/8 x 3/8” | LARGE: 20-13/16 x 20-13/16 x 3/8”


ROMA
Sheet Size: SMALL: 15-5/16 x 15-5/16x 3/8” | LARGE: 16-11/16 x 16-11/16 x 3/8”
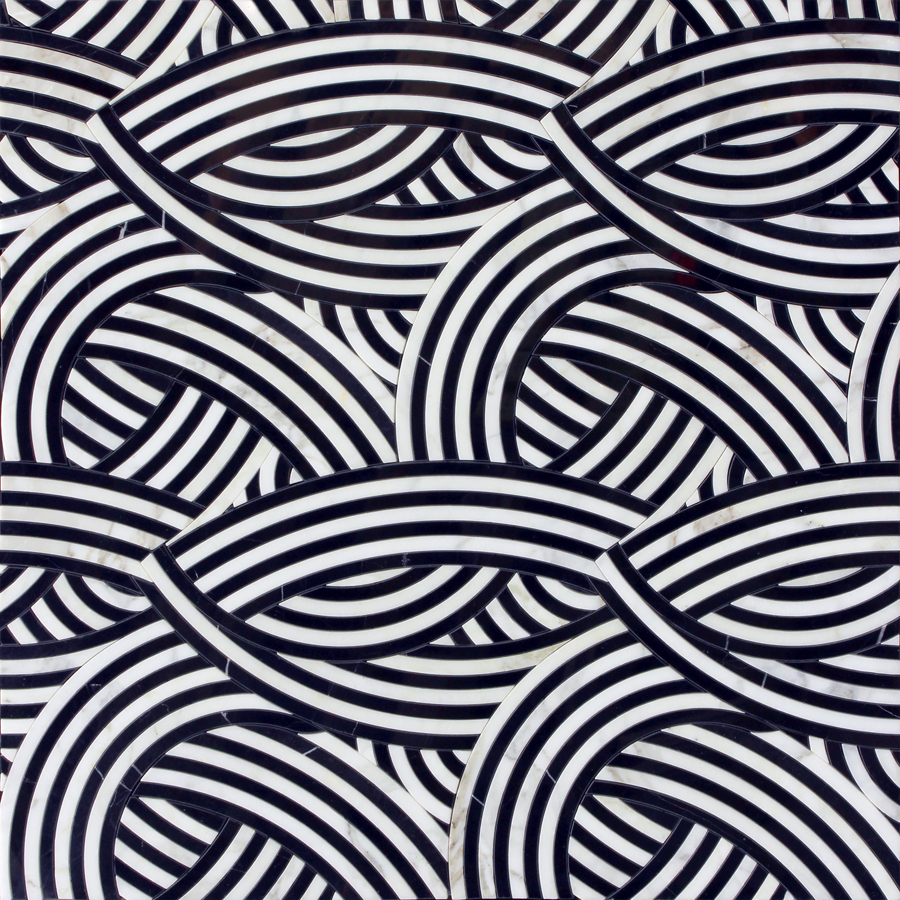
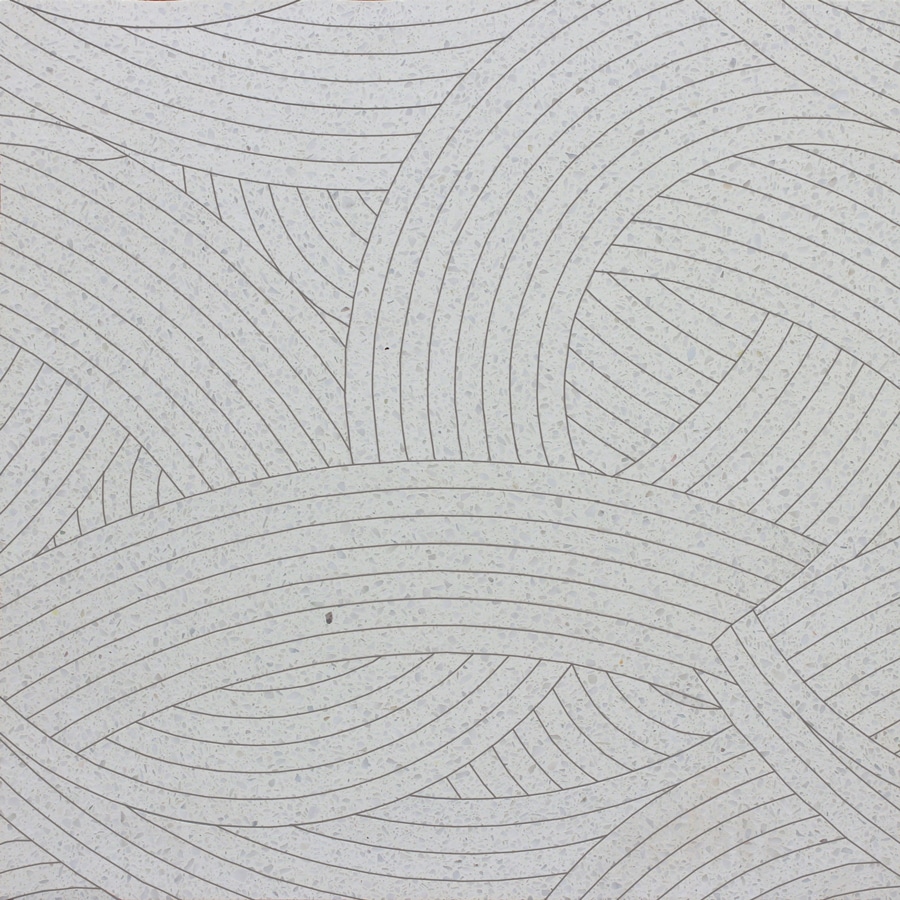
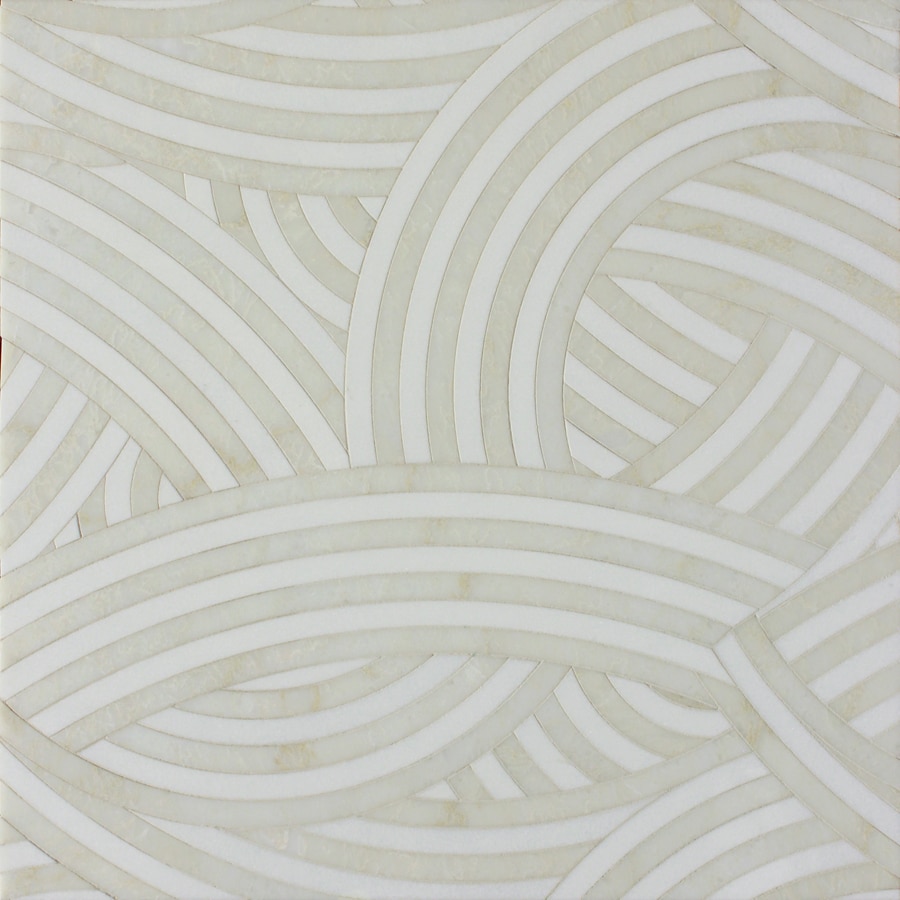
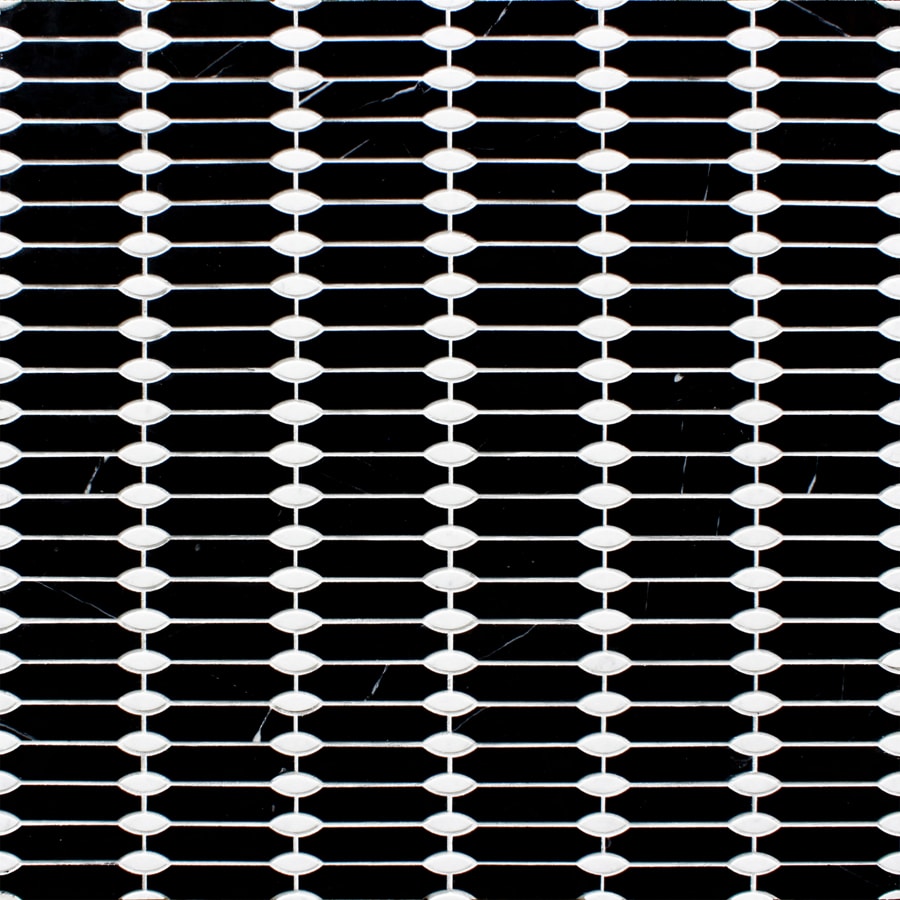
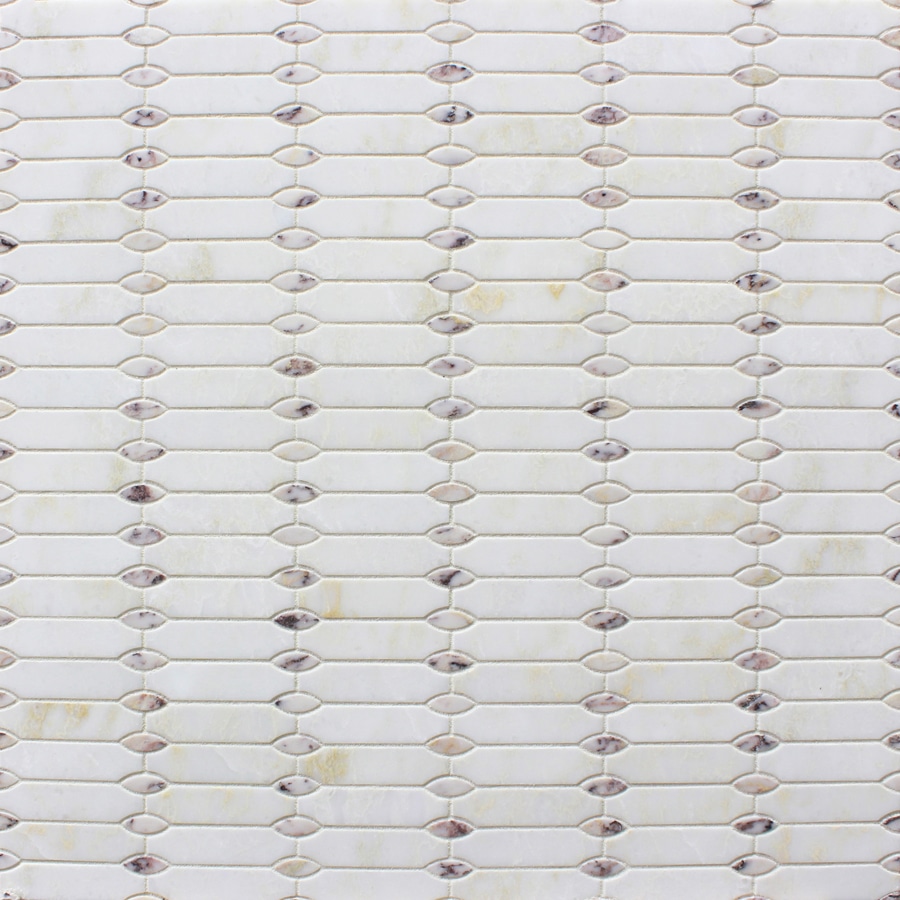
NEXUS
Sheet Size: SMALL: 11-9/16 x 13-3/8 x 3/8” | LARGE: 20-7/16 x 23-5/8 x 3/8”

PALMETTE
Sheet Size: SMALL: 11-1/4 x 13-3/4 x 3/8” | LARGE: 10-1/16 x 11 x 3/8”
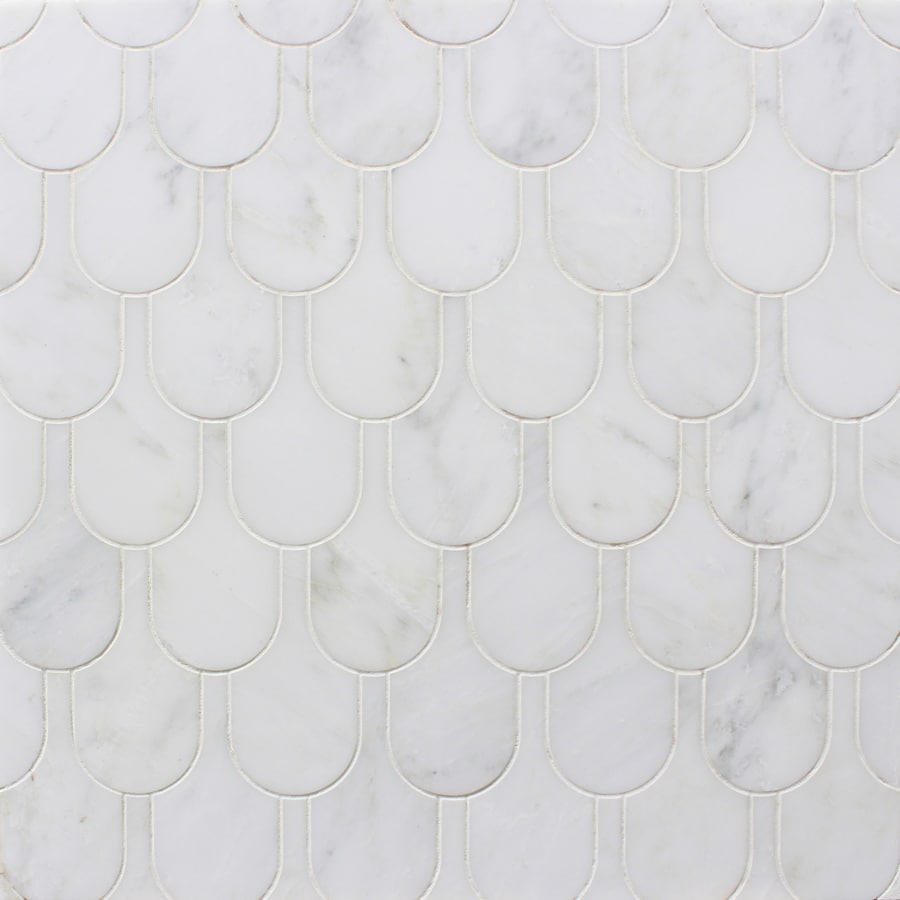
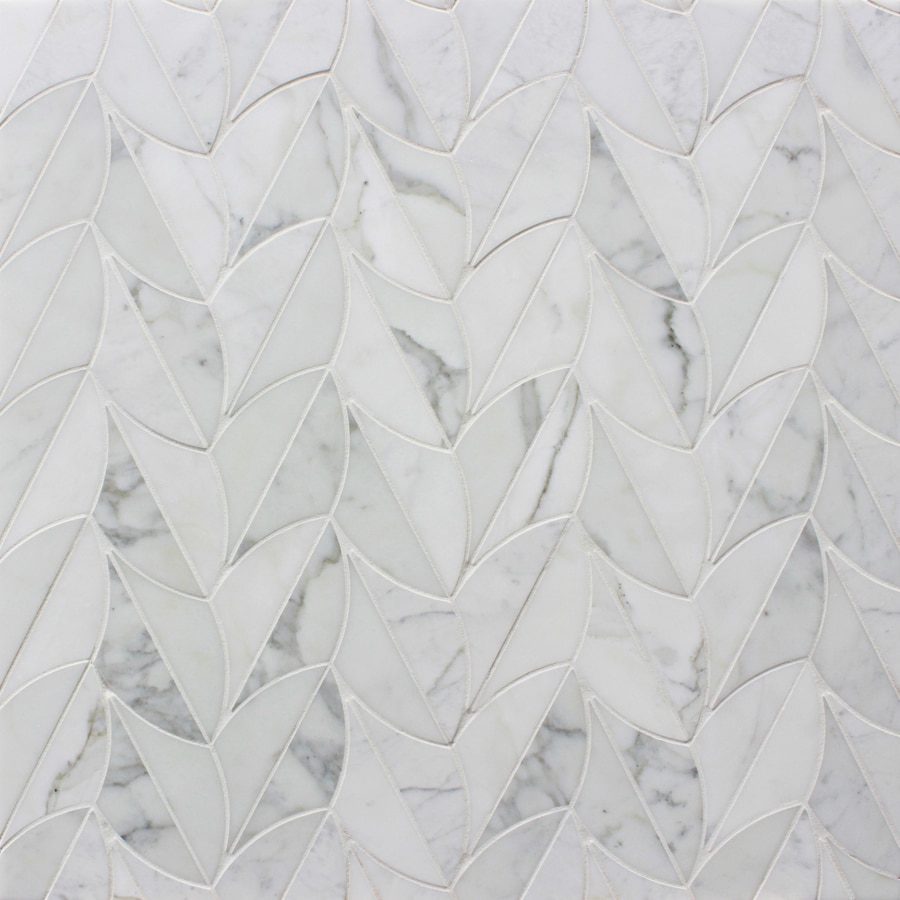
LEAF & PETAL
Sheet Size: SMALL: 13-7/16 x 13-7/16 x 3/8” | LARGE: 11-13/16 x 11-13/16 x 3/8”

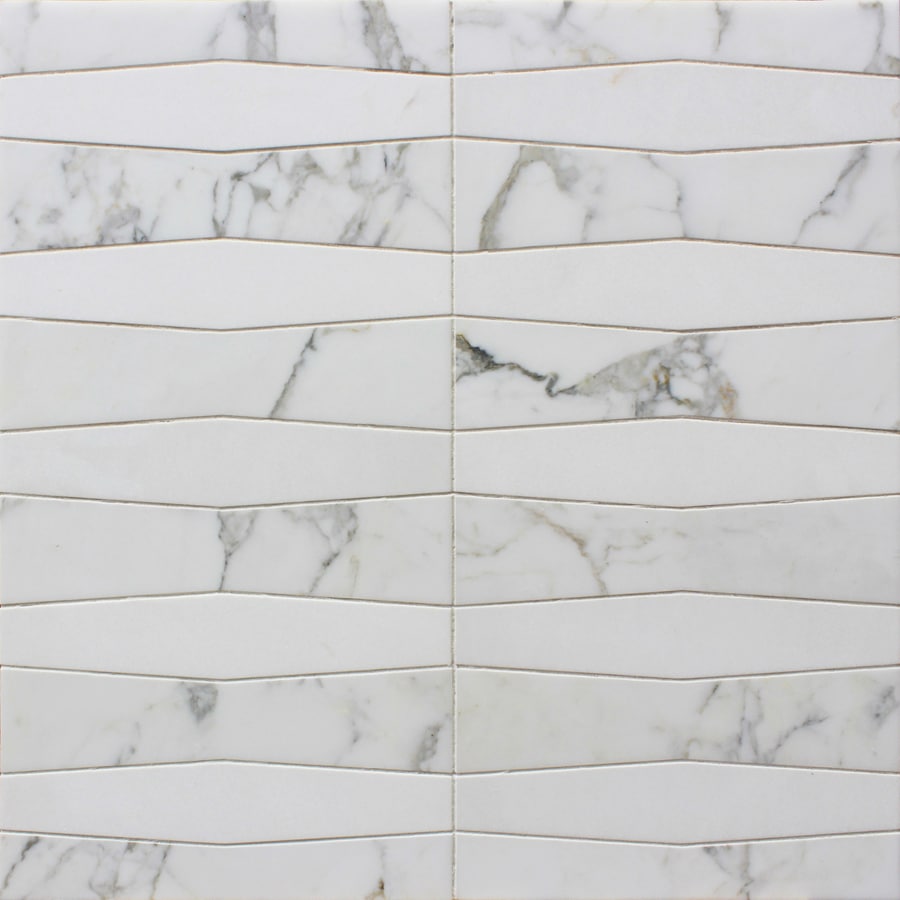
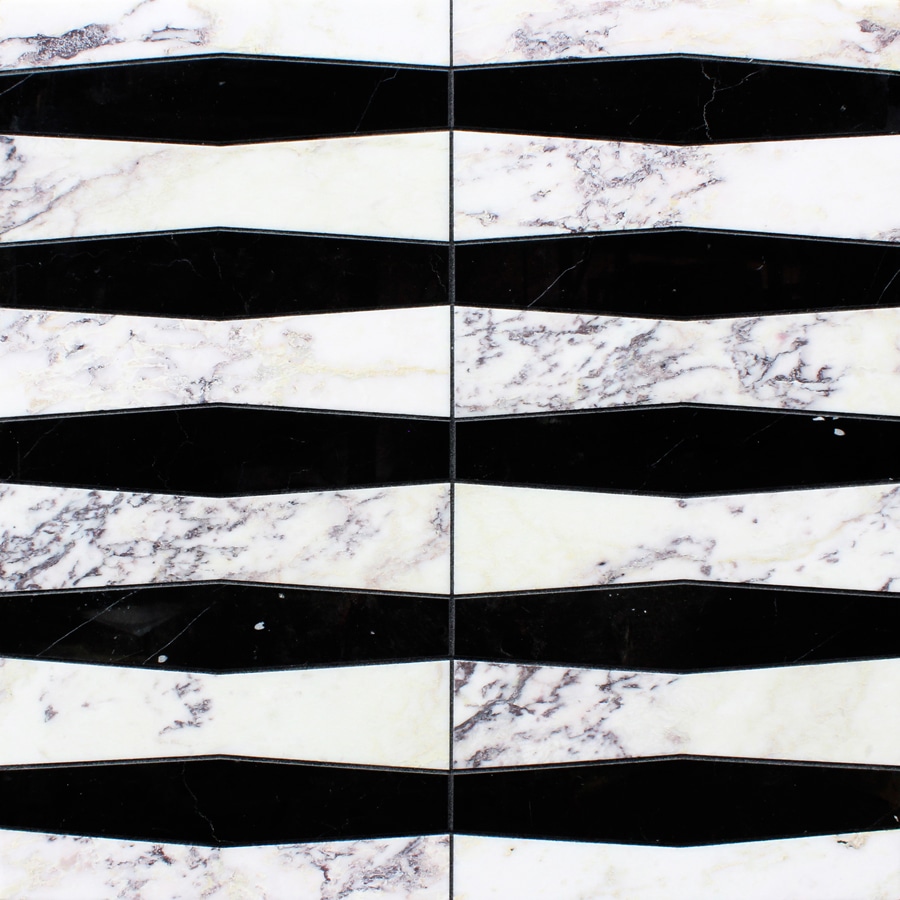
HORIZON
Sheet Size: SMALL: 11-11/16 x 11-13/16 x 3/8” | LARGE: 11-13/16 x 12-5/16 x 3/8”


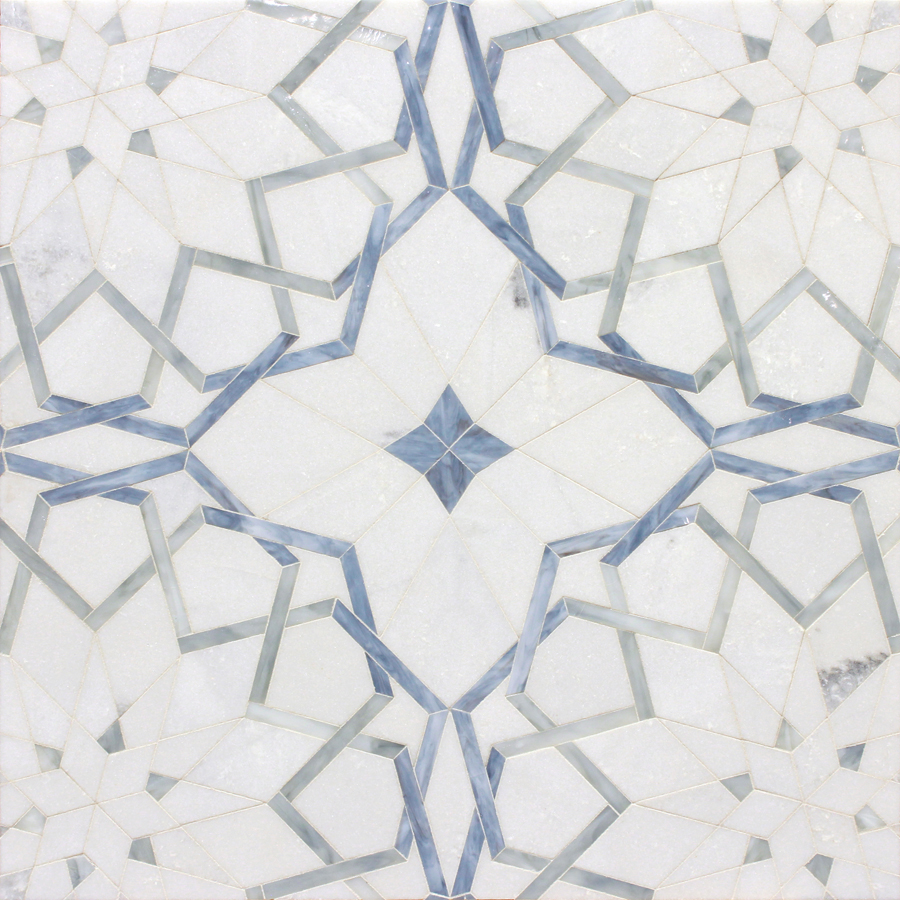
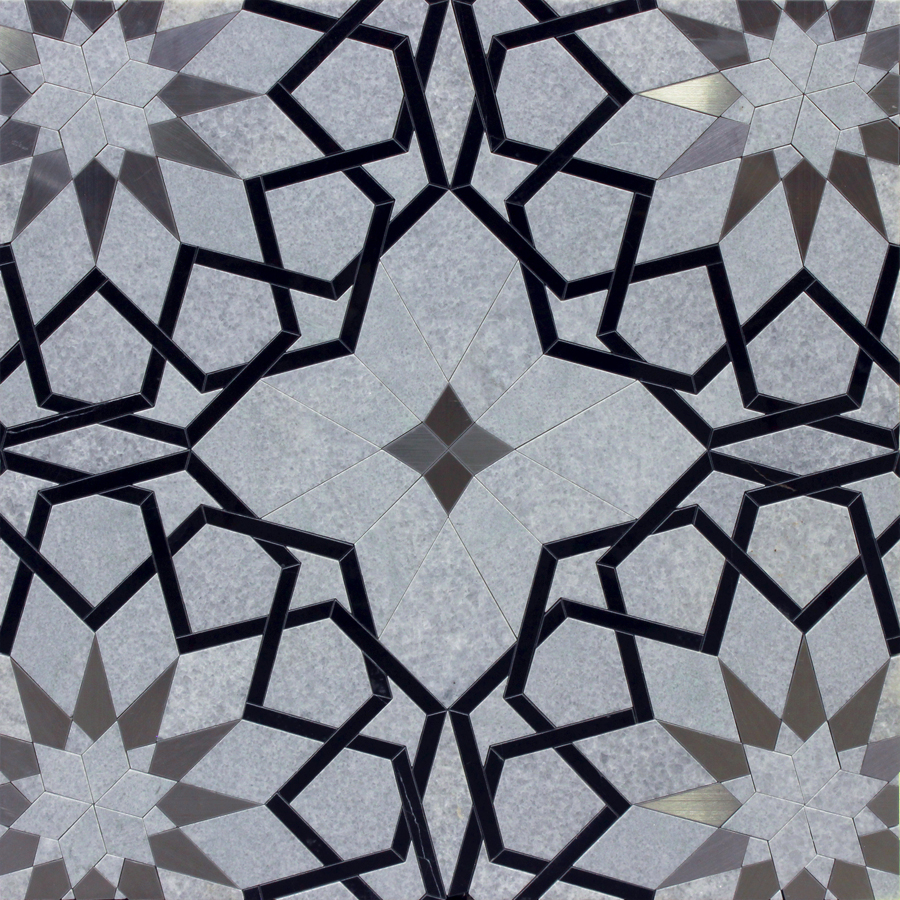
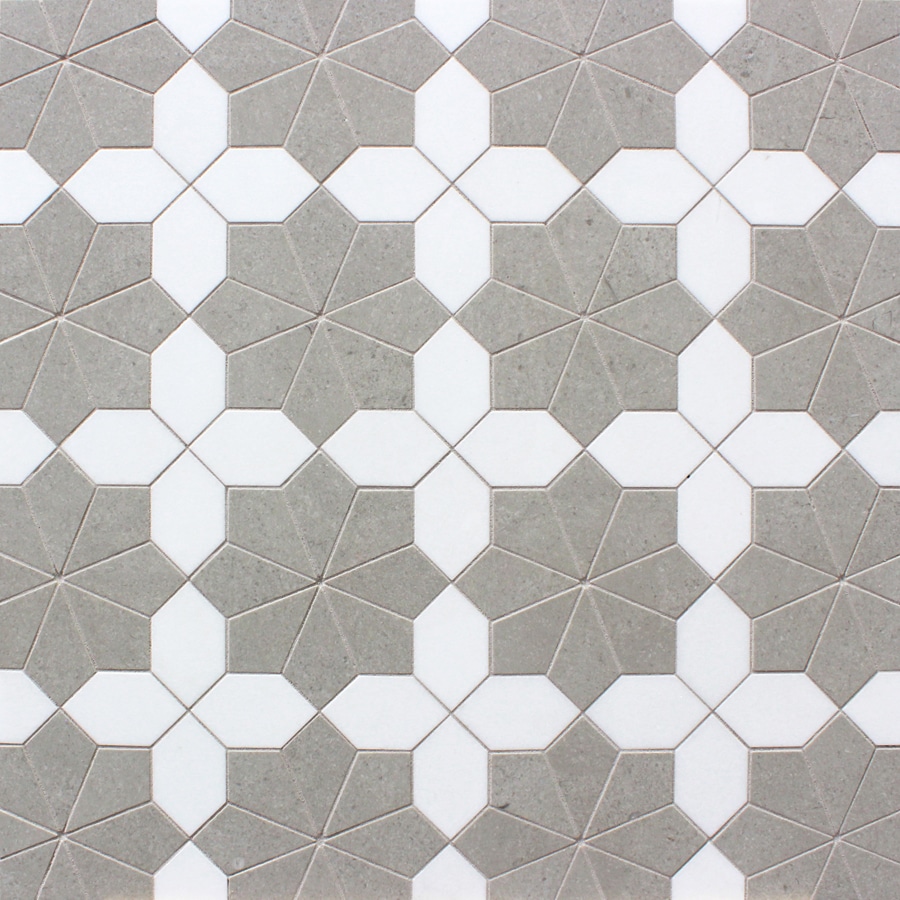
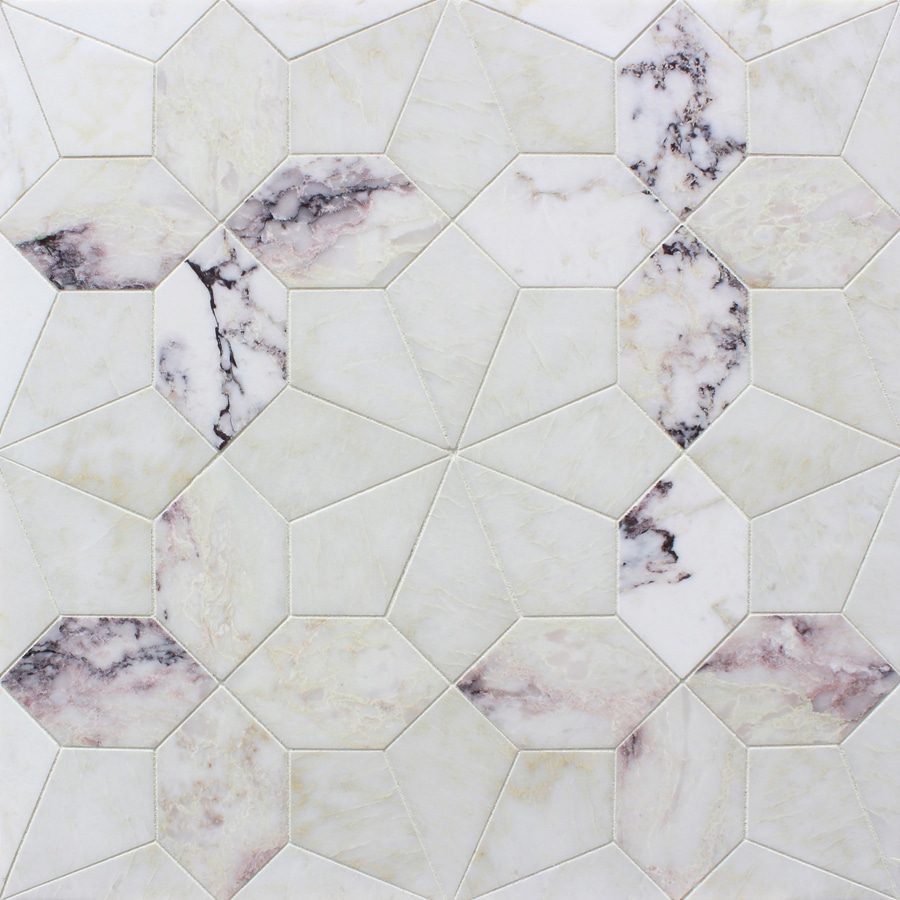
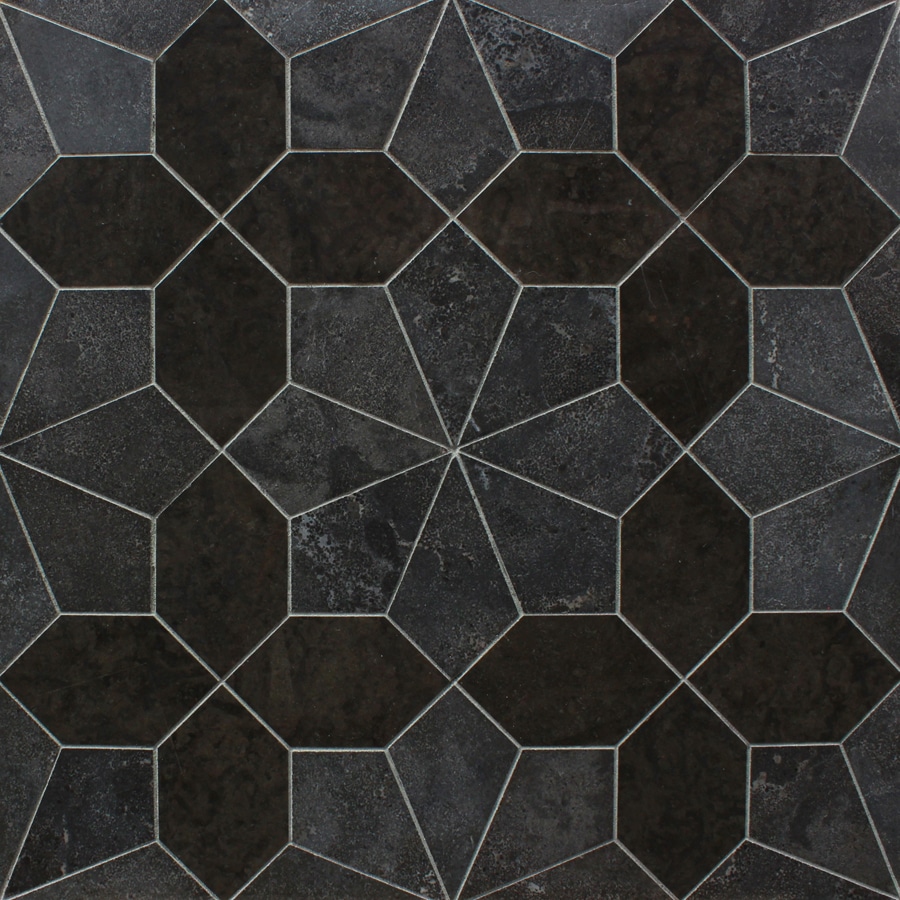
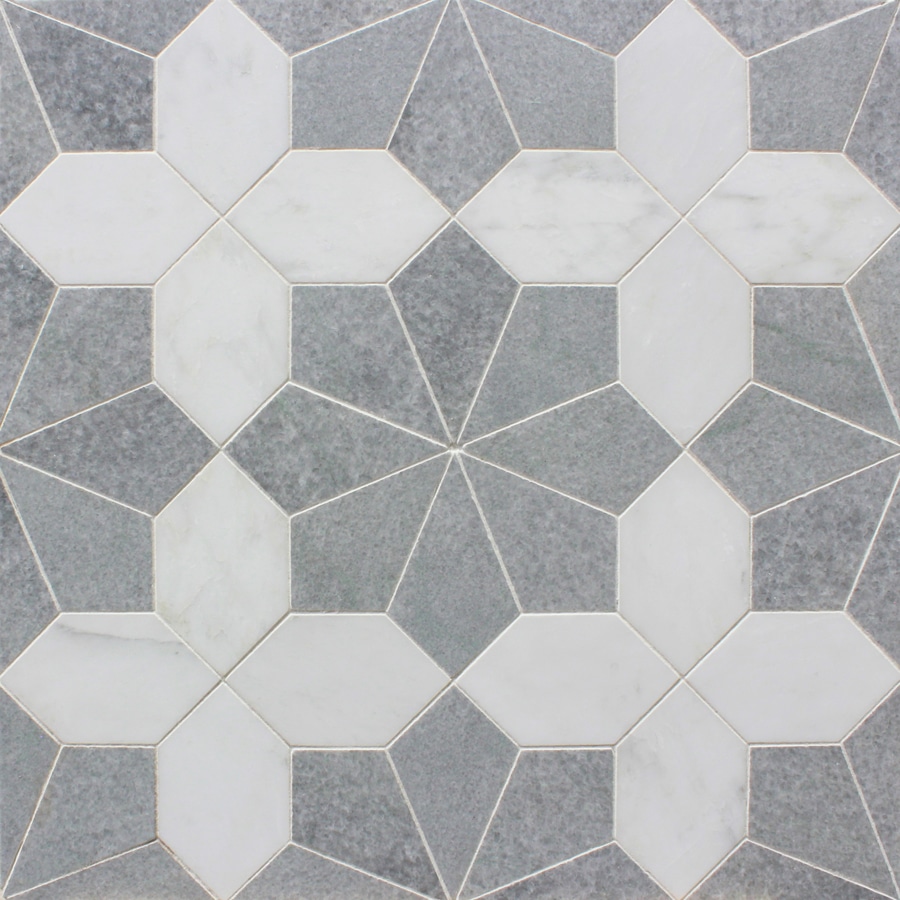
GIRIH
Sheet Size: SMALL: 12-1/8 x 12-1/8 x 3/8” | LARGE: 11-5/16 x 11-5/16 x 3/8”

PRISM
Sheet Size: SMALL: 10-1/4 x 11-1/2 x 3/8” | LARGE: 11-13/16 x 11-13/16 x 3/8”

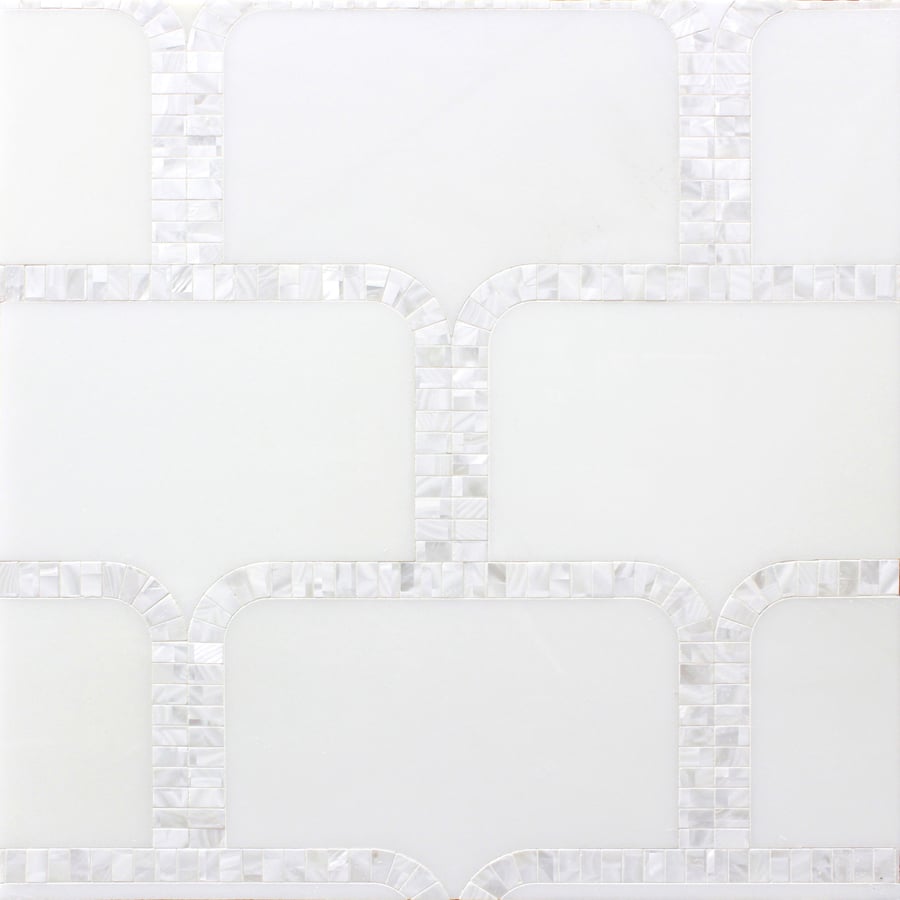
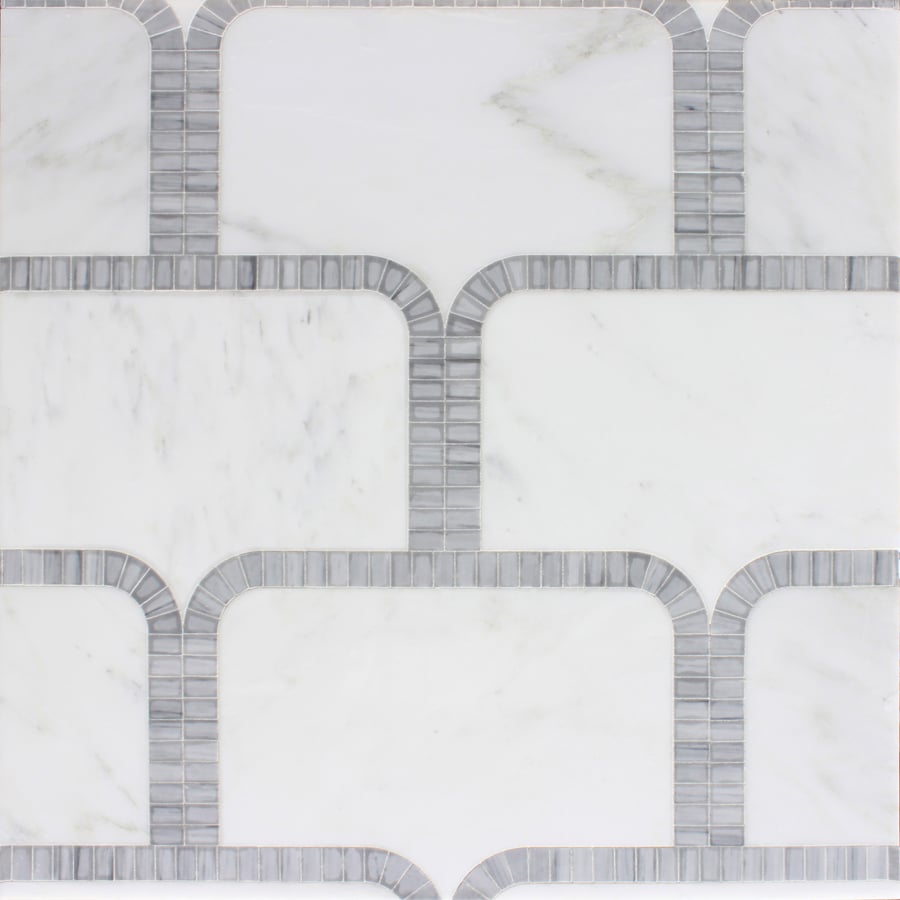
COLONNADE
Sheet Size: SMALL: 11-7/16 x 11-1/2 x 3/8” | LARGE: 11-3/4 x 13-9/16 x 3/8”
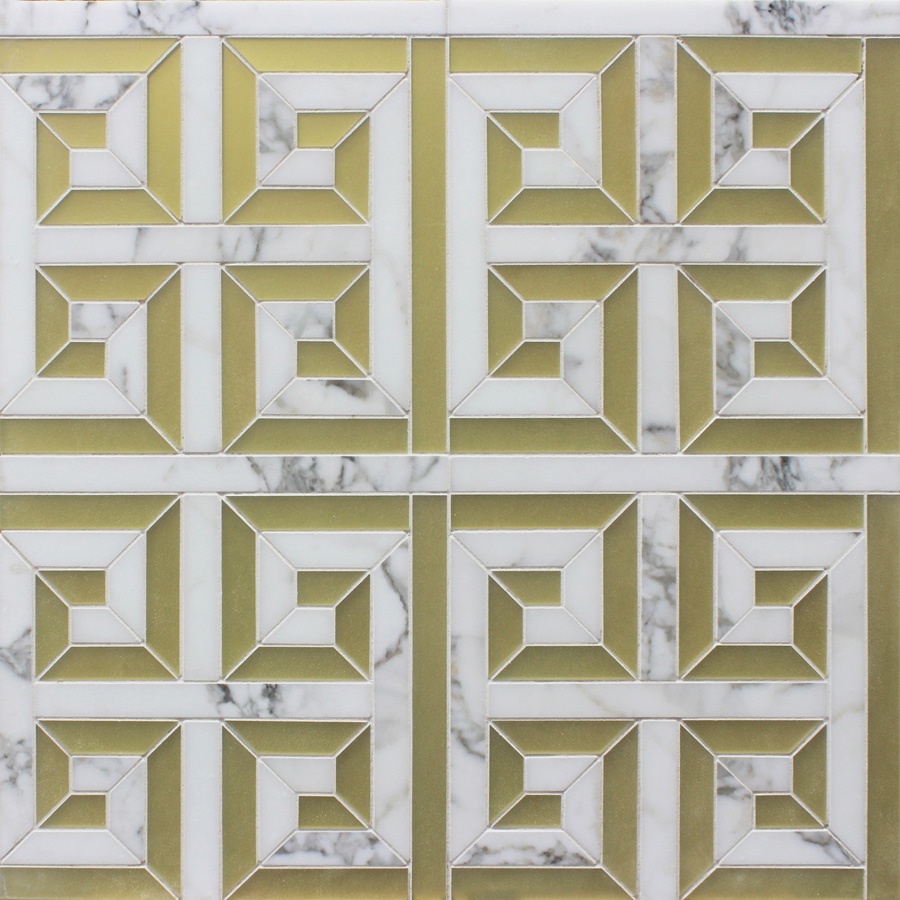
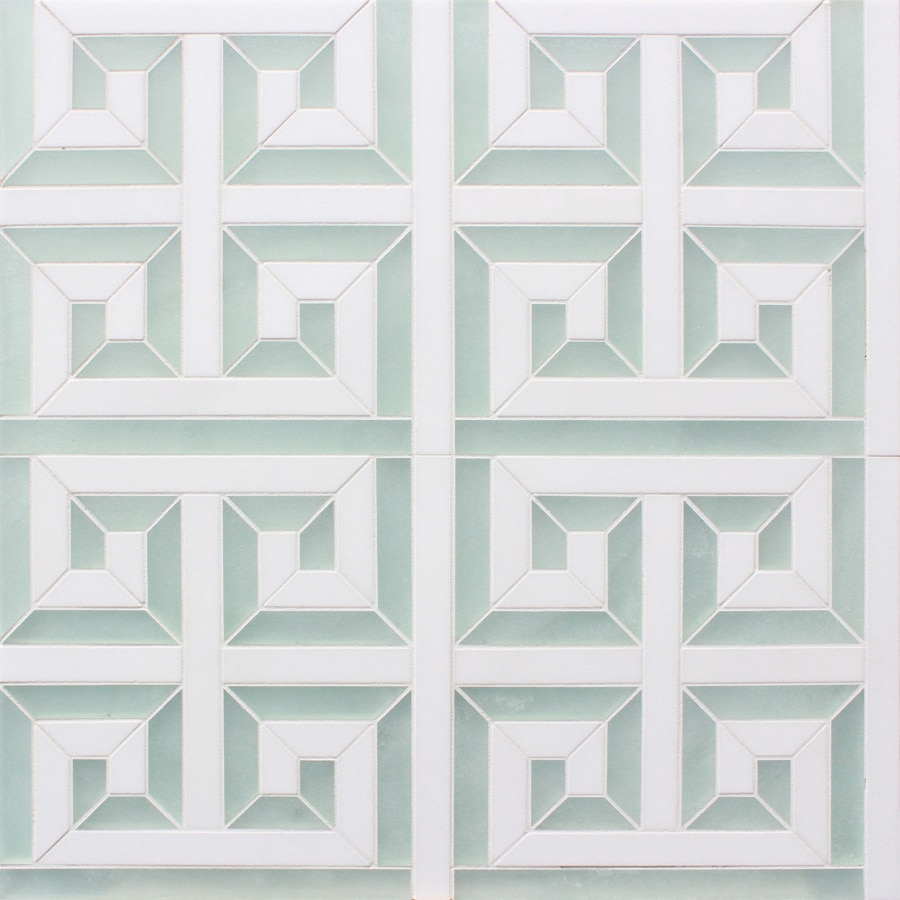
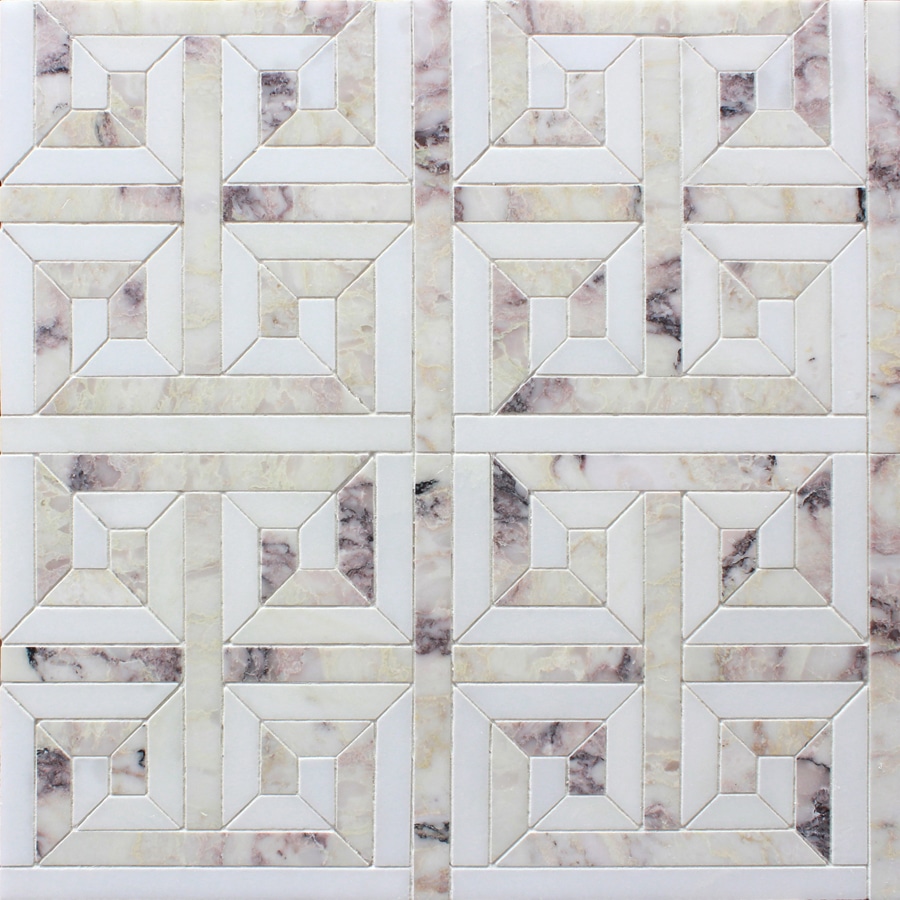
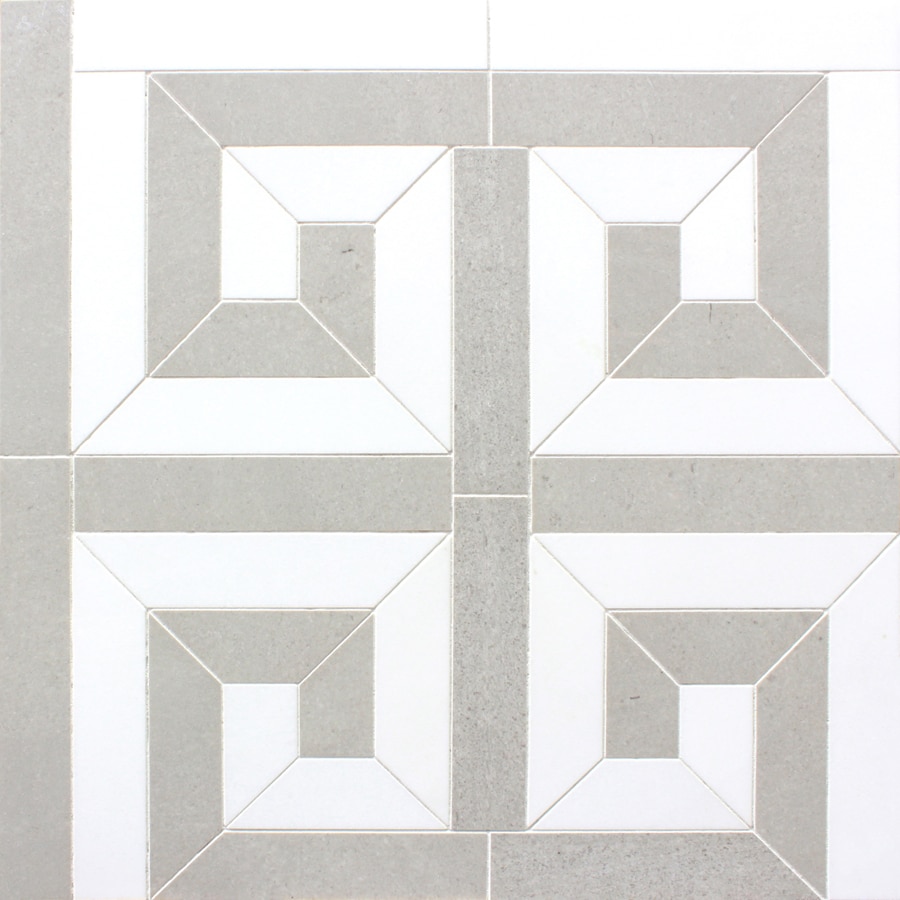
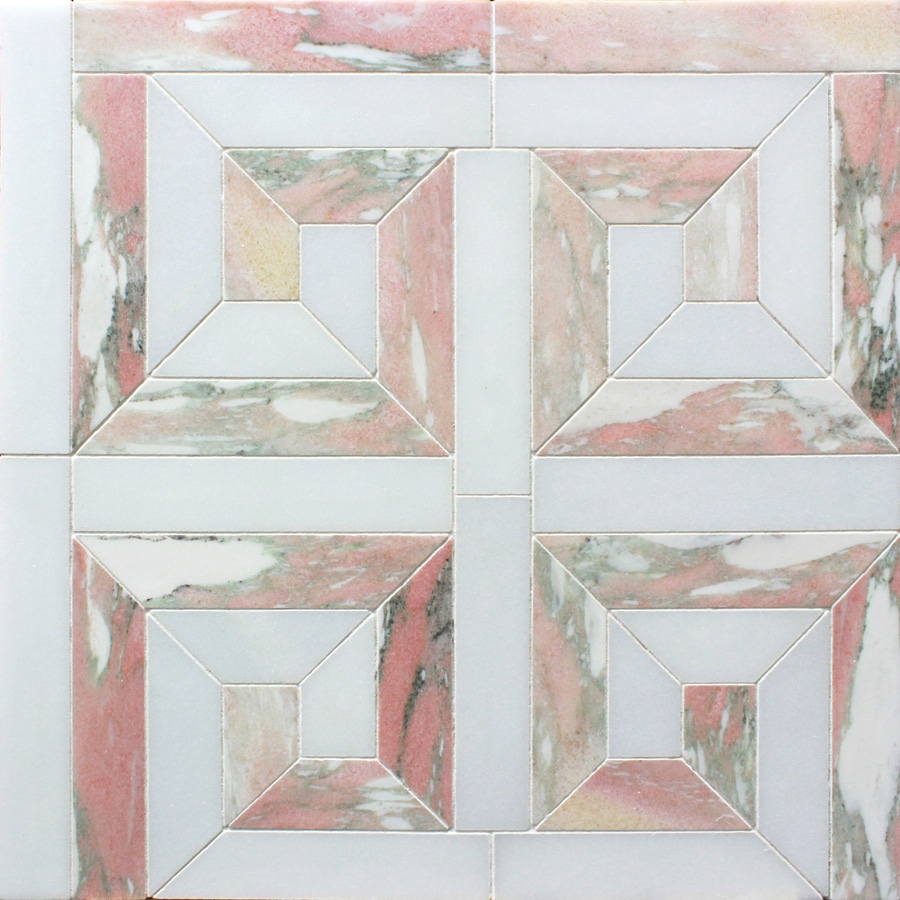
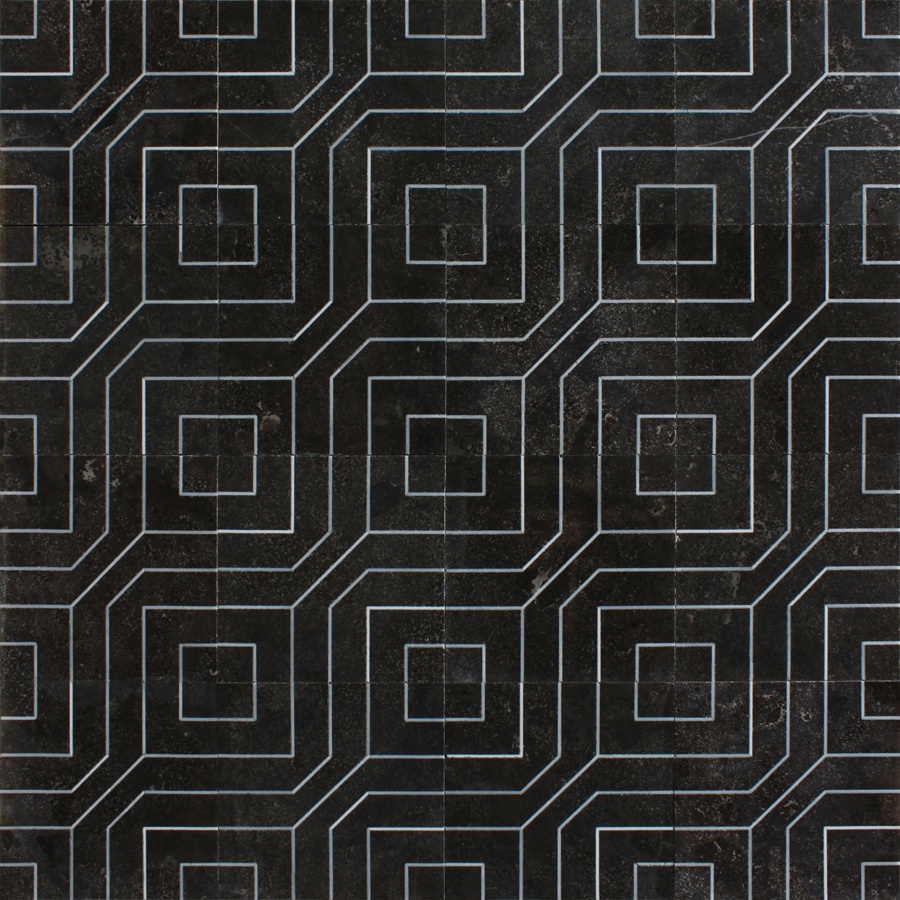
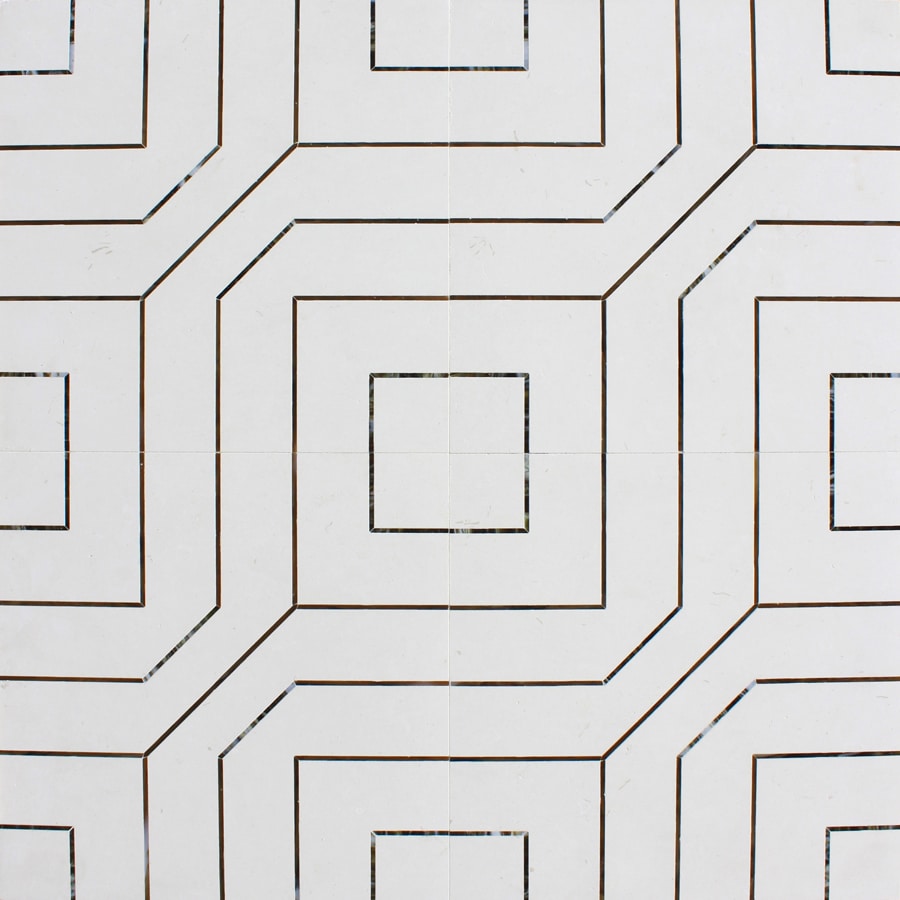
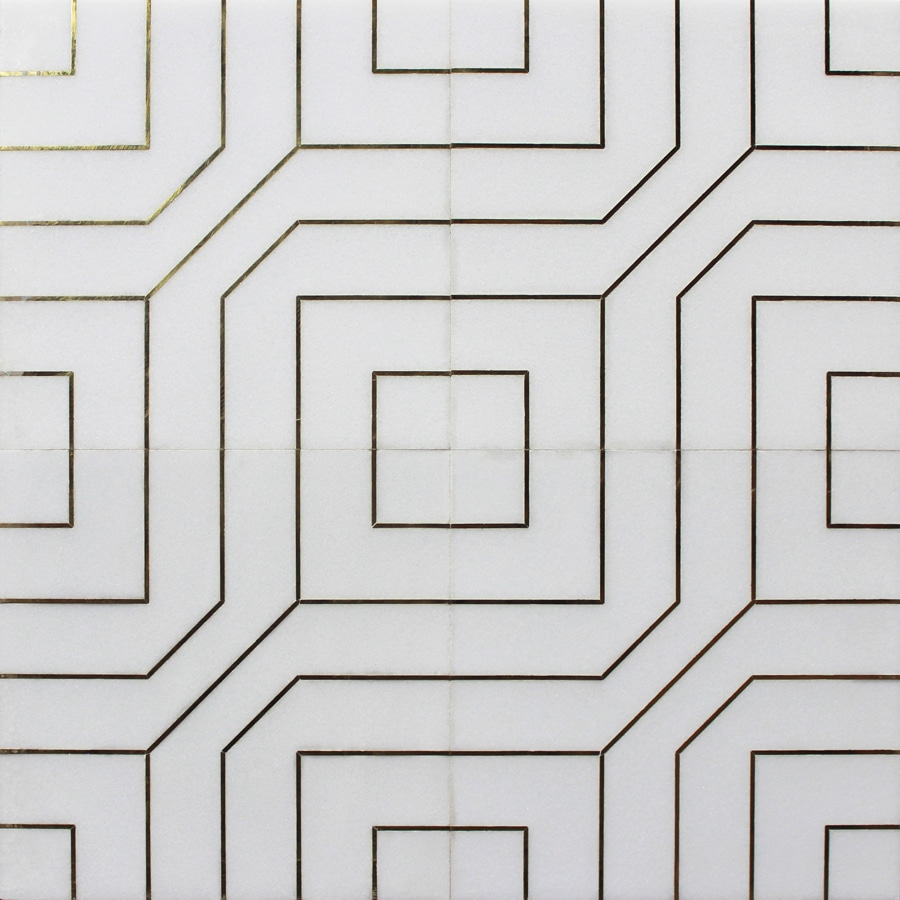
GREEK KEY
Sheet Size: SMALL: 11-13/16 x 11-13/16 x 3/8” | LARGE: 23-9/16 x 23-9/16 x 3/8”
AMPHORA
Sheet Size: SMALL: 11-3/4 x 11-13/16 x 3/8” | LARGE: 11-13/16 x 12-15/16 x 3/8”
CASCADE
Sheet Size: SMALL: 9-5/8 x 12-1/8 x 3/8” | LARGE: 10-1/16 x 12-3/16 x 3/8”


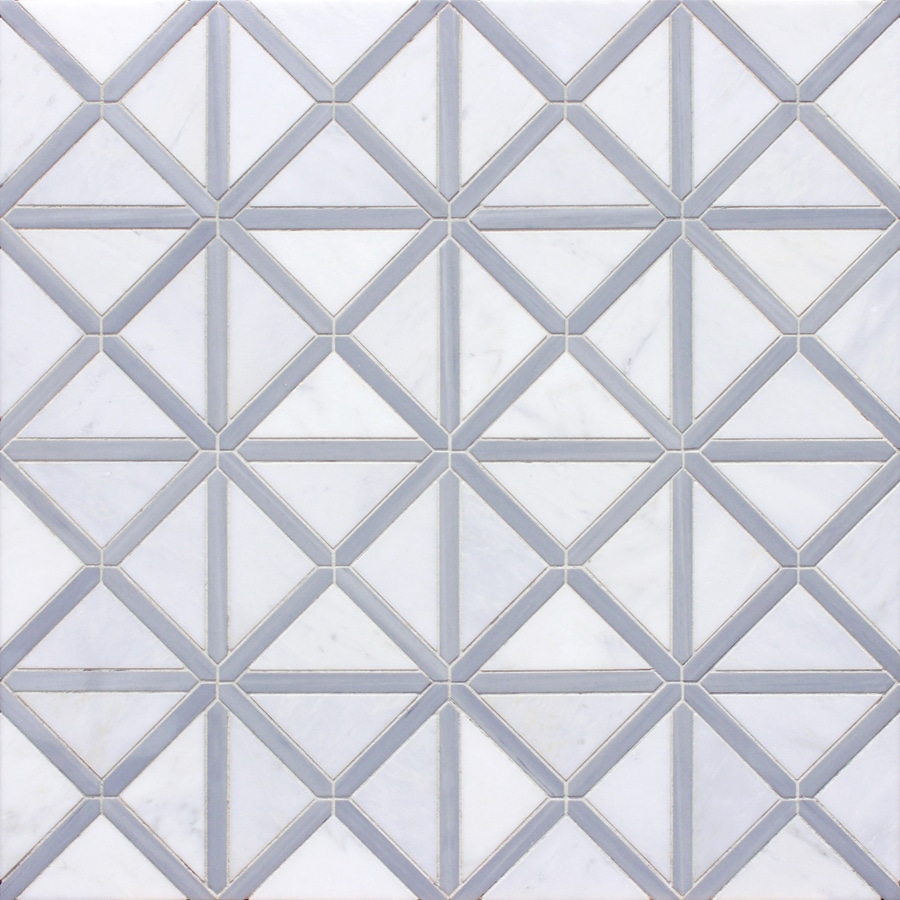
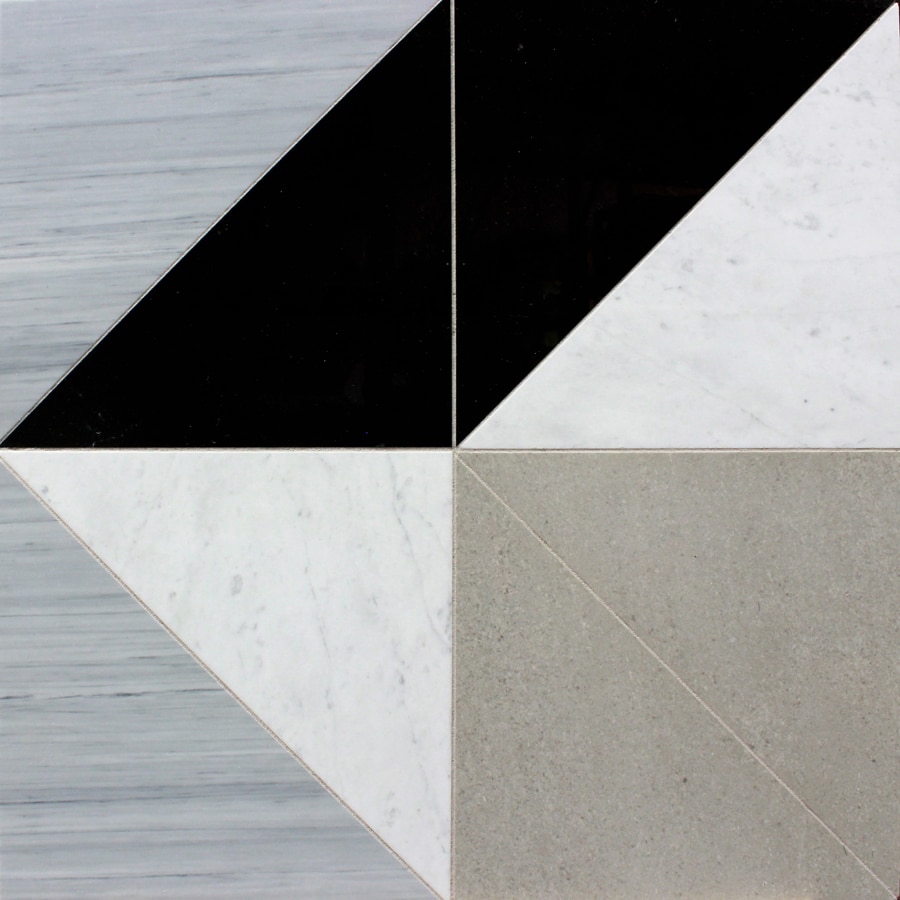
EQUILATERAL
Sheet Size: SMALL: 5-11/16 x 5-11/16 x 3/8” | LARGE: 11-5/8 x 11-5/8 x 3/8”

BRICK BOND
Sheet Size: SMALL: 7-1/16 x 9-13/16 x 3/8” | LARGE: 9-3/4 x 13-9/16 x 3/8”

DIAMOND DAZE
Sheet Size: SMALL: 5-15/16 x 5-15/16 x 3/8” | LARGE: 12 x 12 x 3/8”


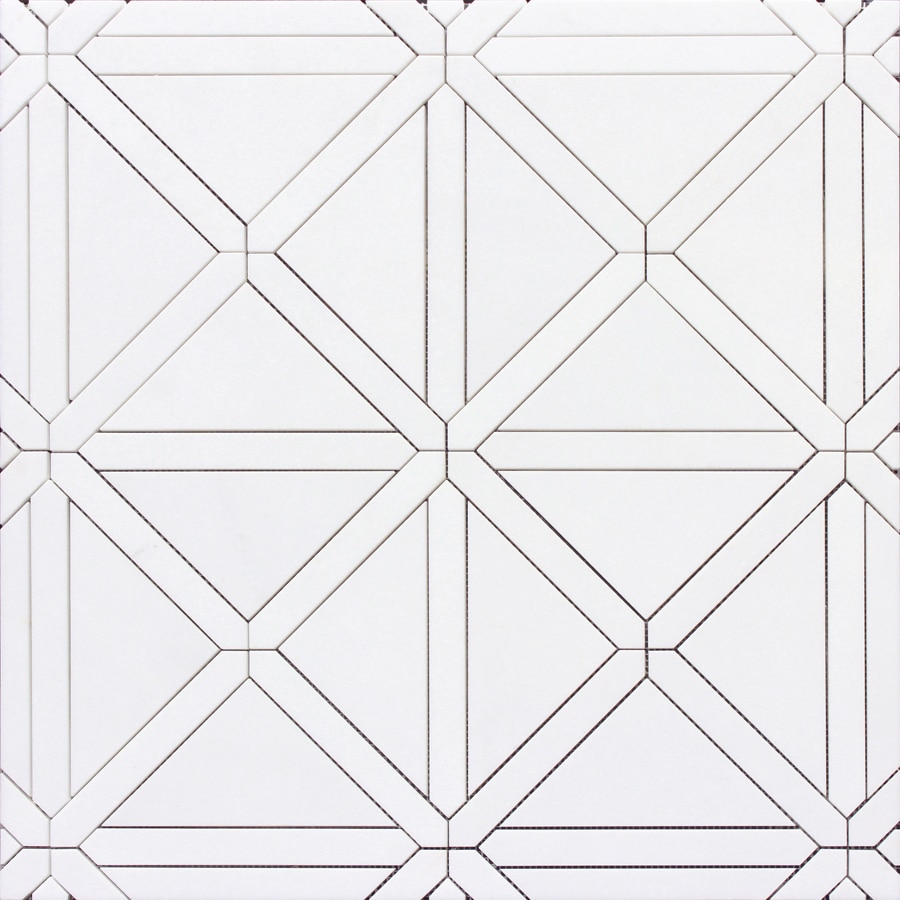
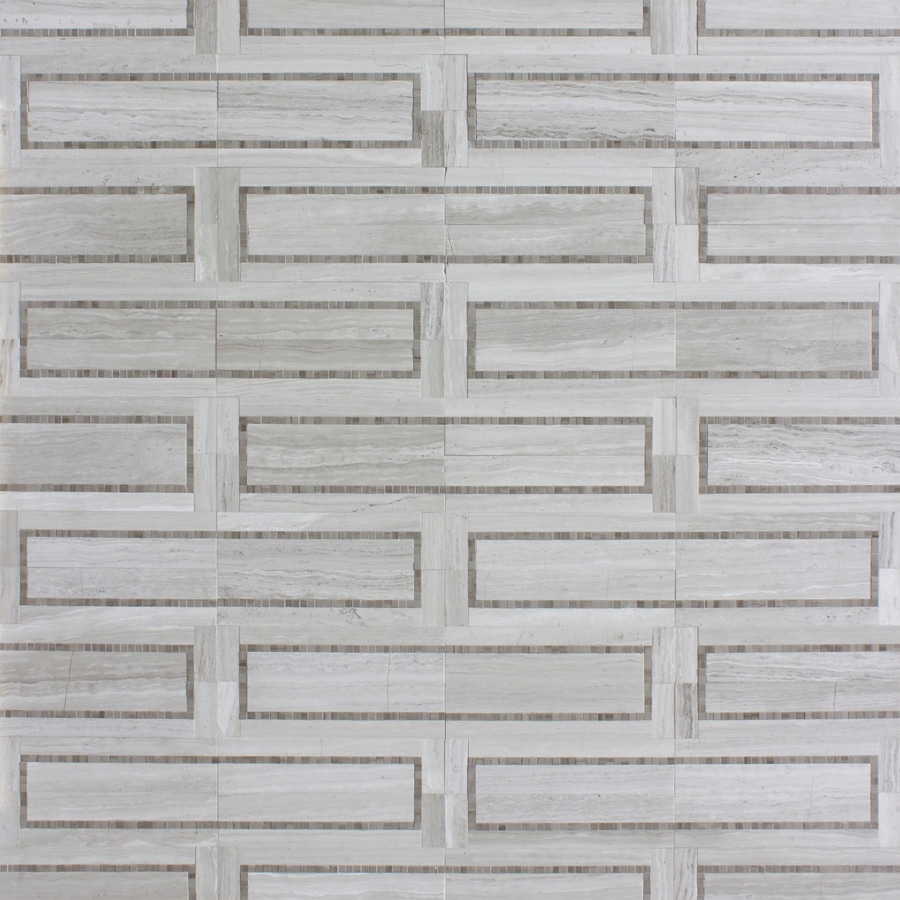
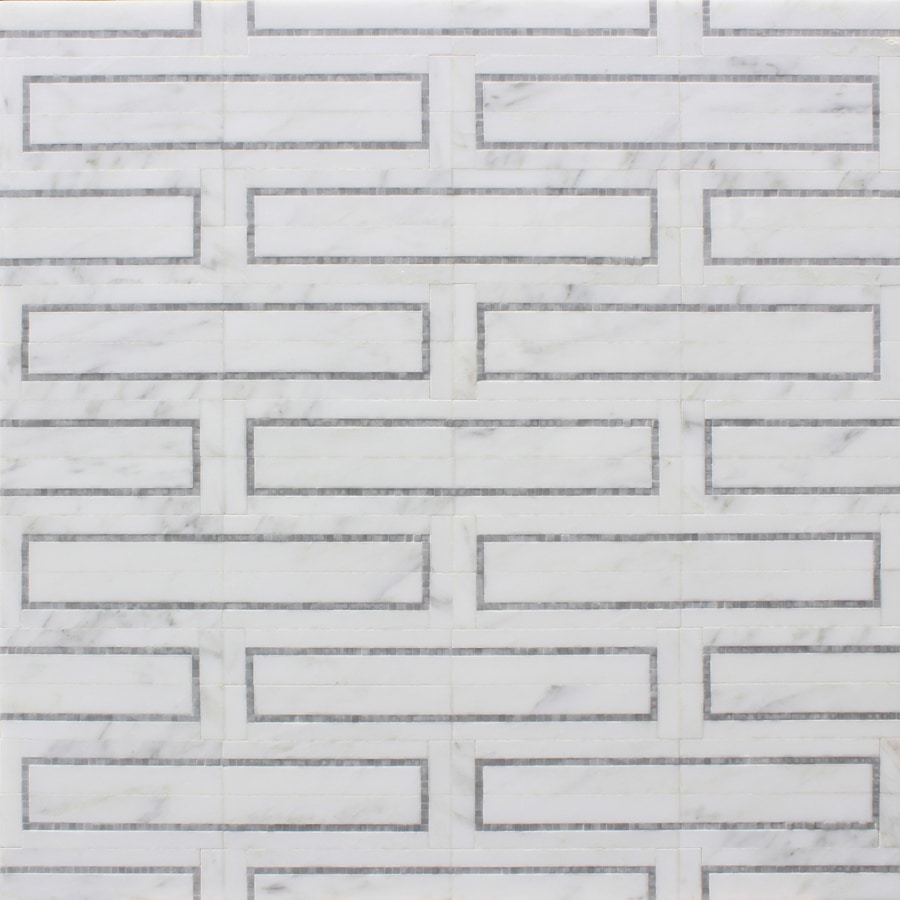
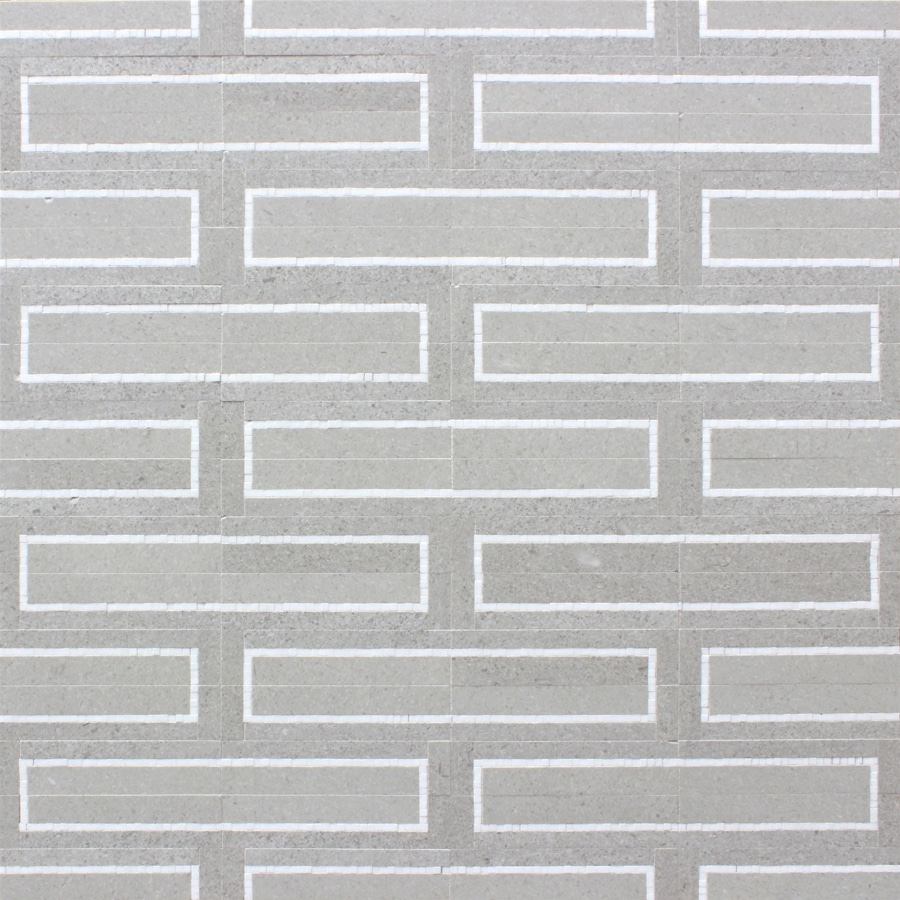
METROPOLIS
Sheet Size: SMALL: 11-13/16 x 11-13/16 x 3/8” | LARGE: 11-13/16 x 11-13/16 x 3/8”
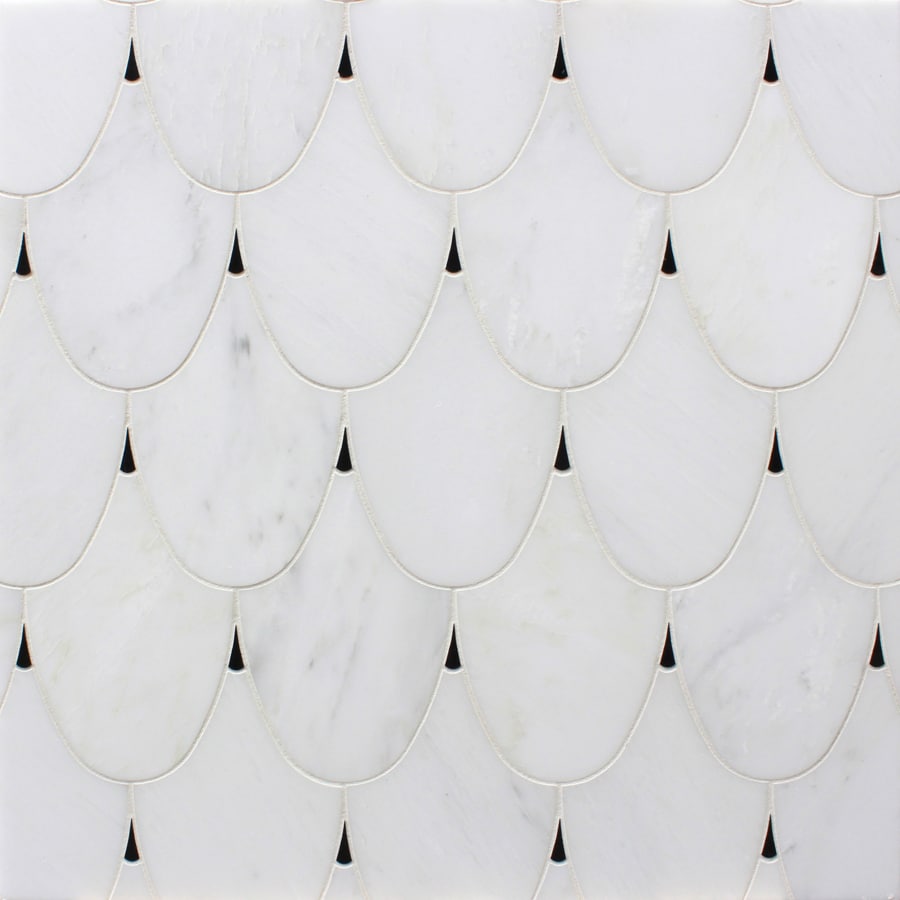
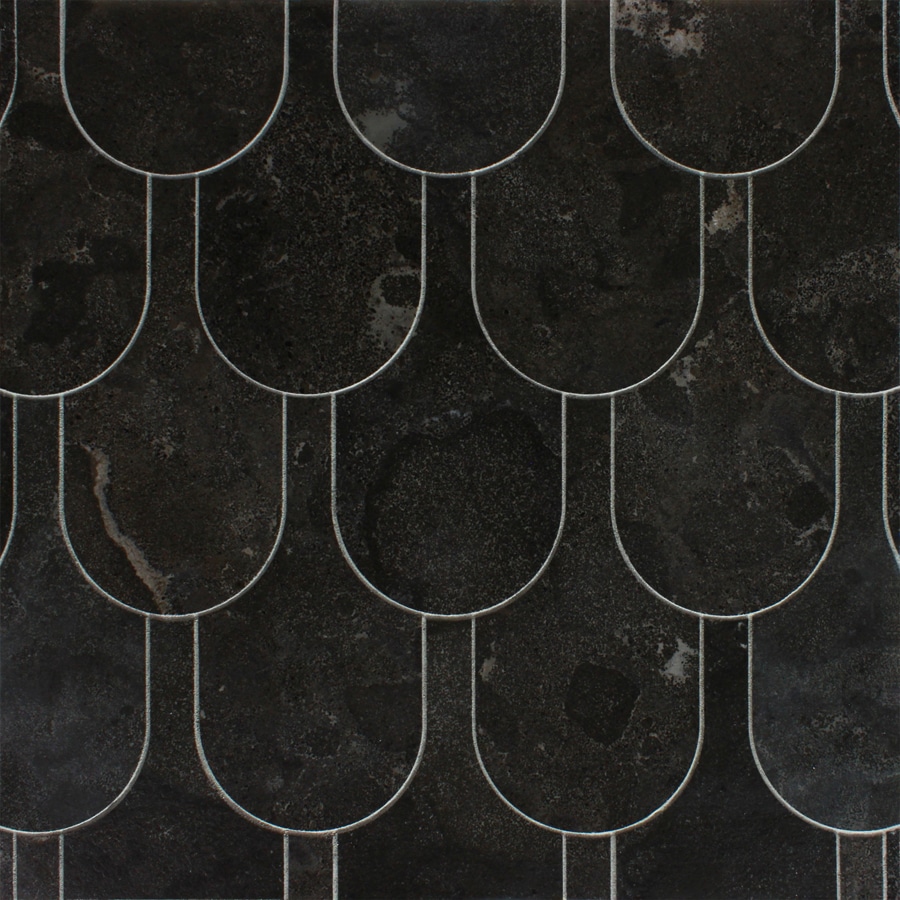
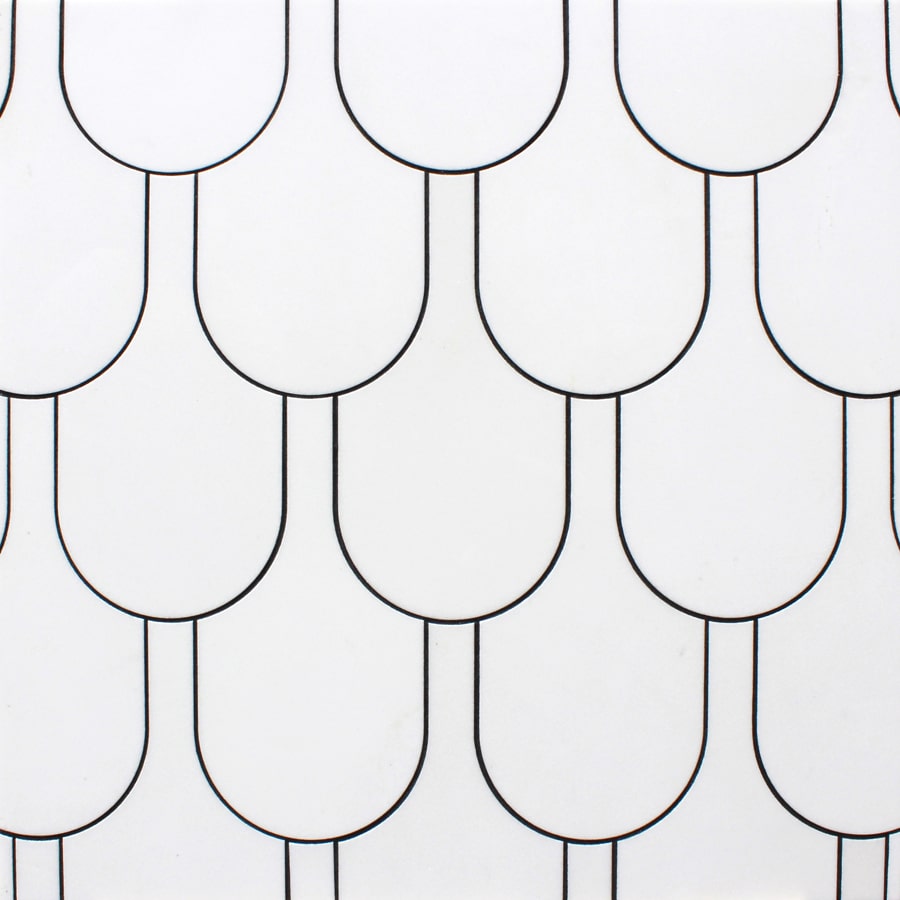
TREFOIL
Sheet Size: SMALL: 6-5/16 x 6-1/2 x 3/8” | LARGE: 9-7/8 x 10-1/8 x 3/8”
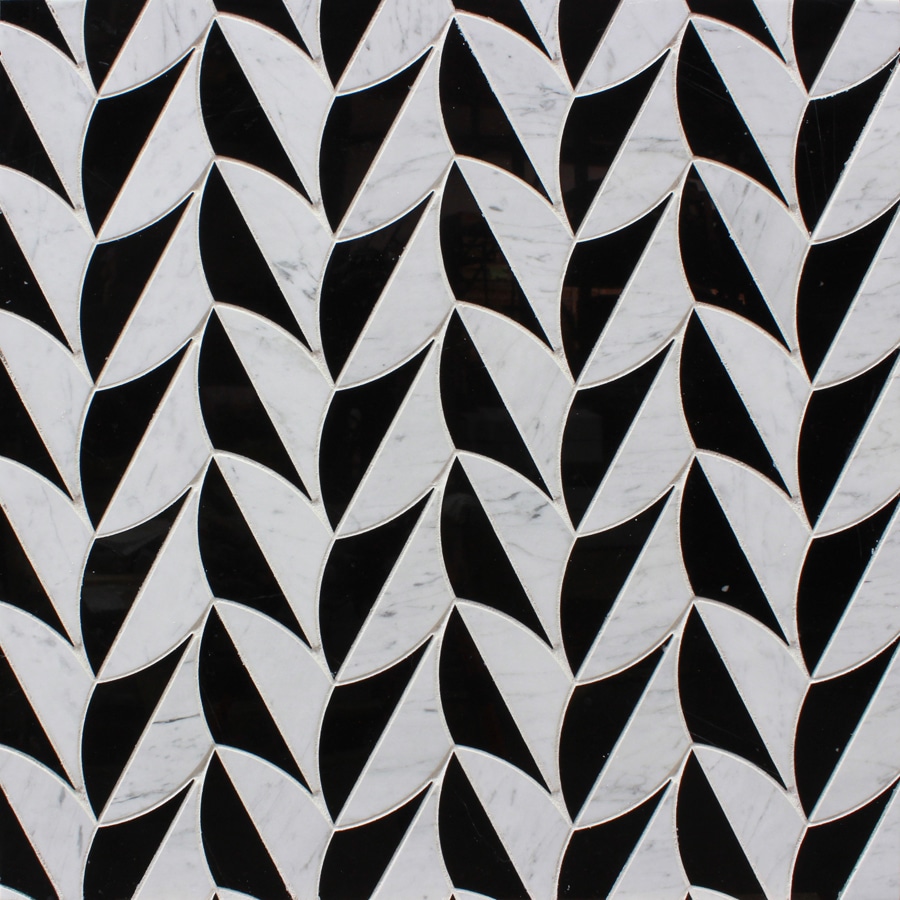
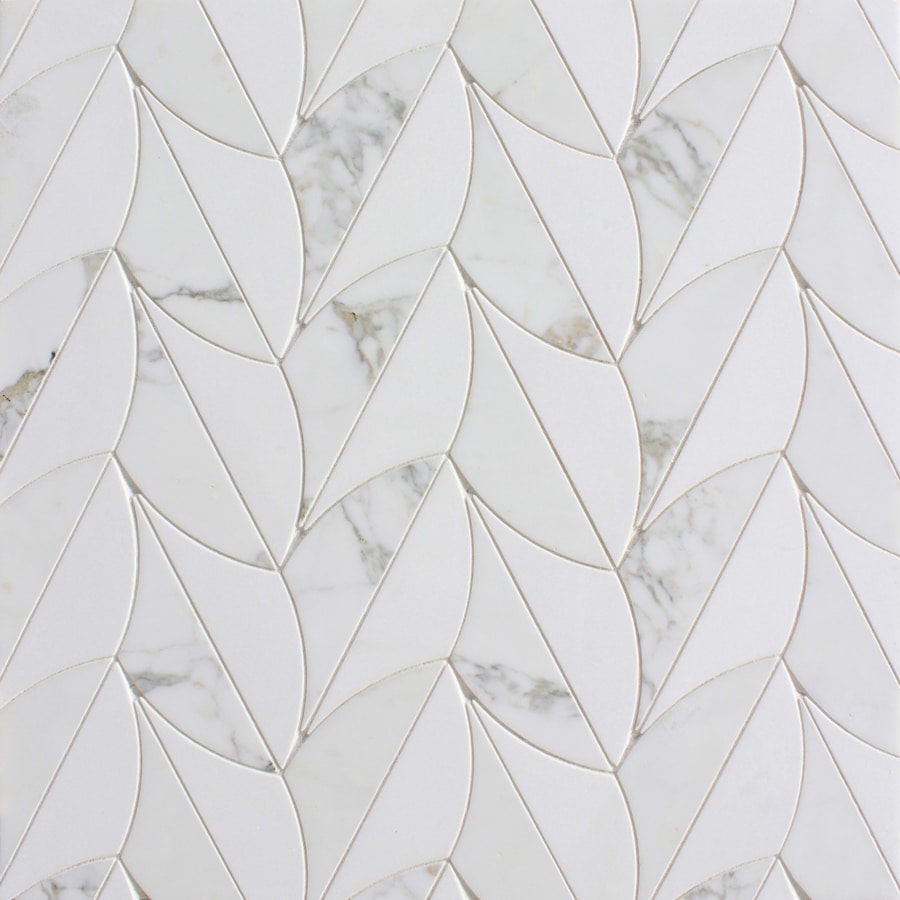
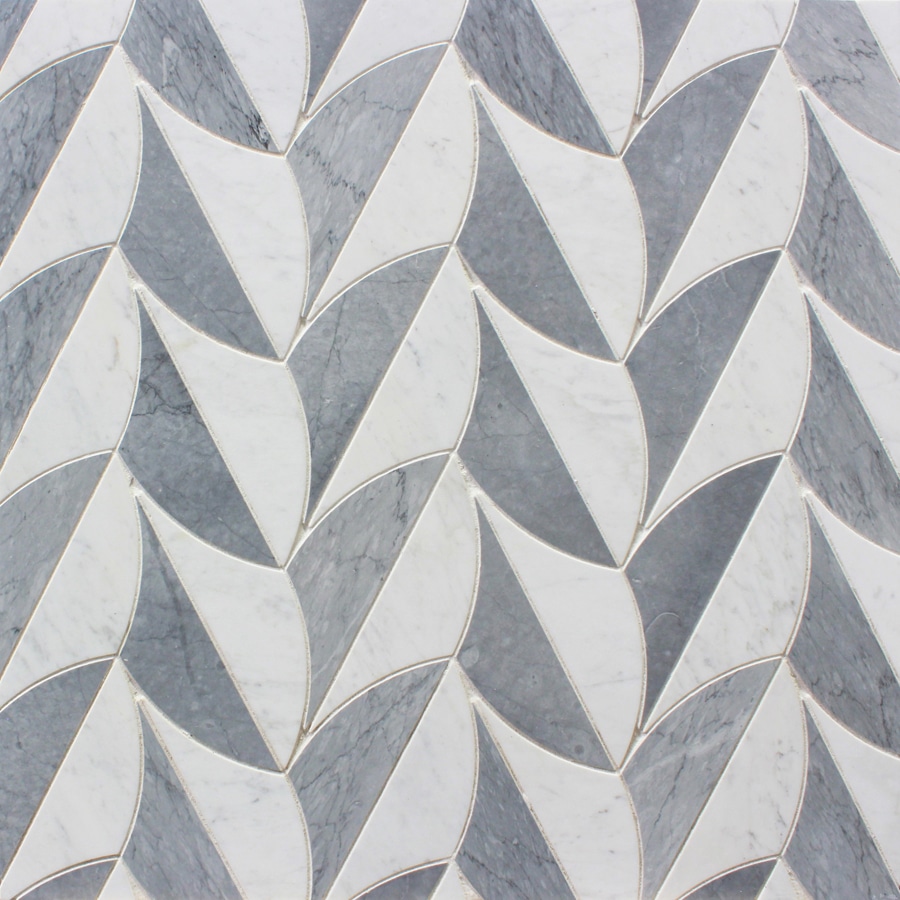
FOLIAGE
Sheet Size: SMALL: 12-5/16 x 15-1/16 x 3/8” | LARGE: 8-9/16 x 10-1/2 x 3/8”

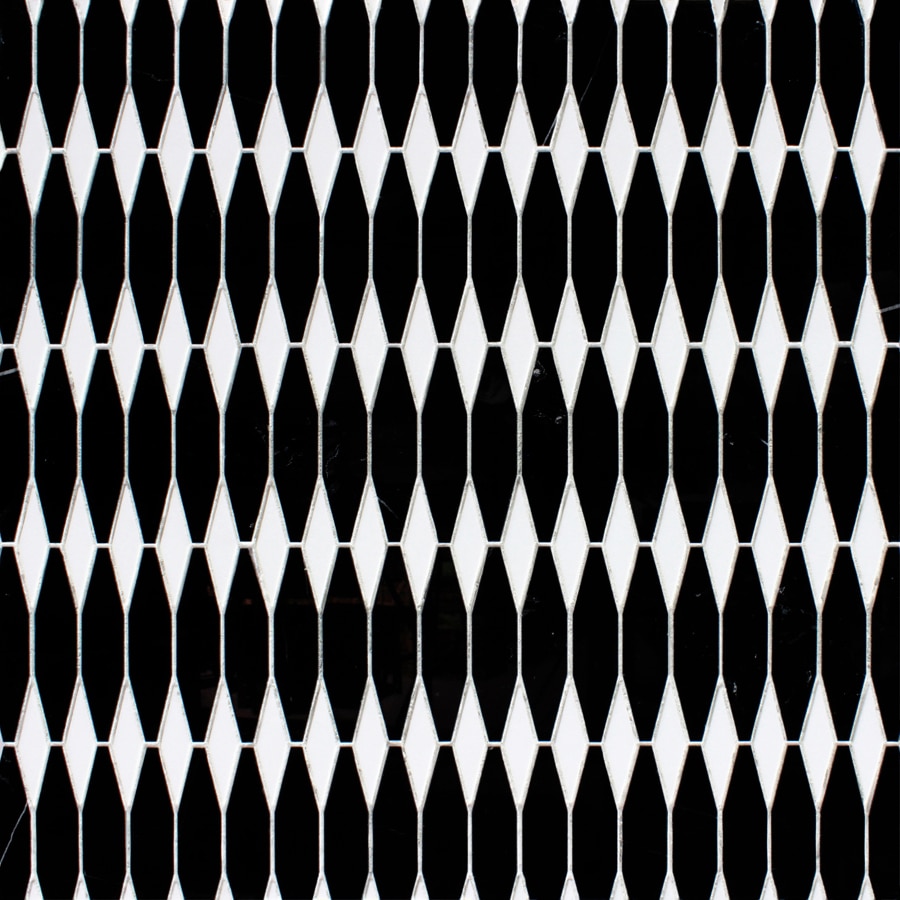
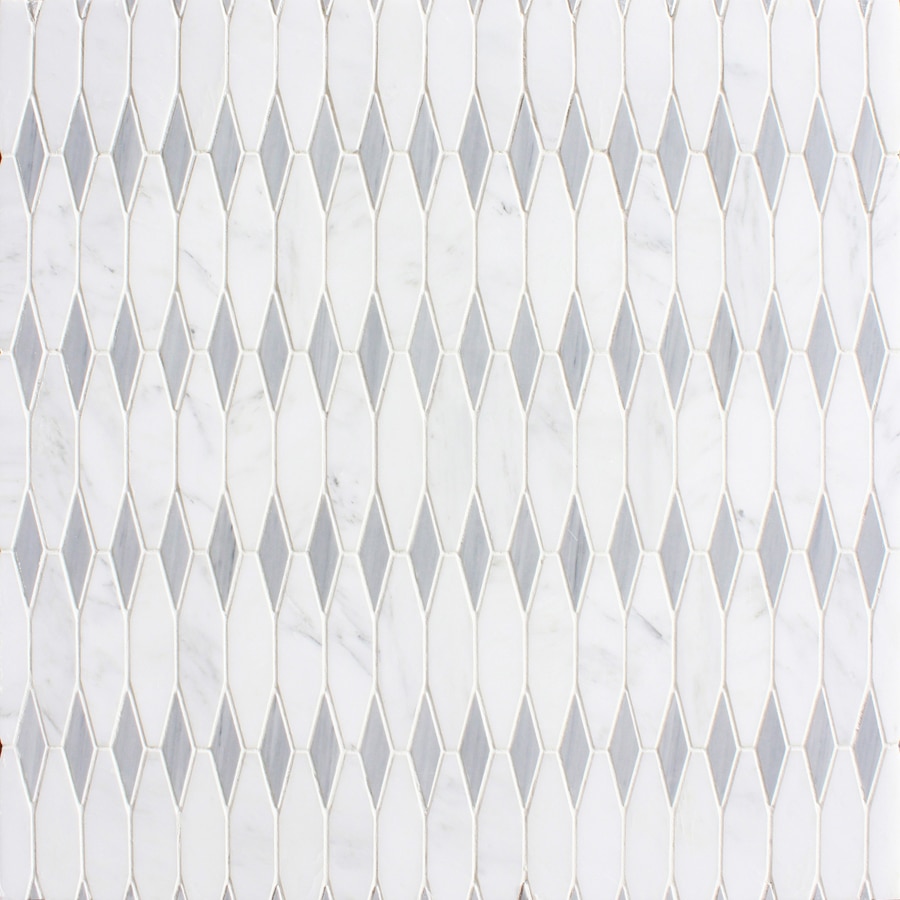
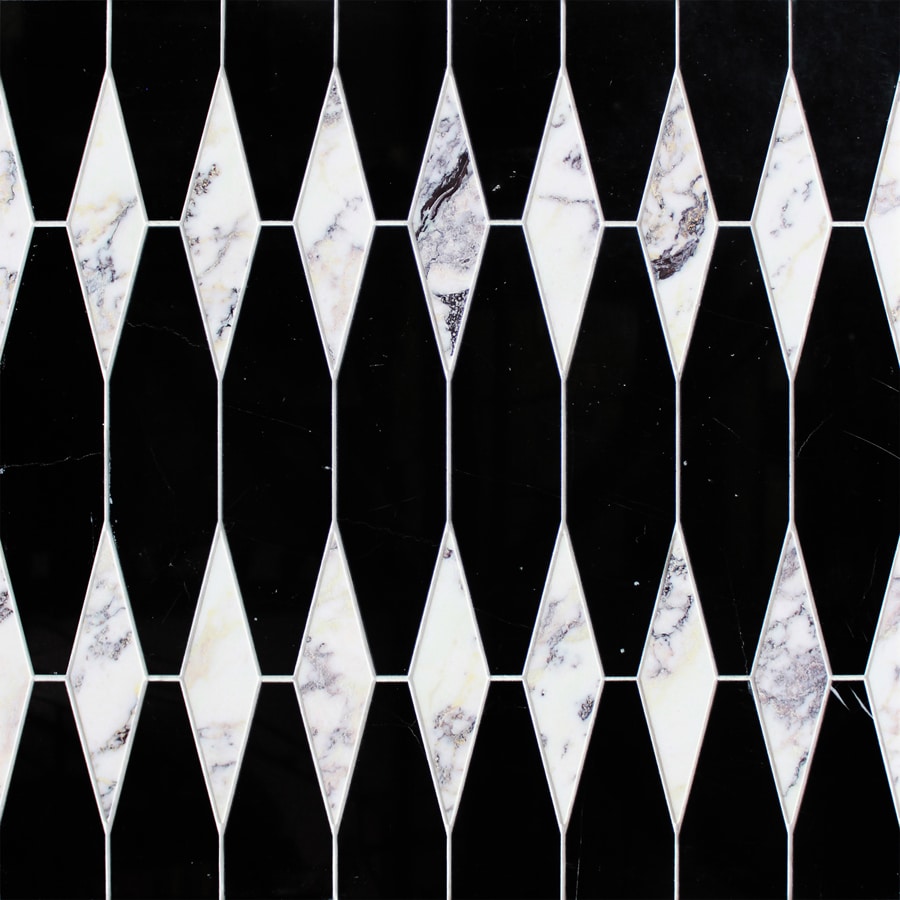
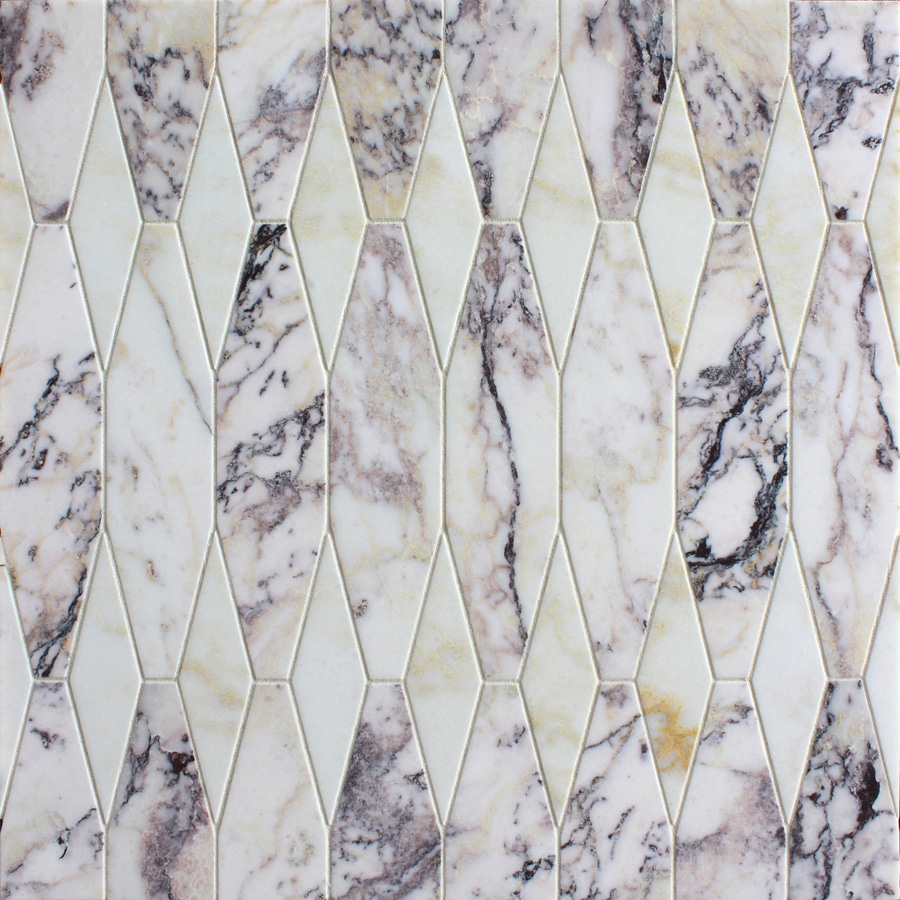
MARQUIS
Sheet Size: SMALL: 10-3/8 x 11-15/16 x 3/8” | LARGE: 8-1/4 x 9-1/2 x 3/8”
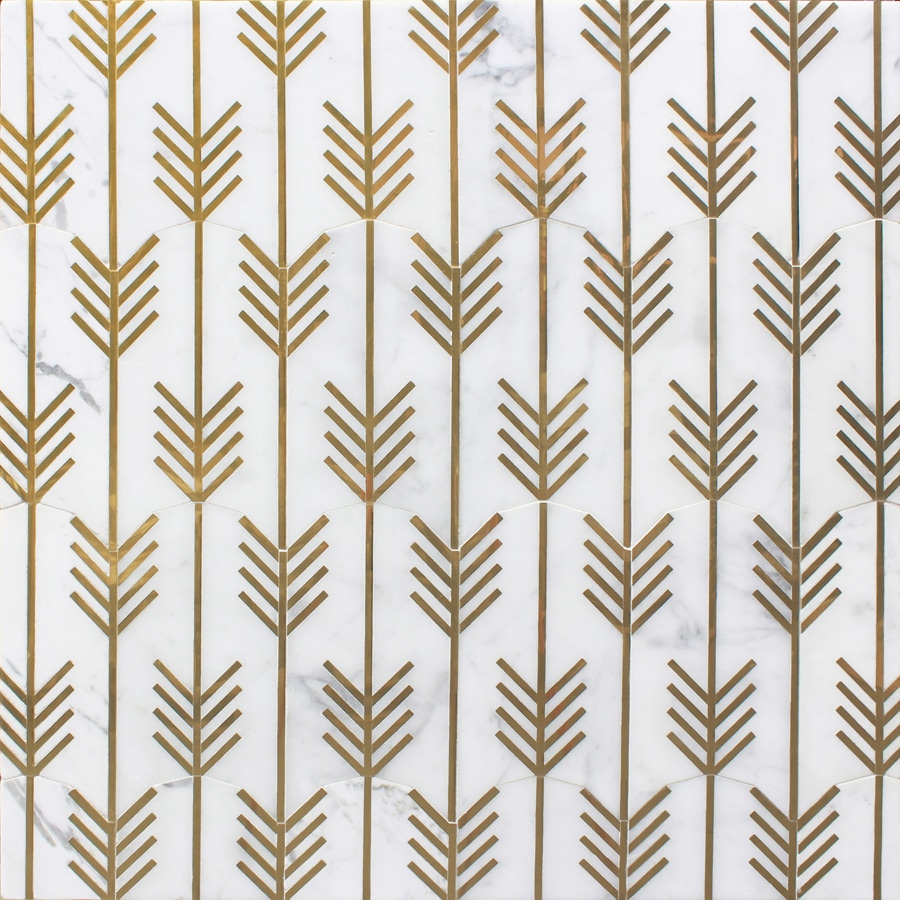
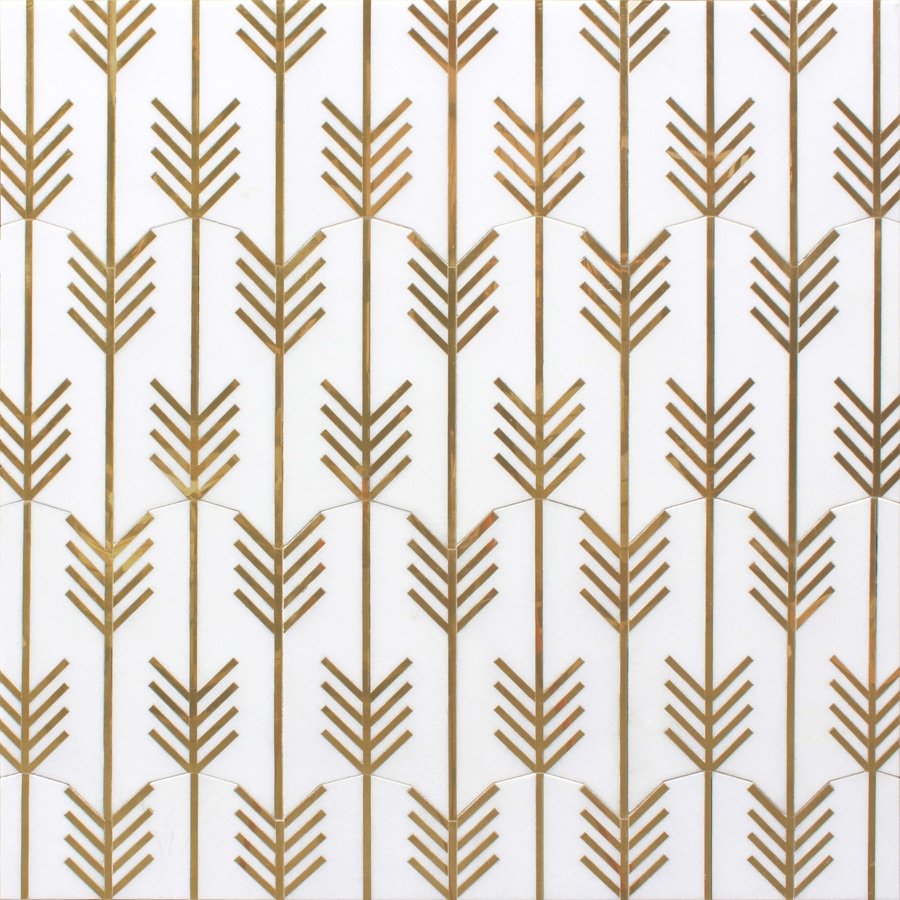
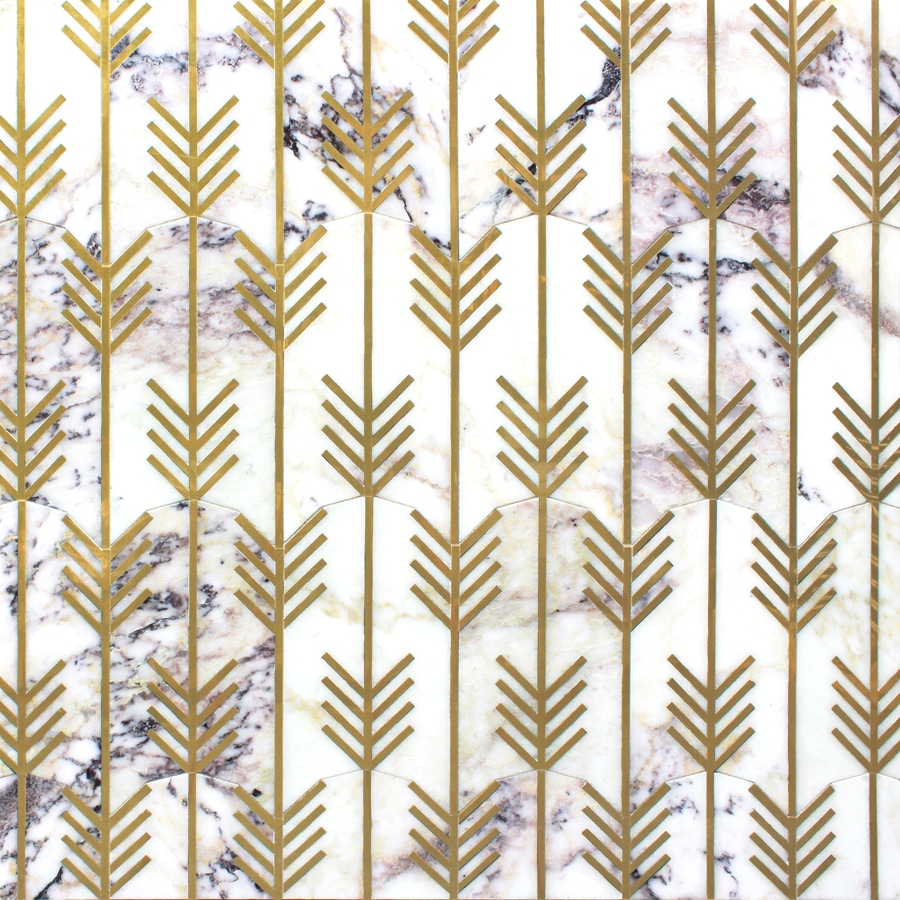
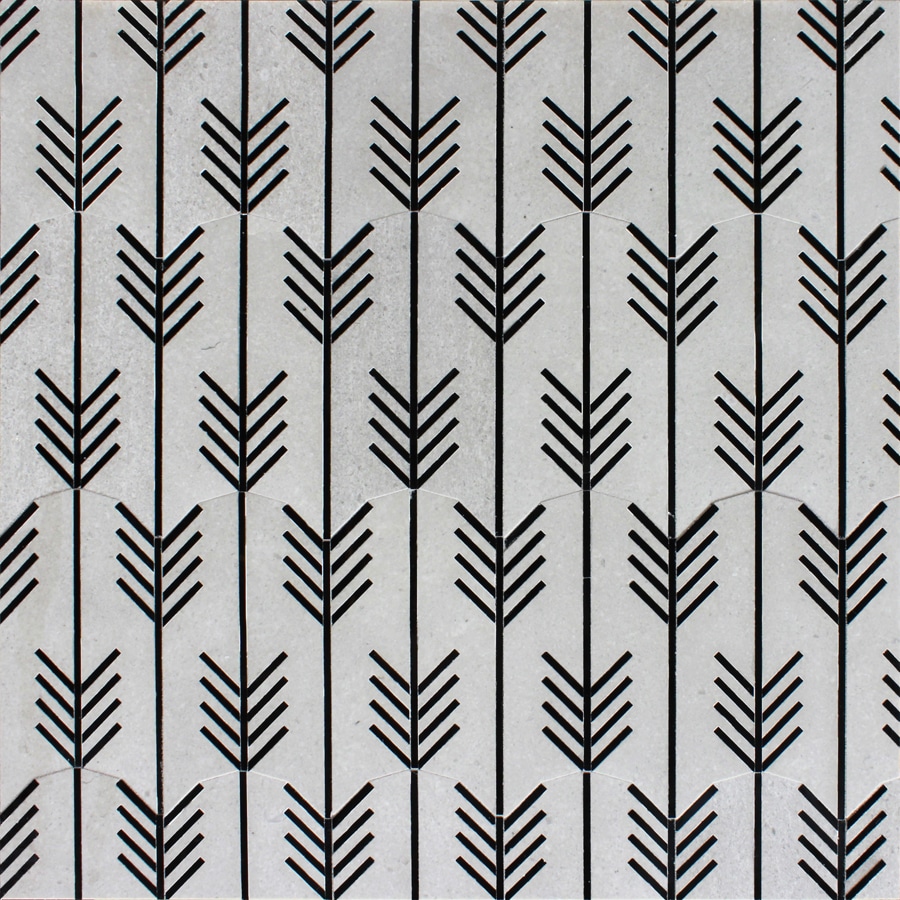
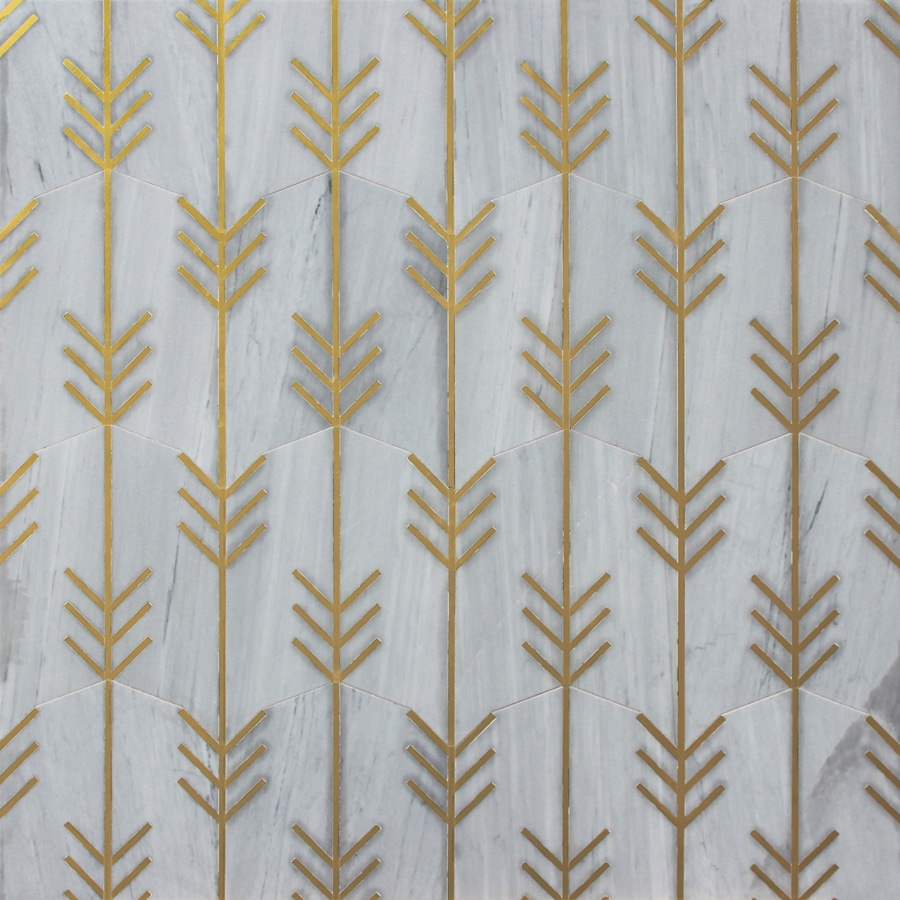
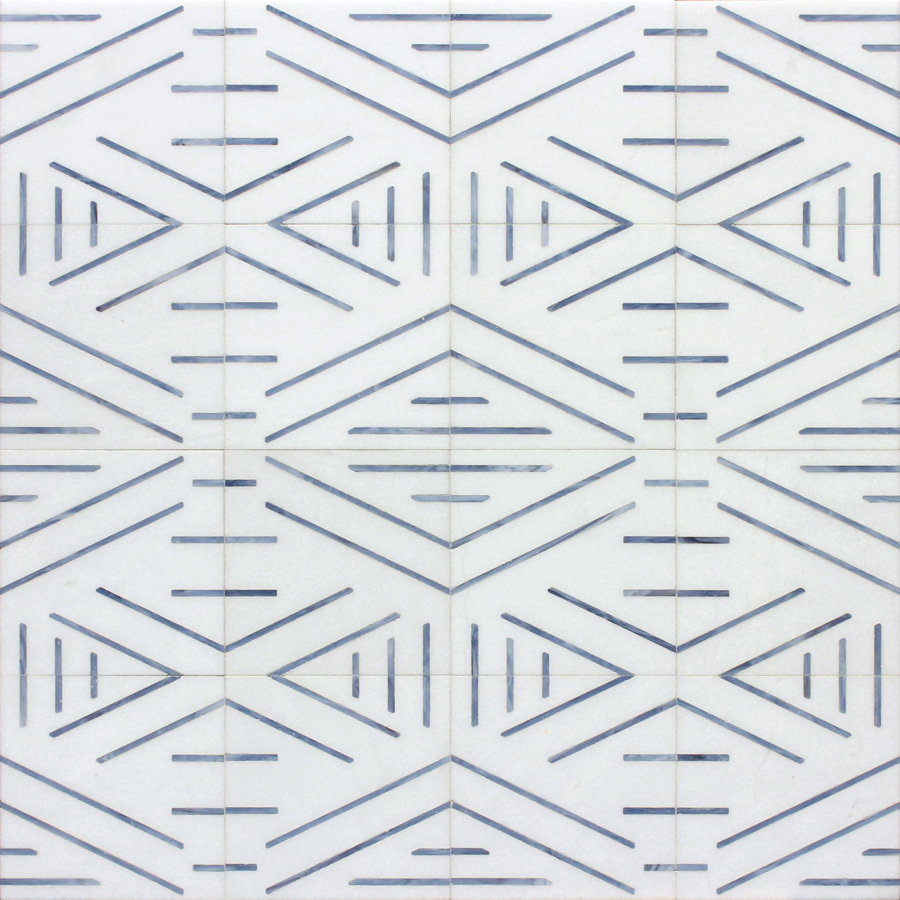
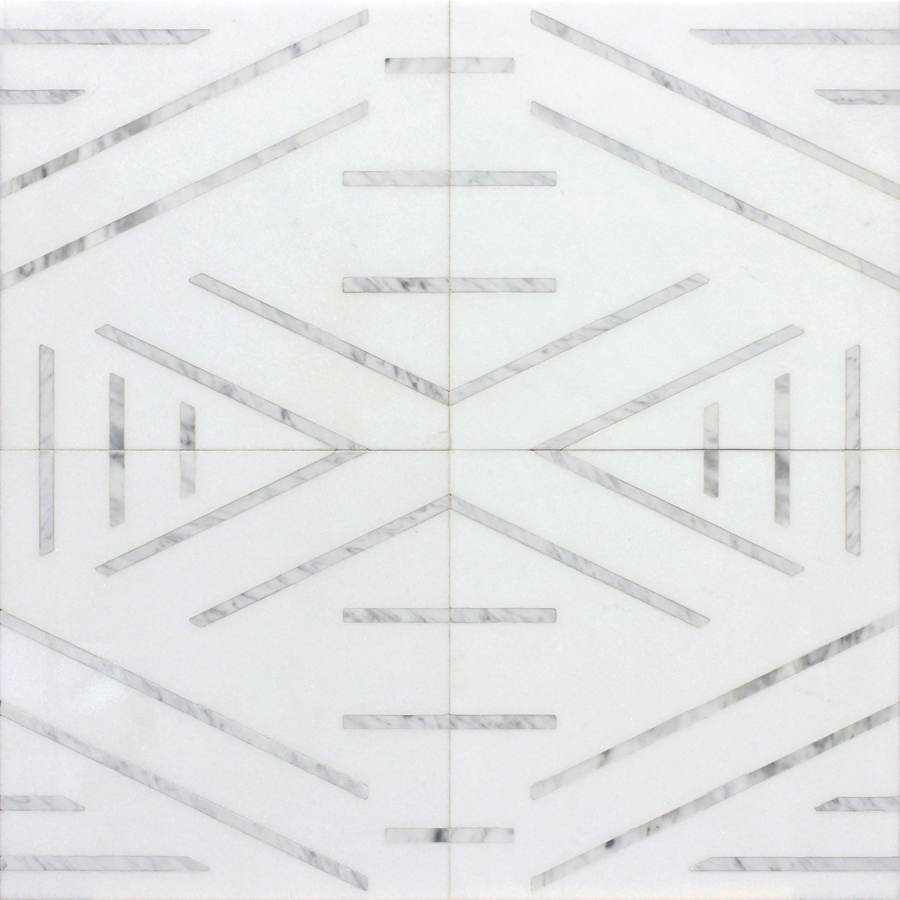
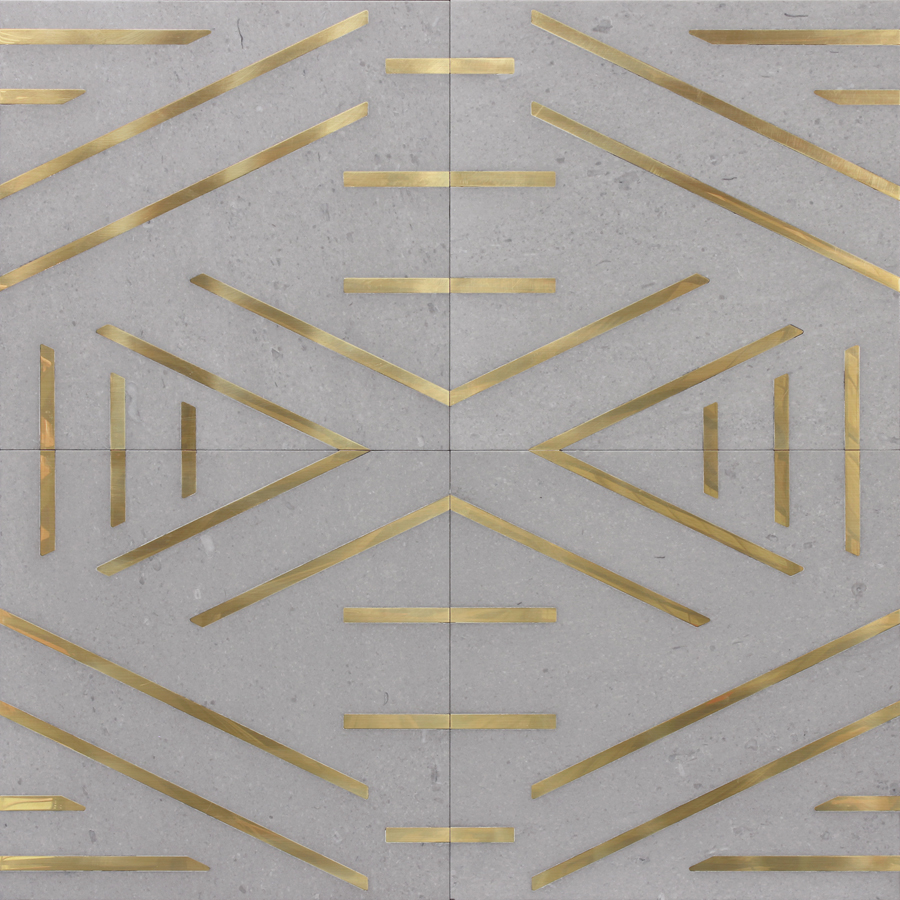
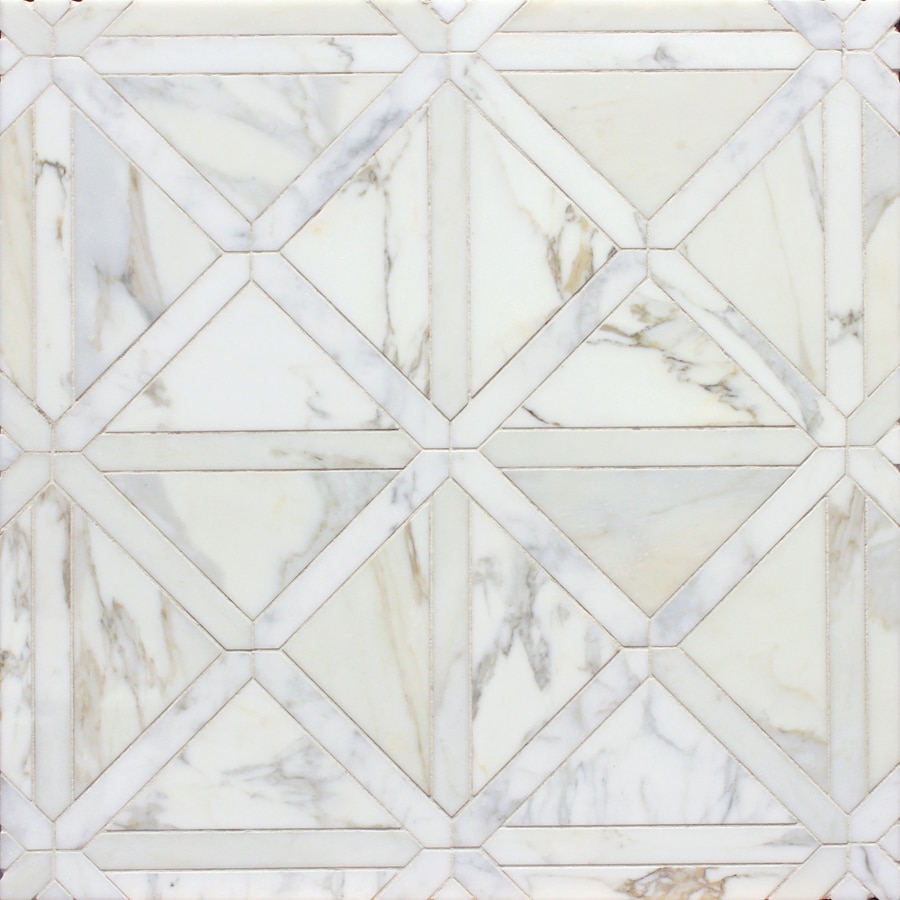
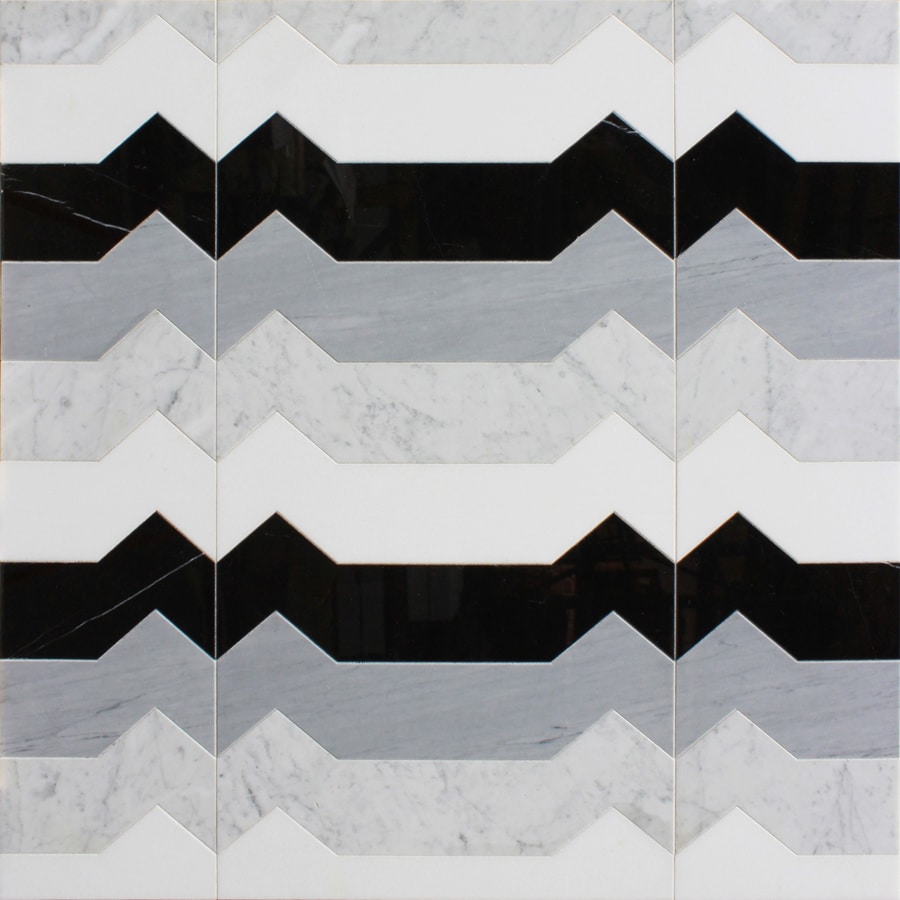
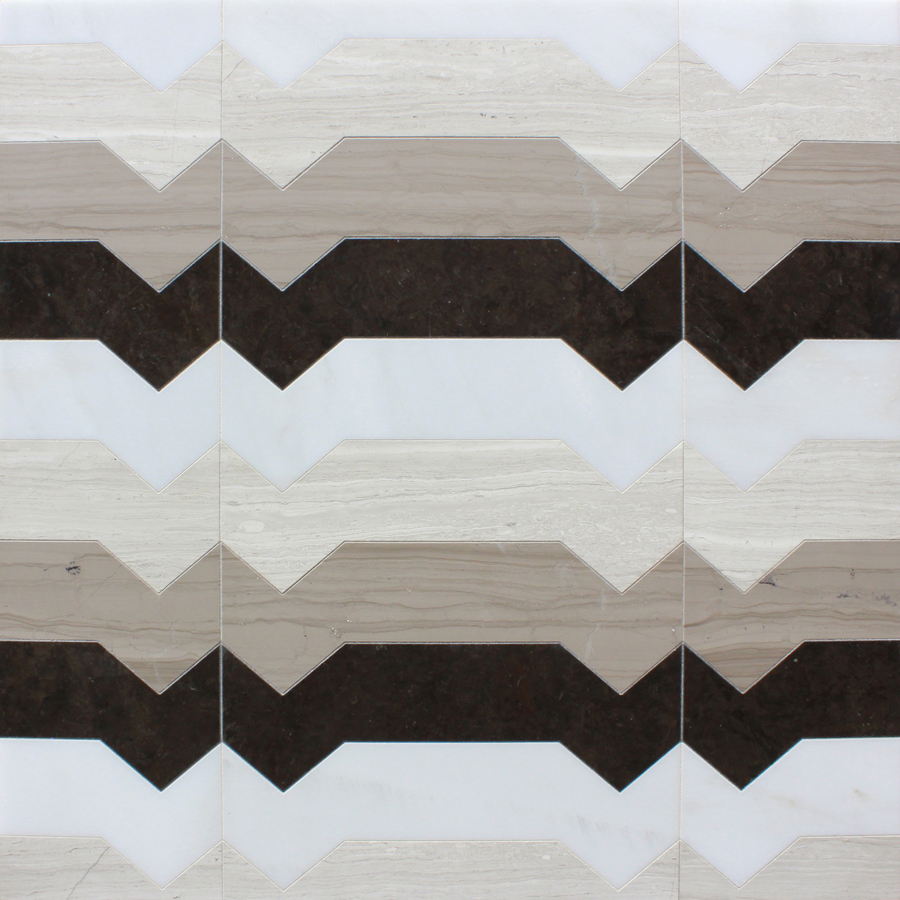
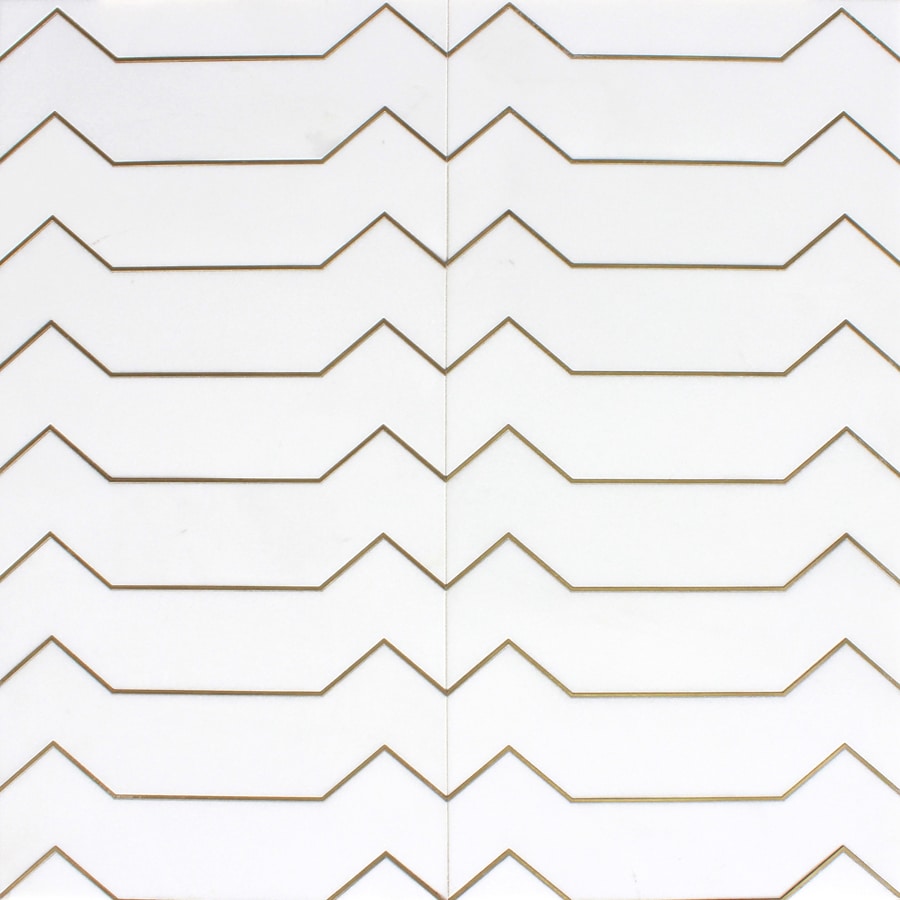
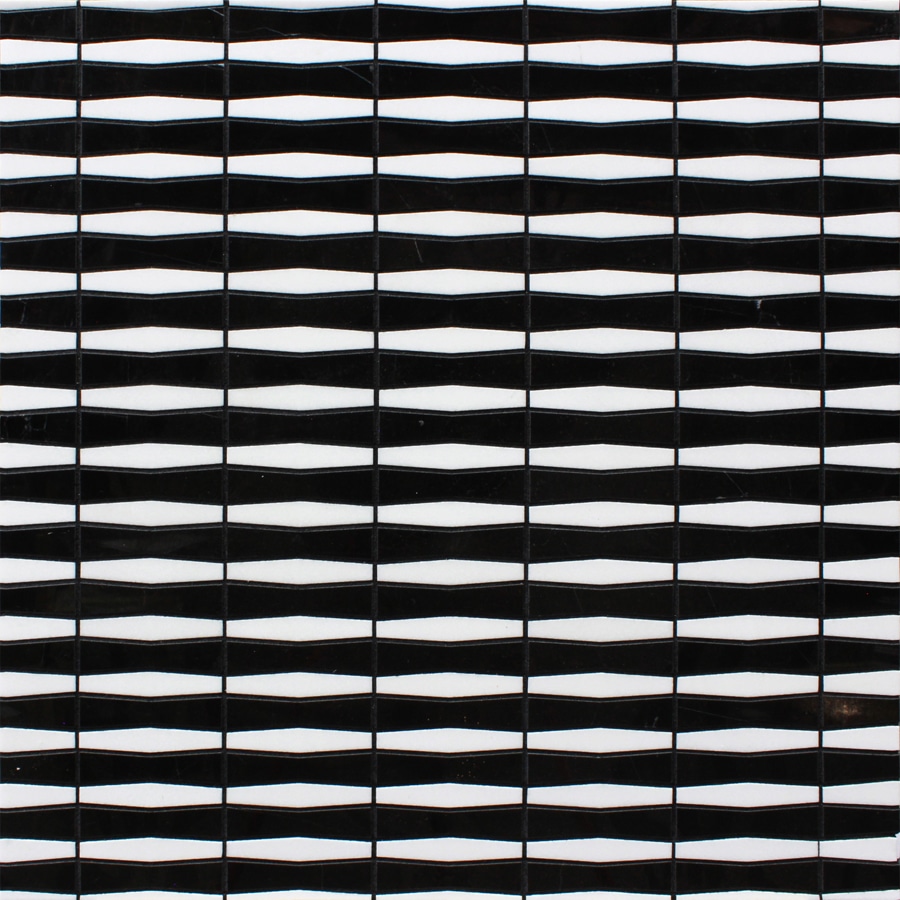
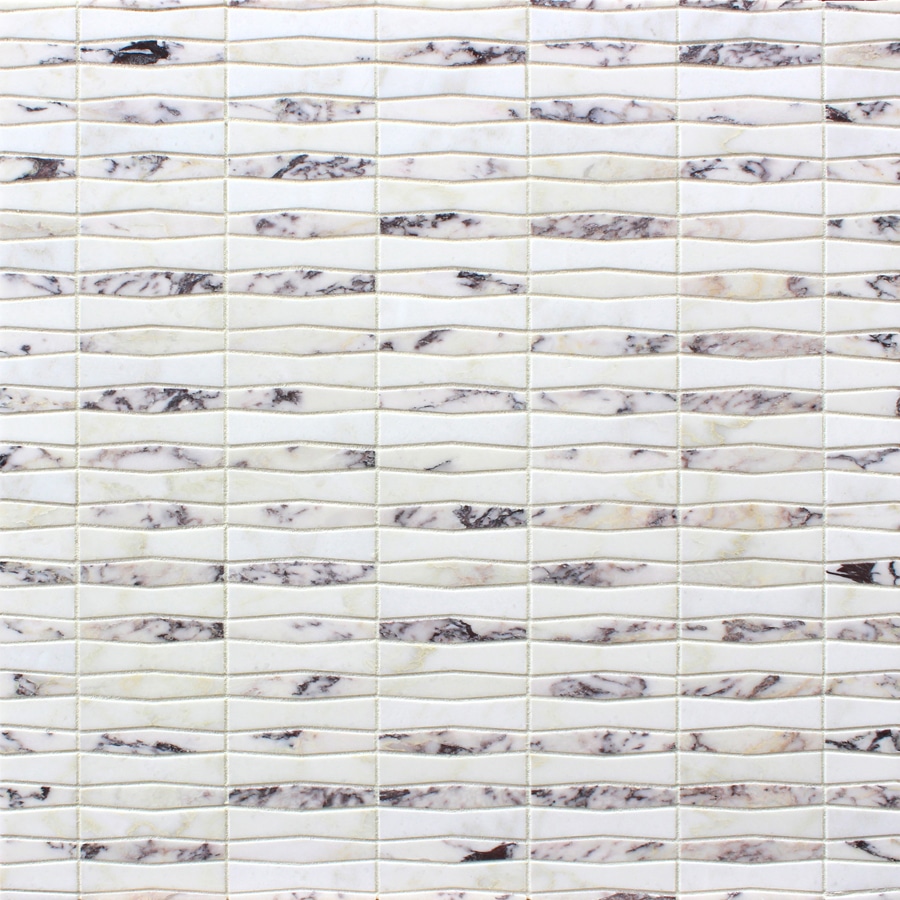
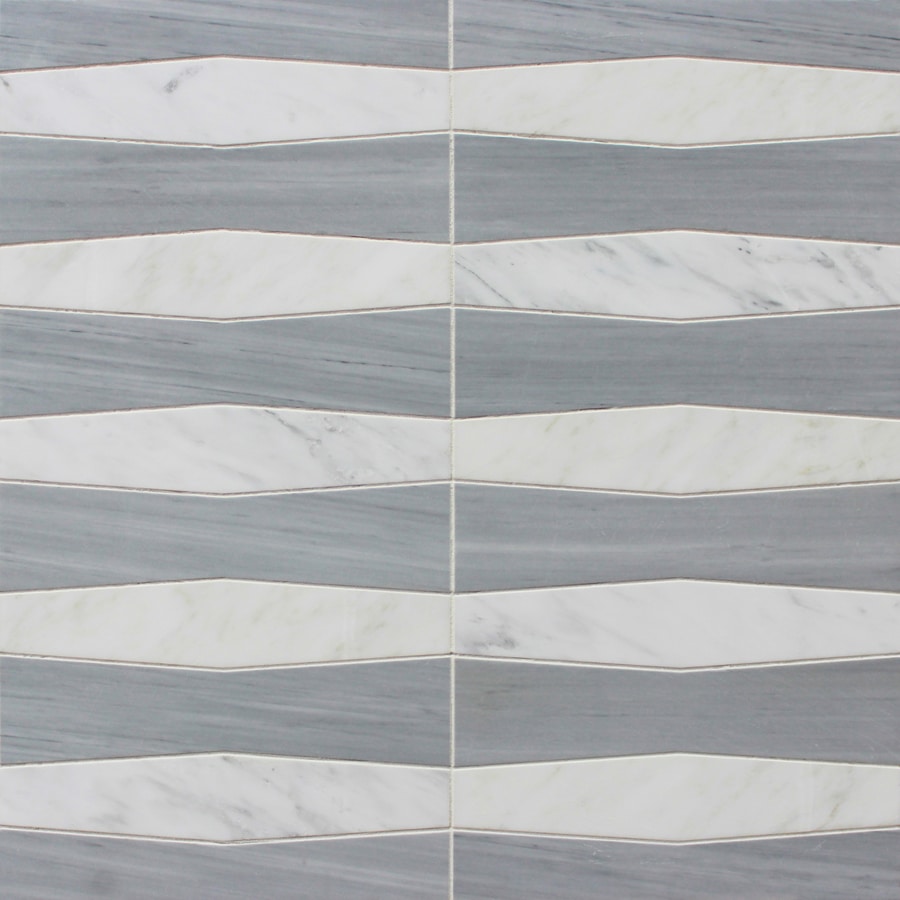
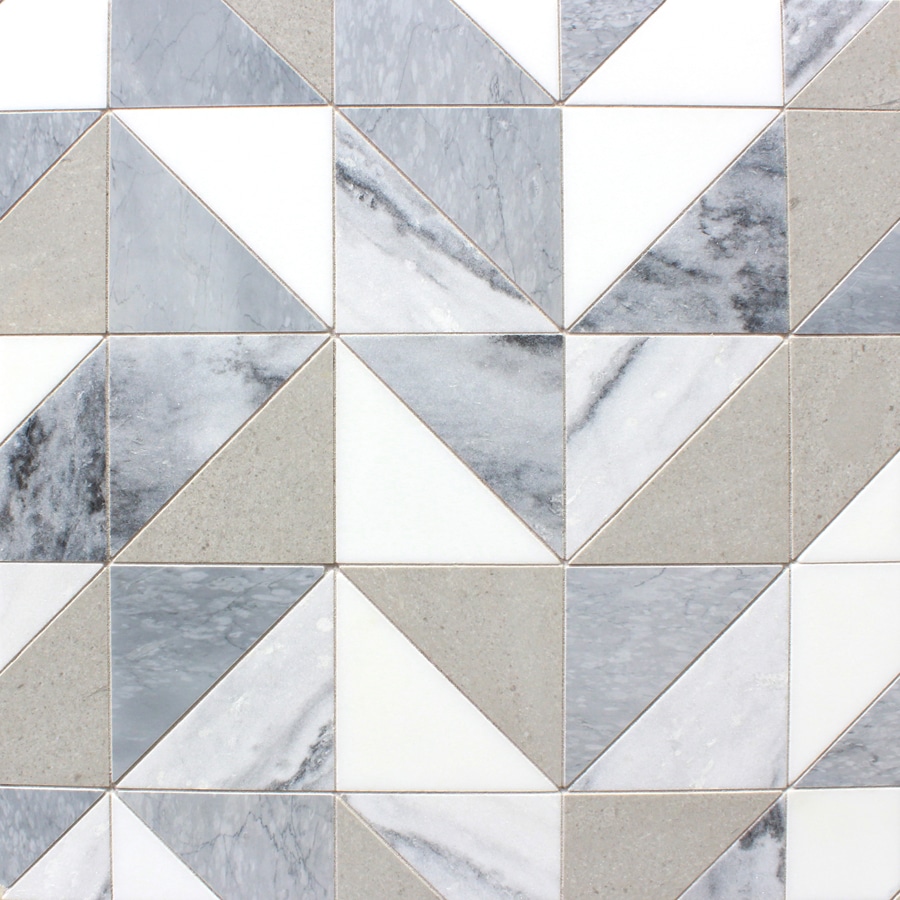
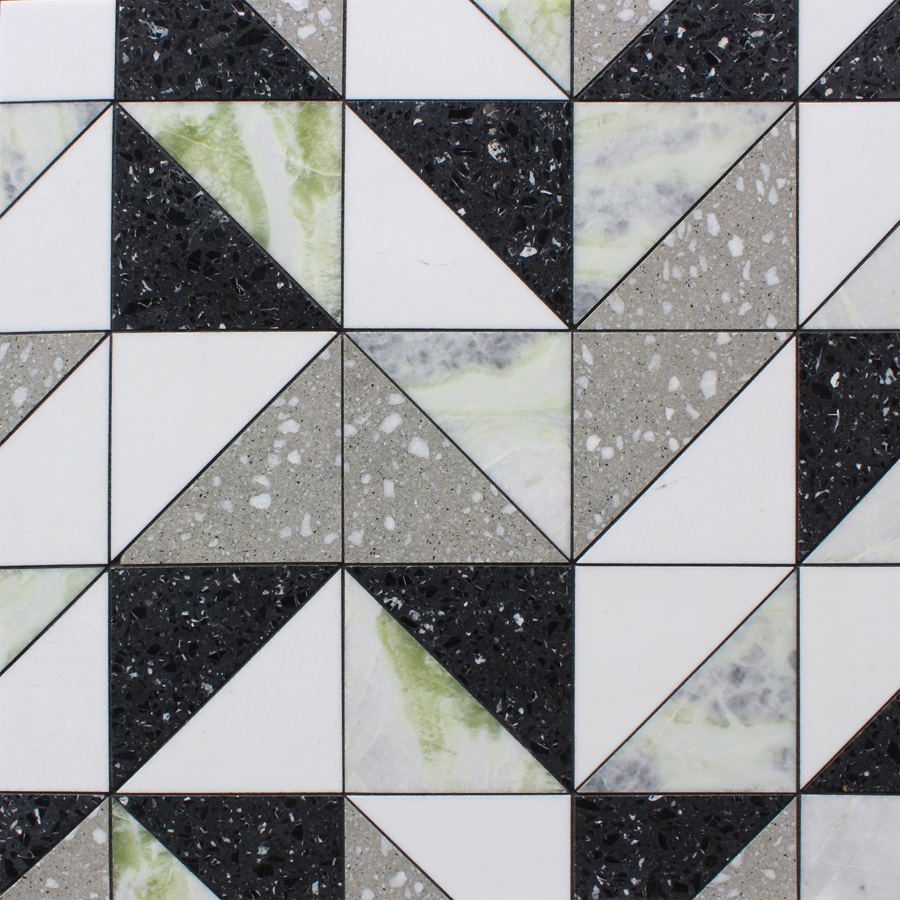
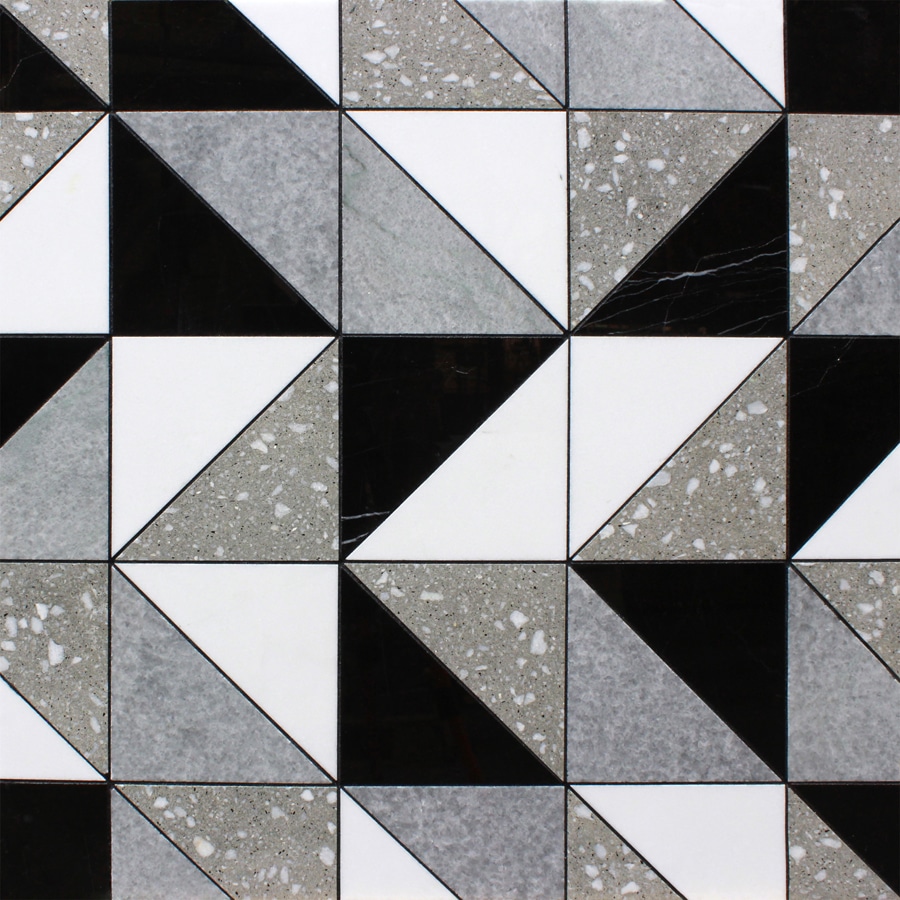
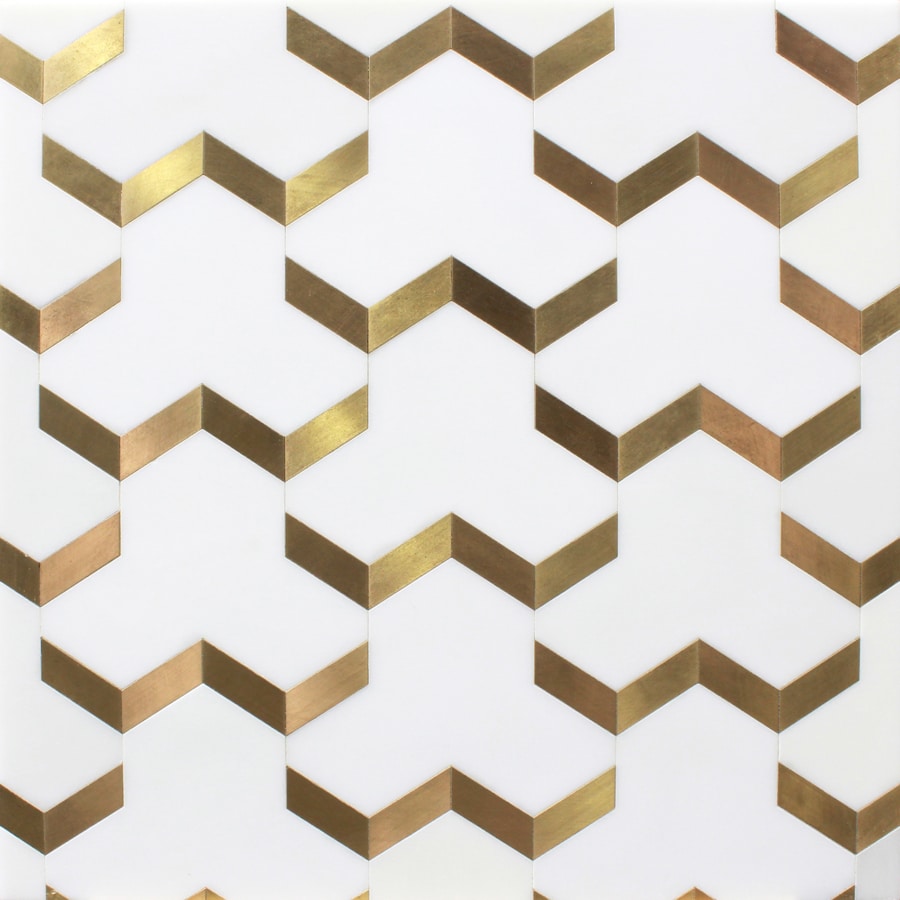
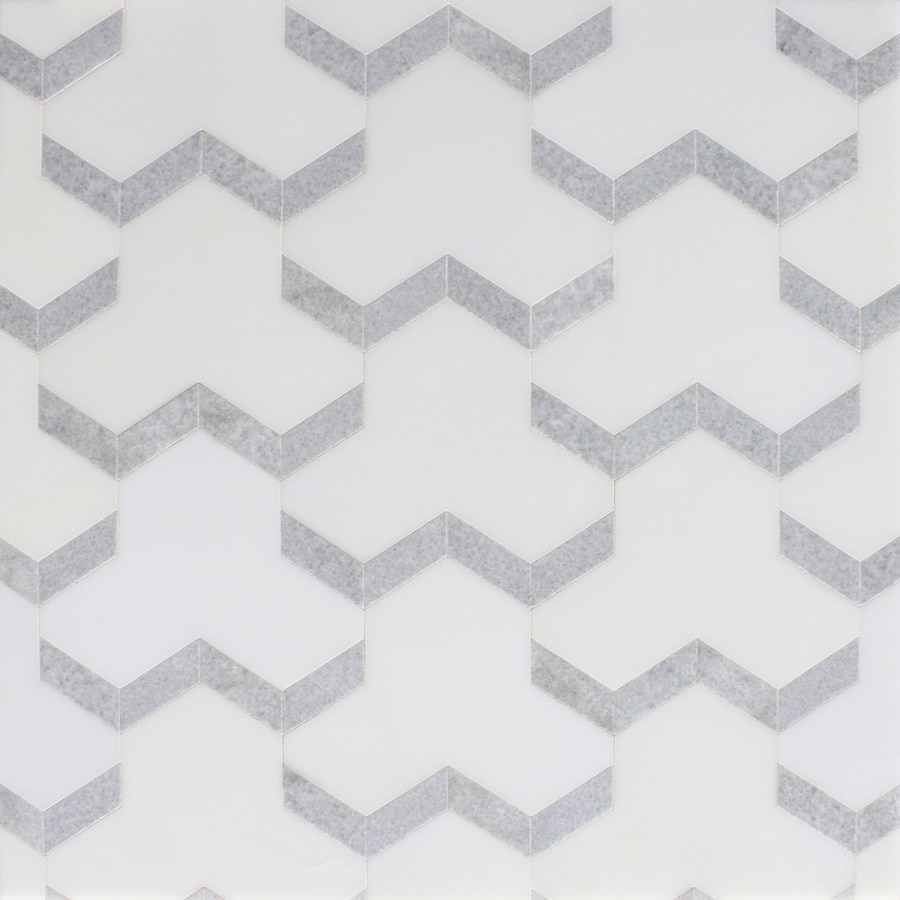
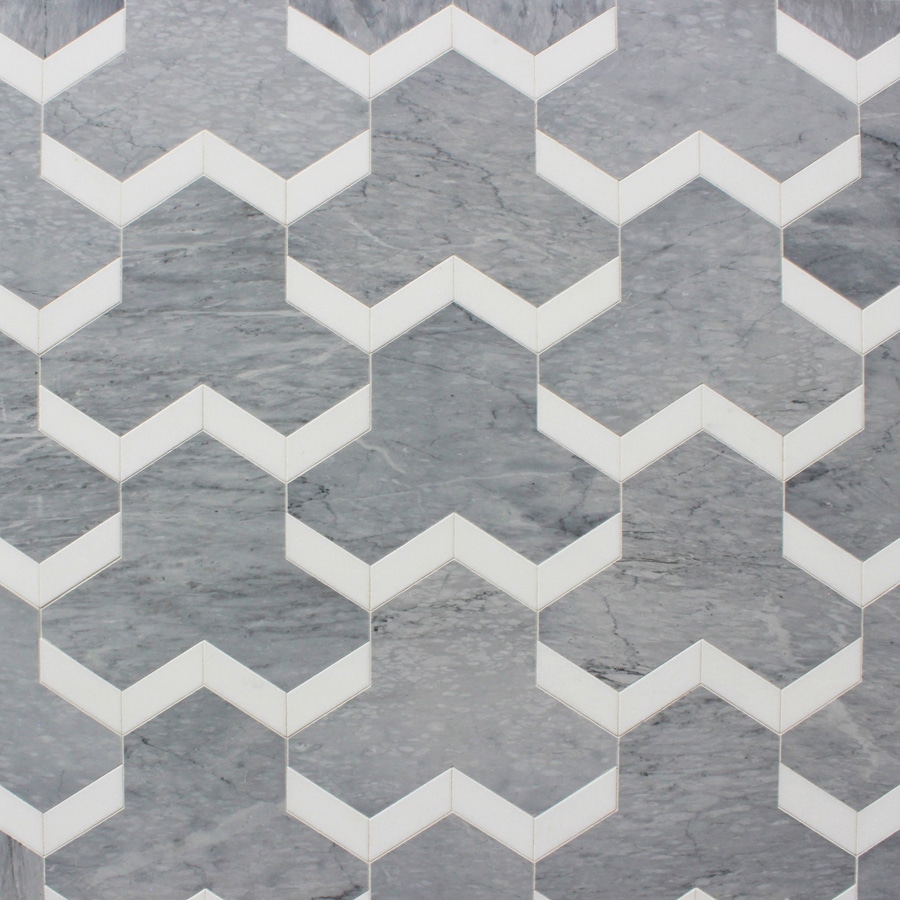
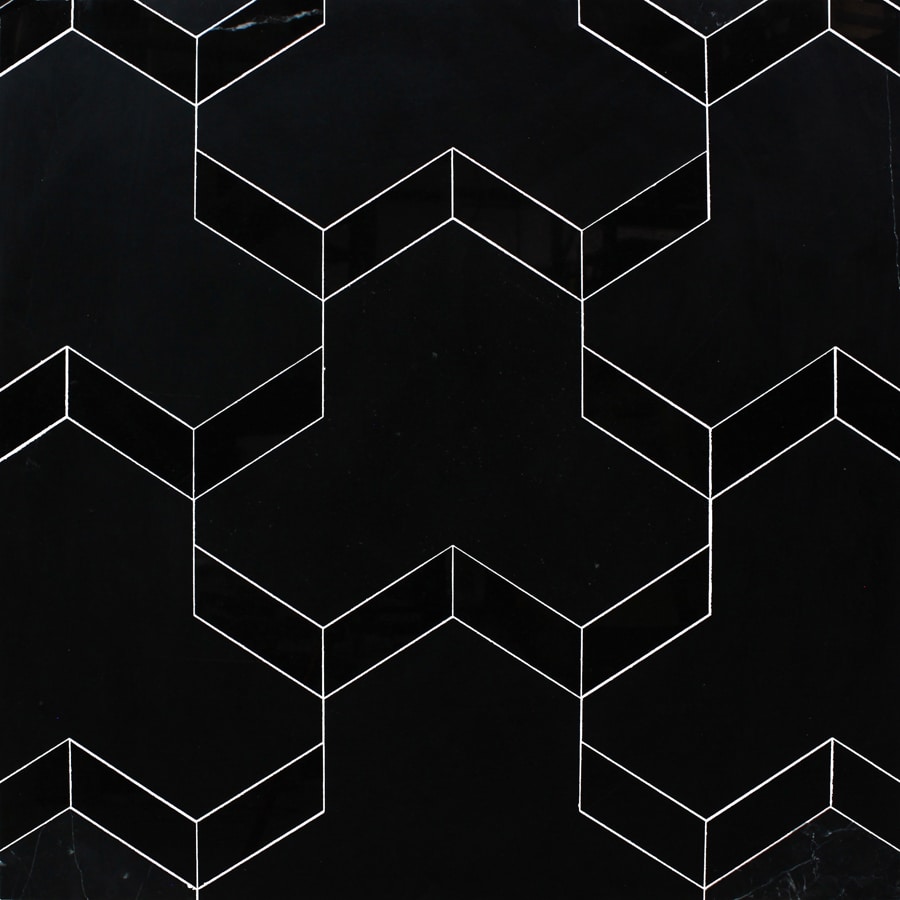
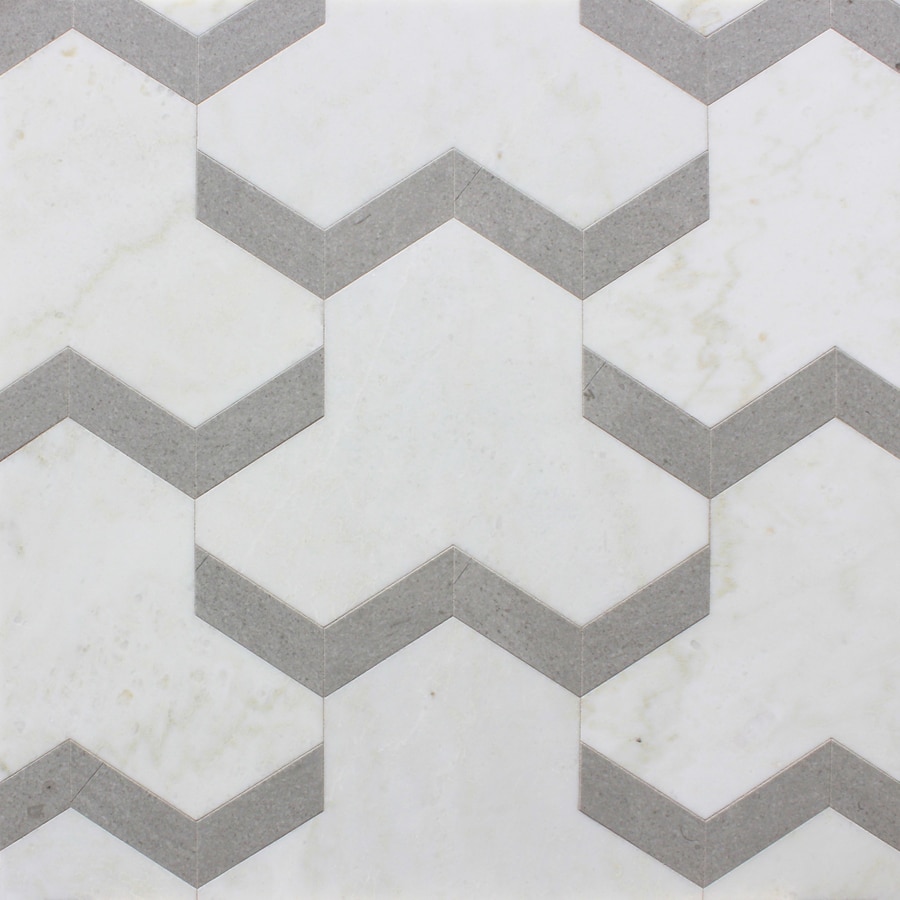
ARROWS
Sheet Size: SMALL: 13-5/16 x 14-7/16 x 3/8” | LARGE: 11-5/8 x 13-1/4 x 3/8”