You are here: Home | Terracotta and Ceramic | Terracotta |
VIALE ITALIAN TERRACOTTA
*COMING SOON*
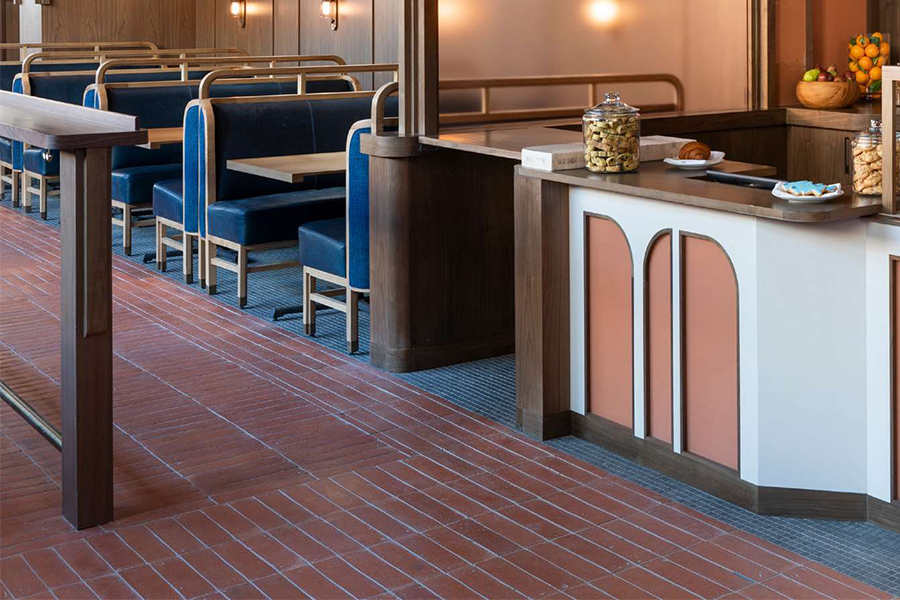
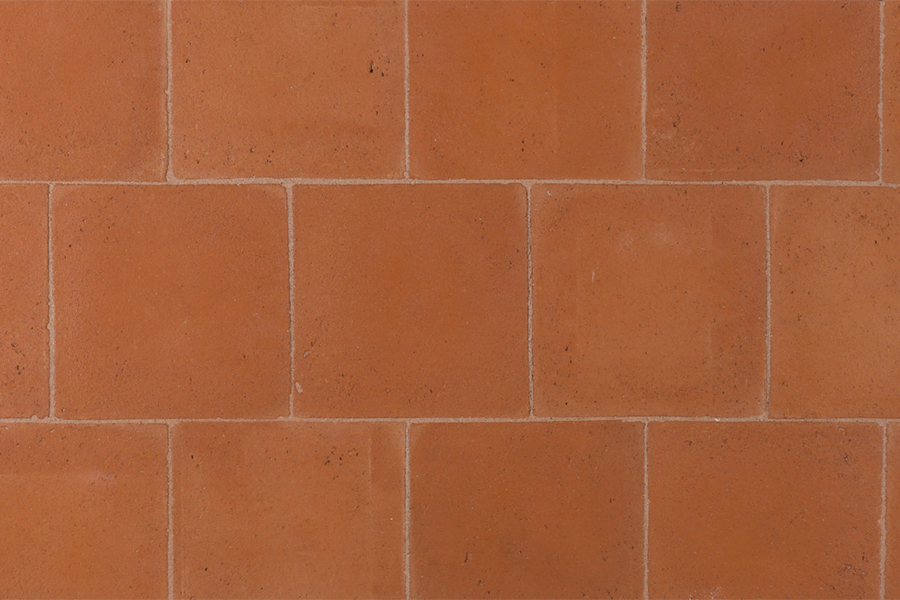
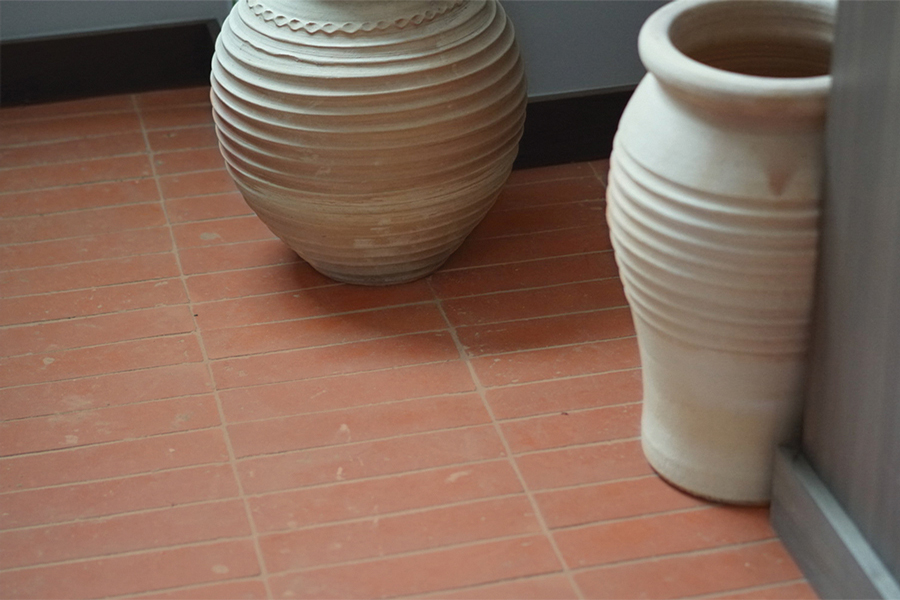
Viale Italian Terracotta is handmade in the traditional Tuscan style. It is made from dense high-fired clay with a uniform red color and a smooth flat surface. Handmade tile with natural clay, expect size & shade variation. Request a sample before placing an order.
Pictures shown are representations ONLY. Sizes are approximate & may vary slightly with each order. Call for current stock. Stock LA Warehouse.
Custom sizes & shapes are subject to minimum qty and lead time.
Usage: Commercial & residential, interior, exterior, vertical, and horizontal applications.
INSTALLATION IMAGES BELOW↓
| TYPE | FINISH | NOMINAL SIZE | THICKNESS | AVAILABILITY |
|---|---|---|---|---|
| Slab | Smooth | 11" x 11" | 3/4" | Coming Soon |
- Exterior Cladding: Yes
- Exterior Pavers: Yes
- Interior Walls: Yes
- Interior Floors: Yes
- Kitchen Countertops:
- Other Countertops:
- Wet Areas:
- Traffic: Commercial & Residential
IMPORTANT!!! READ CAREFULLY BEFORE INSTALLATION
INSPECTION & STORAGE
1. Upon receipt of your order, please inspect all tiles carefully.
2. Rock Mill will not be responsible for product issues once tiles have been installed.
3. Report any issues to Rock Mill within 30 days.
4. Exercise care when handling tiles during installation, to avoid chipping or scratching.
5. Keep tiles dry and store boxes in a dry area, away from dampness, to avoid damage.
SUBSTRATE & MEMBRANES
1. Consult a licensed contractor for complete, proper installation and guidance.
2. Terracotta is made from natural clay. Expect variation in color, size, thickness & texture.
3. Mix tiles from different boxes throughout the installation process, and lay them out before setting them to determine the best look. Wipe any residue off of tiles before installation.
4. Install surface should be clean, solid, level, and without cracks. Walls should be plumb. Installation should not be started until substrate meets these conditions.
5. For interior installations, use a waterproof membrane, such as Schluter-Ditra, which offers uncoupling (anti-fracture). For water-proofing, vapor management and reduction of efflorescence, use Schluter-Kerdi . Follow manufacturer’s instructions.
6. For radiant heat, Schluter Ditra-Heat membrane offers heat, uncoupling (anti-fracture), water-proofing and vapor management. Follow manufacturer’s instructions.
7. Rock Mill never recommends using terracotta tiles in shower pans, submerged applications or steam showers.
THIN-SET & TILE SETTING
1. Always use a licensed installer to ensure a quality installation.
2. For adhesive to set the tiles, use a high quality, unmodified thin-set adhesive, such as a Laticrete. Follow manufacturer's instructions.
3. For optimal adhesion and to avoid moisture absorption through the tile, it is essential that each tile be back-buttered and fully-bedded for firm support.
4. Place tiles into wet mortar & adjust tile positioning as necessary for a level installation.
5. Wipe any excess thin-set off of tiles immediately.
6. Allow tiles and substrate at least 24 hours to dry completely, without covering the area.
GROUTING
1. Use a grout bag to apply premium grout in between tiles. Avoid getting grout on surface.
2. DO NOT allow grout to dry on tile surface. Remove excess grout immediately with water and a sponge. Repeat the process until surface is clean. Dry with a soft, clean cloth.
SEALING
1. Use a high-quality sealer, such as Rock Shield Sealer, which is a no-VOC, penetrating sealer that will protect terracotta, cement, natural stone, grout, etc. from damage caused by water, salts, and oil-based stains.
2. If tiles are used in areas that may get wet, each tile should be “dip-sealed” before setting.
3. Treated surfaces are easier to clean and maintain longer.
FLOOR PROTECTION
1. Protect the entire floor with thick paper or cardboard until any construction is finished.
MAINTENANCE & REPAIR
Surface may gradually lose patina over time, depending on traffic and usage.
1. Clean floor surface with a vacuum cleaner to pick up loose dirt. Use a clean mop or cloth with a PH-neutral, natural soap cleaner, and water. Natural soap has cleaning and sealing properties, as the soap residue will fill open pores and add to the patina look.
2. Do not use harsh cleaners such as bleach or detergent; this will not remove the sealer but will change the compound of the product.
3. When completely clean & dry, re-apply stain and/or Rock Shield Sealer as needed for higher traffic areas.
4. Terracotta is naturally porous. A moisture barrier and a high-quality, penetrating sealer are recommended for resistance to staining and moisture absorption. Consult a licensed installer and follow recommended installation instructions.
Please inspect ALL material upon receipt. Claims will not be honored after installation. Rock Mill considers the actions of the installer/contractor/3rd party that customer authorizes to pick up the material to be the responsibility of the customer.
Rock Mill will not honor claims made by the customer, due to unauthorized or improper installation by customer’s installer/contractor. Please ensure that a sufficient quantity of stone is initially ordered to complete the job.
Add-on orders purchased later may vary slightly as new batches may come from different parts of the quarry and will not be guaranteed to match the original order.
All items that are stocked are located at the Rock Mill Gardena, California warehouse.
For more information, please contact your Rock Mill rep. Thank you!
Linear Thermal Expansion: 7.4 (x10-6/oC-1)
Modules of Rupture: >13.7 N/mm2
Abrasion Resistance: 1,116 mm3
Scratch Hardness of Surface (Mohs): 5
Water Absorption: 7.3
Slip Resistance: R12


